
FlashPaper 2 Support
FlashPaper 2 Support
Included with Contribute 3 is Macromedia’s ground-breaking FlashPaper 2 technology. Both Windows and Mac OS X users of Contribute 3 can transform any printable document into a fast-loading, web-friendly format that includes full text search and selection. Windows users can also take advantage of the new Microsoft Office plug-ins to add bookmarks and hyperlinks to documents. The FlashPaper engine includes the option of converting documents into Adobe PDF (Portable Document Format) files.
To insert a FlashPaper document in Contribute 3:
- Choose Insert > Document As Flash Paper.
- Browse to the document you wish to convert to FlashPaper format and click Open.
- In the FlashPaper Options dialog box, specify the page orientation or desired page size. FlashPaper also gives you the option of displaying the document’s outline, if present in the original Microsoft Word document.
- Click OK to convert the document to FlashPaper format and insert it into the web page.
You can remove the FlashPaper you recently inserted by selecting Edit > Undo.
Searching in a FlashPaper Document
You can search easily for a word or group of words in any FlashPaper document:
- Type the word or group of words in the search text field (see Figure 1).
- Click the Search button (the magnifying glass icon) or press Enter.
- Click the Search button again to highlight the next match.
Note: The search feature is available only if you have Flash Player 7 or later.

![]()
Figure 1. FlashPaper toolbar features (from left to right): Pan, Select, Search, Zoom (slider and text box), Fit in Viewer, Fit Width, Page Navigation (text box plus Previous/Next buttons), Print, and Open in New Browser.
Selecting Text in FlashPaper
You can select text easily in a FlashPaper document, copy it to the Clipboard, and paste it into another document:
- Click the Select button (see Figure 1).
- Drag over the text you want to select in the document.
- Copy the selection to the Clipboard.
- Switch to the document you wish to paste the text into.
- Paste the selection from the Clipboard.
Converting a Microsoft Word Document to FlashPaper Format (Windows Only)
Windows users can easily turn a Microsoft Word document into FlashPaper:
- Open the document in Word that you want to convert.
- Choose FlashPaper > Convert to Macromedia Flash.
- In the Save As Flash dialog box, give the SWF file a title and click Save.
Once completed, you can open the FlashPaper document by double-clicking the FlashPaper icon. You do not need Word installed to view the FlashPaper-converted file.
Note: By default if your Word document contains an outline, you should see the outline headings in the FlashPaper side panel. Clicking the triangle to the left of a heading displays a list of subheadings. Clicking any of the titles automatically takes you to that section of the FlashPaper document.
Creating Accessible Content in FlashPaper Document
FlashPaper integrates with Microsoft Office applications (Word, Excel, and PowerPoint). This enables Windows users to convert Office content into FlashPaper documents that include such elements as hyperlinks, document outlines, and accessible content.
Creating Hyperlinks: Start by selecting the content you wish to become a link:
- Choose Insert > Hyperlink and define the link.
- Select FlashPaper > Convert to Macromedia Flash.
- Save the file to the desired location.
Creating Document Outlines: Using document outlines in FlashPaper maintains the structure and navigational elements that exist in the original Word, PowerPoint, or Excel document:
- Start by applying heading styles to some lines of text in your Office document.
- Select Flash Paper > Options.
- In the Conversion Options dialog box, select the Include Outline check box.
- Select Flash Paper > Convert to Macromedia Flash.
- Save the file to the desired location.
- Double-click the FlashPaper document to open it. This results in the document looking something like Figure 2.
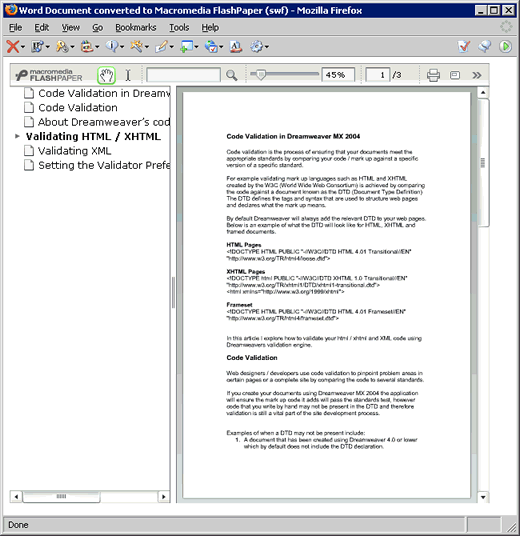
Figure 2. Viewing a FlashPaper document in a browser
Creating Accessible Content: When converting a Word, PowerPoint, or Excel document that already contains accessible content, FlashPaper preserves the accessible content for you:
- Select the content you wish to make accessible.
- Choose Format > Picture and click on the Web tab.
- Type the desired text in the Alternative text box and click OK.
- Select Flash Paper > Convert to Macromedia Flash.
- Save the file to the desired location.
FlashPaper content complies with Section 508 of the American Disabilities Act. The FlashPaper viewer’s toolbar buttons, controls, and scroll bars are accessible to users with disabilities. Additionally, both the JAWS for Windows and Windows-Eyes screen readers can read regular and alternative FlashPaper text.
Comments