Ferrari Text 2
4. Add Text |
Select your font family (A) (Ferro Rosso if you want to use the Ferrari font), font style Regular (B), font size 126 (C), anti-aliasing method Smooth (D), Left align text (E) and click on the color box (F) and select the color EFFAFE and click OK.

We selected a light blue color to ‘reflect’ the color of a blue sky.
Now click somewhere on the left side of our image and type the word Ferrari or any other text that fits neatly inside the canvas.
Now select the Move Tool ![]() and select the text and center it inside the canvas:
and select the text and center it inside the canvas:
Tip: Instead of selecting the Move Tool in the tool bar, you can also hold down the Ctrl key (Command key on the Mac) while the Horizontal Type Tool is active; this will make the Move Tool temporary active (works with other tools too).
5. Add Layer Styles |
Go to the layers palette and click on the Add a Layer Style icon![]() and use the following settings (make sure that you take the time to check every setting carefully!):
and use the following settings (make sure that you take the time to check every setting carefully!):
Drop Shadow:
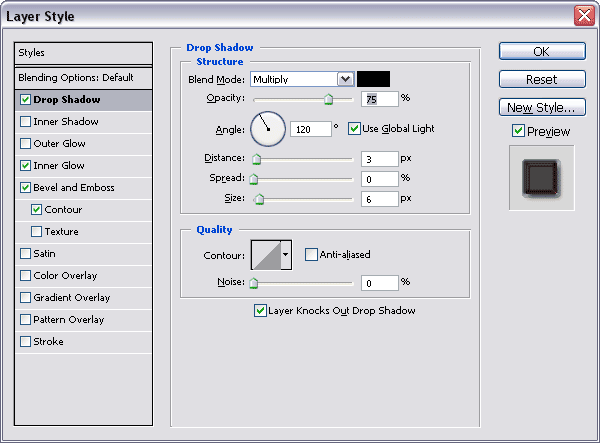
Inner Glow (Note: the color red that was used has the value E40000)
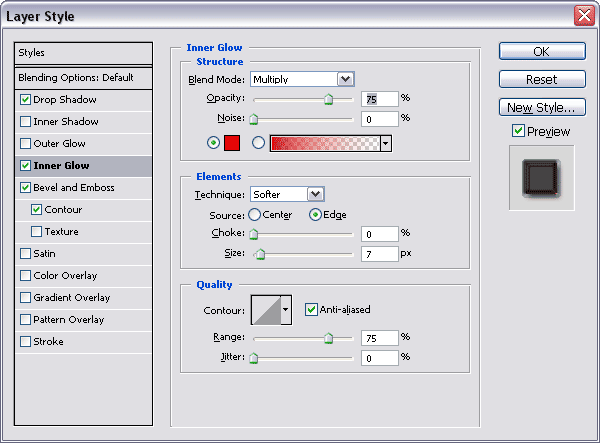
Bevel and Emboss (make sure you deselect the option Global Light first before you enter values for Angle and Altitude!)
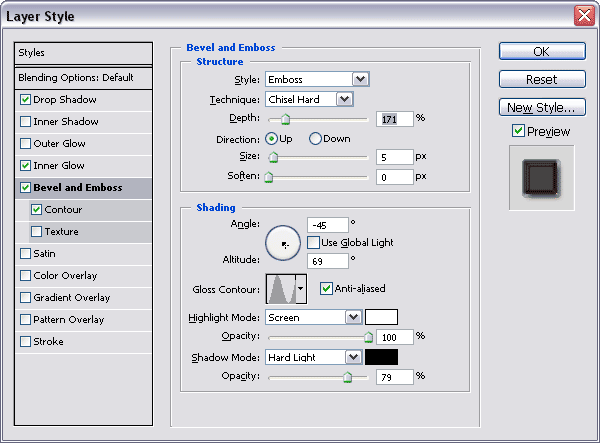
Part of Bevel and Emboss is the option called Contour (A). Please select it.
Now click on the default contour by clicking on the area marked with B.
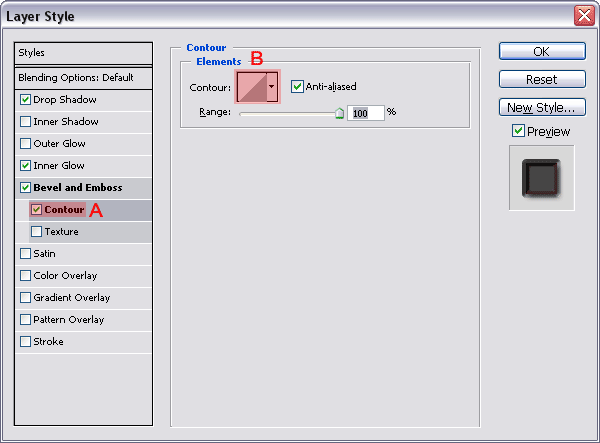
The Contour Editor window will appear:
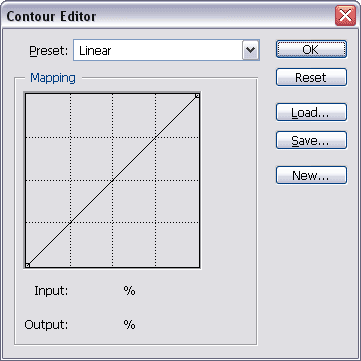
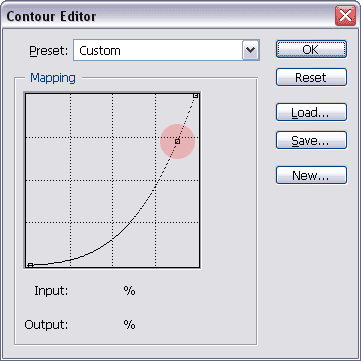
Click once one the diagonal line to create a point and move it to the exact area marked in red.
When done click OK in this window and click OK in the main layer style window.
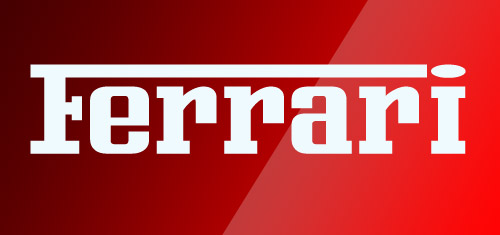
Here’s the final result (after some slight sharpening):



Comments