
Ferrari Text
For this Photoshop tutorial you need to use a ‘fat’ font, like these ones:

In my example I’ve used a free font called Ferro Rosso which can be downloaded here (only Windows version).
If you want to use this font, then Install the font in the following directory: C:Program FilesCommon FilesAdobeFonts and restart Photoshop. The reason to install the font in this directory and not in Windows’ default font directory is that the font will now only be used by Photoshop.
Make sure that you read the documentation that comes with this logo.
Open a new document in Photoshop. I opened a document with a size of 500x235 pixels.
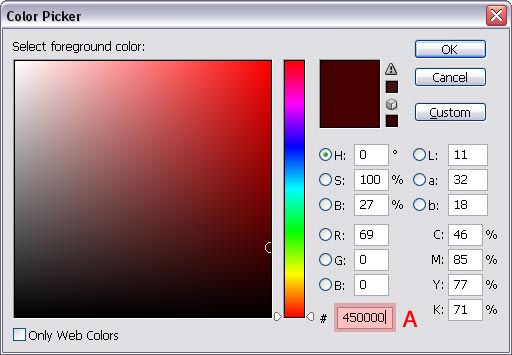
Set the foreground color…

 … by clicking on the foreground color in the options bar.
In the Color Picker window that opens you type 450000 in the area marked with A.
Now set the background color…
 …to FE0000 and click OK.
Note: you don’t have to type capital letters when you type in a value like FE0000, fe0000 is allowed too.
2. Fill the background layer |
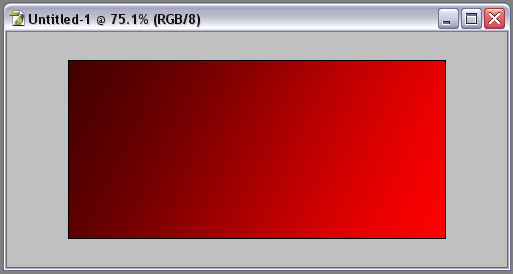
Make sure that a Linear Gradient (B) is selected in the options bar at the top and that the option Reverse (C) is not selected and that the linear goes from this dark red to red (A), otherwise click on the gradient at A and select the right one. (mode should be normal, opacity 100%, dither and transparency should be both selected, but in most cases they’re probably already having the right values).
![]()
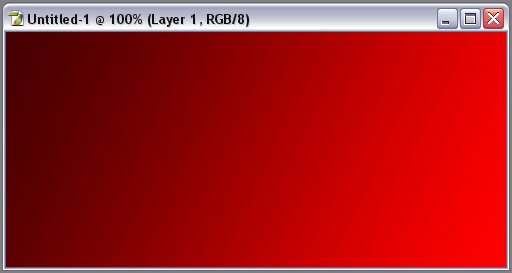
With the Gradient Tool still active, click in the upper left corner, hold down the mouse key and move the mouse cursor to the bottom right corner and release the mouse button:

3. Add a reflection |
This layer will be automatically the active layer.
If we haven’t saved our document yet (which we should), then it’s still named Untitled-1. What we are looking at is our document window. The document window contains the complete image with in our case a zoom factor of 100%:
In the next step we want to make make an selection that goes beyond the borders of our canvas (the red area with the gradient) and to see the area outside our canvas we need to zoom out. You can do that the easy way if you have a wheel mouse, by rolling the wheel on the mouse forward or you can use the Zoom Tool ![]() in the tools bar (the shortcut is Z). If you use the zoom tool, then make sure you hold down the Alt key (Option key on the Mac) before you click on the mouse button to zoom out.
in the tools bar (the shortcut is Z). If you use the zoom tool, then make sure you hold down the Alt key (Option key on the Mac) before you click on the mouse button to zoom out.
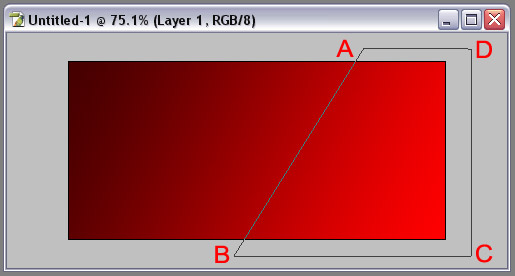
In my example I’ve zoomed out to about 75%:
Go to the tool bar and select the Polygonal Lasso Tool ![]() .
.
Now click in the area marked with A, then click where B is, continue with C and D and then move your cursor back towards A and when you’re near A you’ll notice a small circle appearing under the right side of the ![]() symbol, meaning that if you click now the selection will be closed, so wait for that circle to appear before you click.
symbol, meaning that if you click now the selection will be closed, so wait for that circle to appear before you click.
I didn’t make a very accurate selection, because it doesn’t really matter as long as the four points are outside the image area:
The reason why we make a selection that is larger than our image, is that it’s easier to avoid mistakes. Take for example point C; it’s easier to place it like that, instead of trying to click exactly in the lower right corner of our canvas with the red gradient on it. Since we make this selection larger than what we actually need, we’re able at a later stage to make some slight adjustments to this layer by moving it around with the Move Tool ![]() .
.
Press the letter D on your keyboard, which makes the foreground color black and the background color white:
Now press X on your keyboard to switch fore- and background color: ![]()
We’re now going to draw a gradient using the current fore- and background colors. Select the Gradient Tool ![]() in the tool bar using the same setting for the gradients that we used in step #2.
in the tool bar using the same setting for the gradients that we used in step #2.
Click somewhere in the area of the green dot, hold down the mouse button and release it in in the lower right corner:

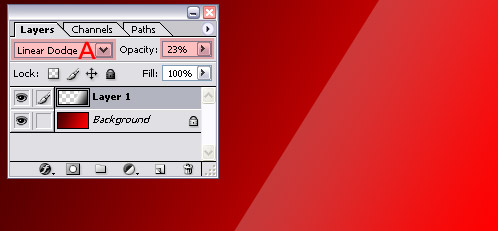
With Layer 1 still active, change its blending mode in the layers palette to Linear Dodge (A) and change the opacity to about 23%. Now press Ctrl+D (Command+D on the Mac) to to deselect our selection.
Double click on the Zoom Tool ![]() to reset the zoom factor to 100%:
to reset the zoom factor to 100%:
Comments