
Fantastic Sunset Wallpapers Effects
This task we’ll see how is it possible to represent the vector wallpapers, create your own brushes and use different layers.
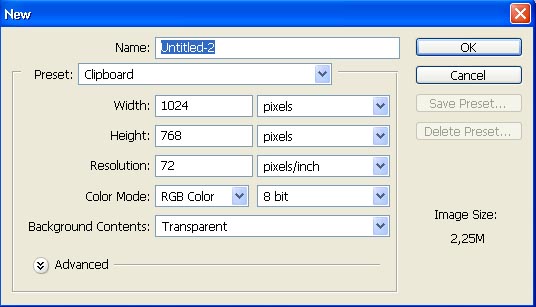
First we need to open a new file of usual wallpapers sizes: File – New (ctrl+n).
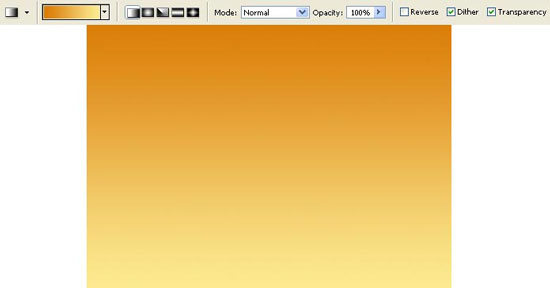
Select the Gradient Tool to stretch out the color from the top to the bottom, selecting preliminary the necessary colors.
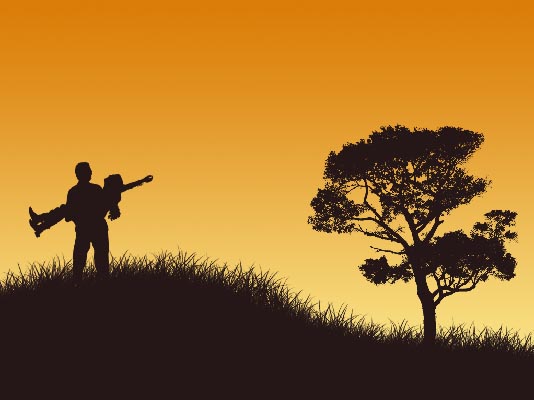
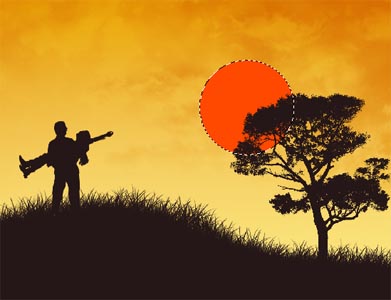
Create a kind of marking on a new layer (Layer – New – Layer), which will represent the land on our picture. Use the Polygonal Lasso Tool for this operation. Then select the Paint Bucket Tool to paint out the picture.

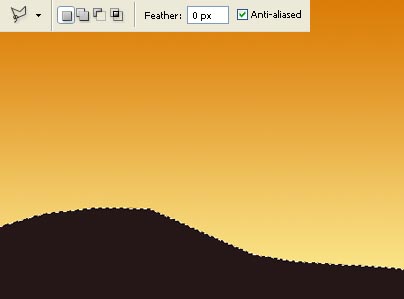
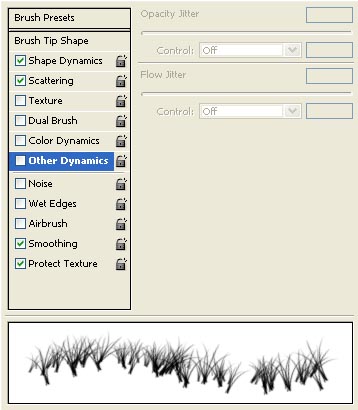
Move off the marked elements: Select – Deselect (ctrl+d) and choose the Brush Tool
of grass shape and continue picturing the grass on the represented land
already, changing a little the brush’s size. Move off preliminary from
the Brushes window the ticks near the next options: Color Dynamics and Other Dynamics.

Using
the set of prepared brushes already, insert a tree and the people on
our picture, but when picturing these elements, apply the same color of
the grass. The brushes of tree’s shape may be downloaded here: http://www.deviantart.com/deviation/29661536/? qo=6&q=boost%3Apopular+in%3Aresources%2Fapplications%2Fpsbrushes+tree. The brushes of people shape may be downloaded on this address: http://www.deviantart.com/deviation/33101073/? qo=13&q=by%3Aanarasha-stock&qh=sort%3Atime+-in%3Ascraps
Create
a new layer above the background’s layer and insert the sky’s picture
on it, but firstly we need to open on a new layer the necessary sky’s
picture: File – Open (ctrl+o).
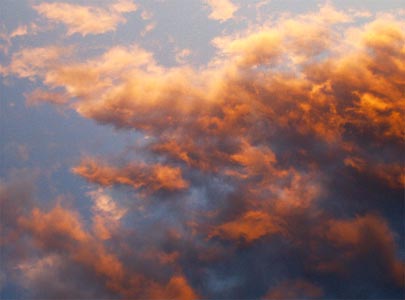
Mark it out with Rectangular Lasso Tool and make a copy of it: Edit – Copy (ctrl+c). Get back to the window with the wallpapers and insert it on a new layer: Edit – Paste (ctrl+v). Decolorize next the sky’s layer: mage – Adjustments – Desaturate (shift+ctrl+u) and turn it around vertically: Edit – Transform – Flip Vertical. Using next option Edit – Free Transform (ctrl+t), it’s possible to make the corrections on the size.
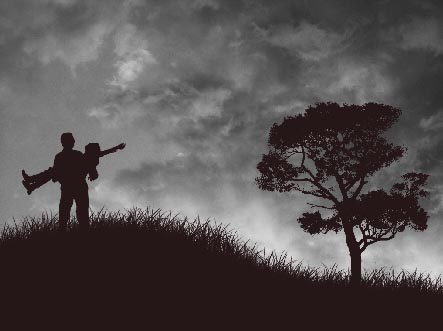
The next command Image – Adjustments – Curves (ctrl+m) will be helpful in correcting the brightness and the contrast of the layer.

Change the layer’s Blending Mode on Soft Light.
Open a new layer above the sky’s layer. Then select the Elliptical Marquee Tool and press the shift button to create a round marking. Paint it out with the necessary color.
Insert the same way several more circles:
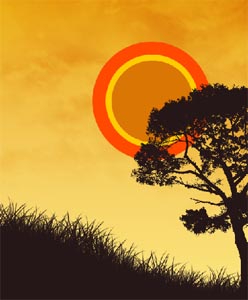
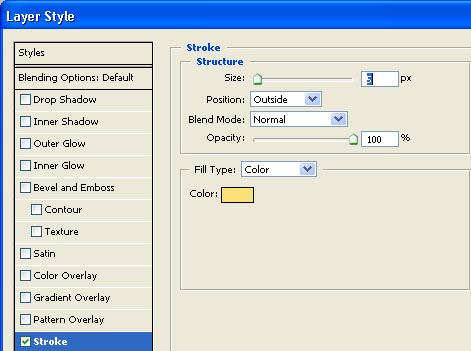
Then we have to outline the elements, choosing previously the next option: Layer – Layer Style – Stroke.
Create a new layer above the circles’ layer and group out both layers: Layer – Create Clipping Mask (ctrl+g). The Gradient Tool will be helpful in decolorizing several of the circles.
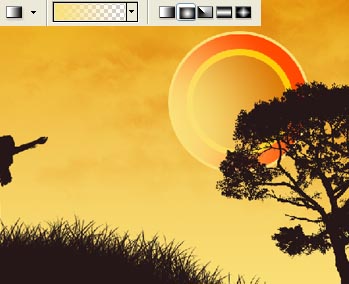
Merge down the layers: Layer – Merge Down
(ctrl+e). On a new layer we have to represent one more set of the
circles, changing a little the colors and moving the center. Place this
layer lower than the big circle’s layer:
Then paint out this layer: Layer – Duplicate Layer (ctrl+j) and select Edit – Free Transform (ctrl+t) option to turn it around and change the size of this set of circles:
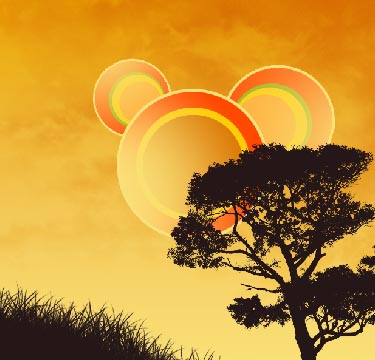
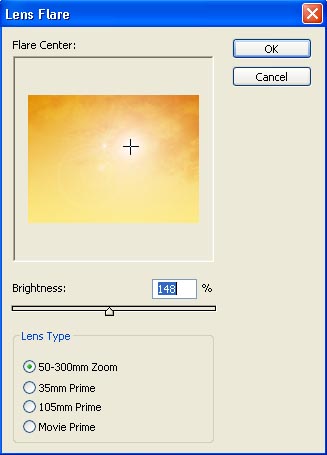
Combine the background’s and the sky’s layers (ctrl+e) and apply to the new layer a special filter: Filter – Render – Lens Flare, setting the flare in a way to be situated under the circles.
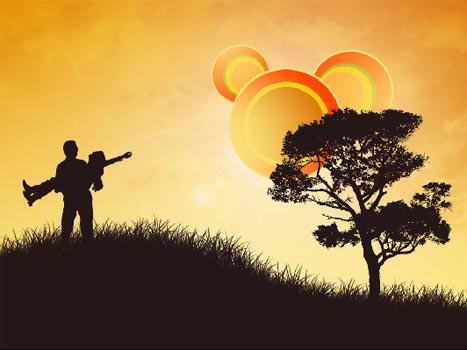
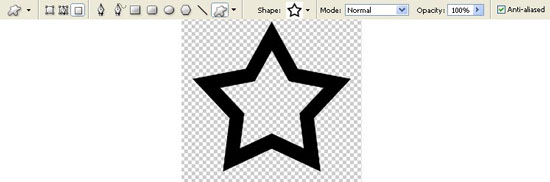
Next we’ll create a brush of our own, having the star’s shape. For the beginning we have to open a new file (400×400 px). Draw a star on it, selecting the Custom Shape Tool of black color:
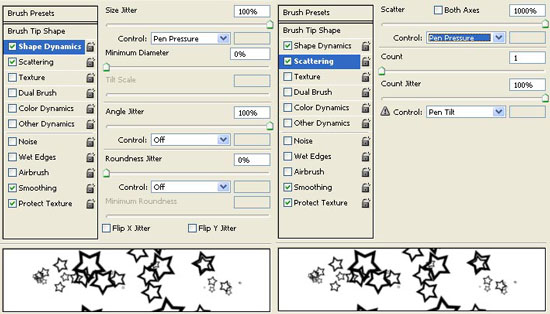
Apply the next command: Edit ? Define Brush Preset and change the adjustments of the brush in the Brushes window.
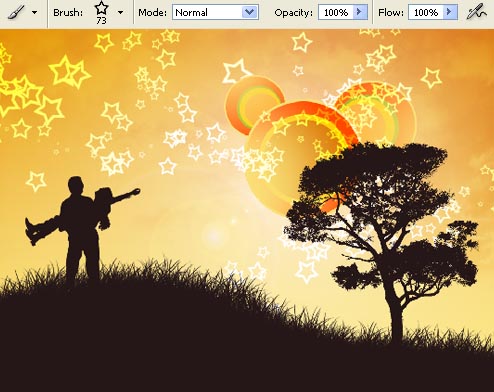
Then create a new layer, under the land’s layer. Change its Blending Mode on Overlay and insert the stars on it.
On the layer above, we have to create several rays painted in white color (Paint Bucket Tool).
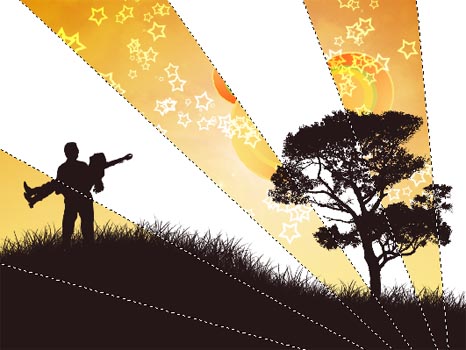
Change the layer’s type on Overlay and minimize the Opacity till 35%.
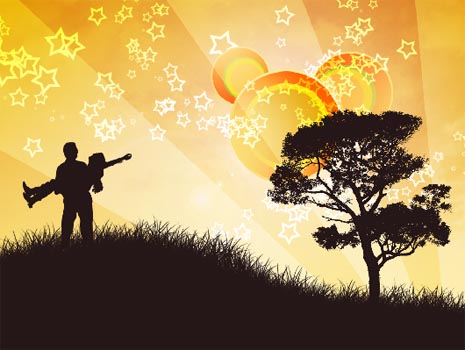
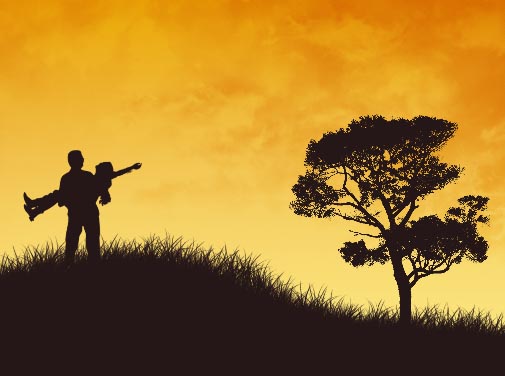
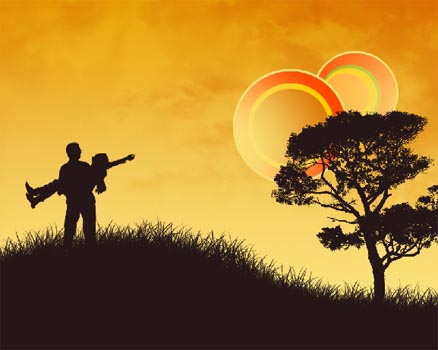
The picture is finished!
Made by Sigma
Comments