
Fairy Tale – Rainy Day – photo effects
The next lesson we’ll
learn to combine the objects and people situated on different pictures,
create the effect of rainbow and old picture, use the layers, layers’
masks and work with the colors and blurring filters.
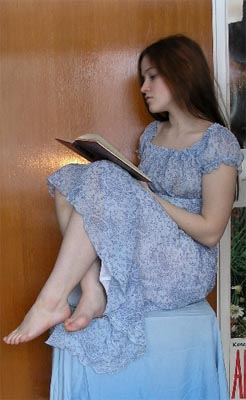
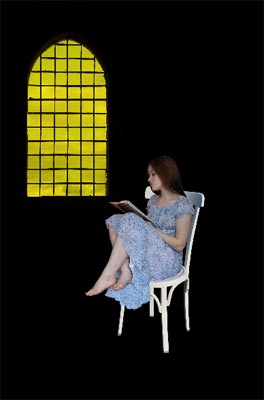
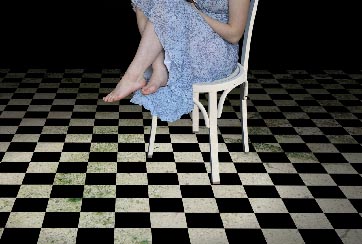
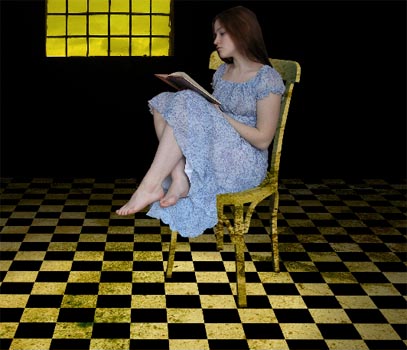
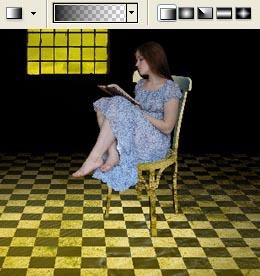
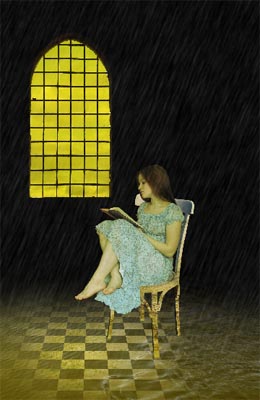
For the beginning we have to open in a new window the photo of a sitting girl: File – Open (ctrl+o).
Mark out the girl’s figure, selecting firstly the Polygonal Lasso Tool:
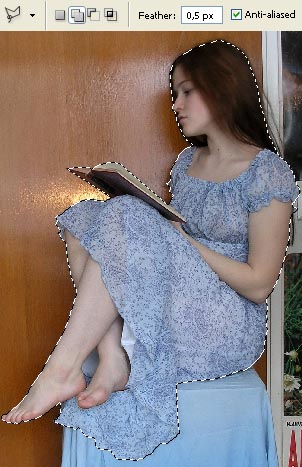
Make a copy of the marked figure: Edit – Copy (ctrl+c) and insert it on a new layer: Edit – Paste (ctrl+v) or simply select the next combination of buttons: ctrl+j. Erase the previous layer: Layer – Delete – Layer. After that we have to enlarge the image, using the Crop Tool. Open in a new window the picture of a chair.

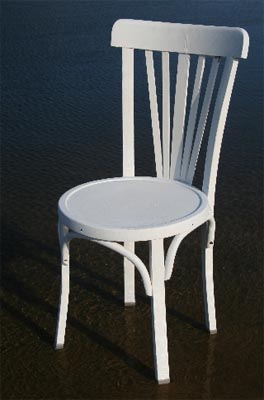
Mark it out with Rectangular Marquee Tool,
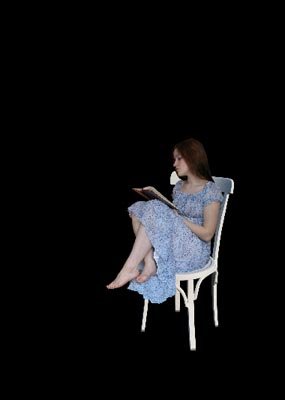
make a copy of it (ctrl+c) and get back to the girl’s file to insert it
on a new layer (ctrl+v). Place it under the girl’s layer and make the
corrections of the size, using the combination Edit – Free Transform (ctrl+t). Then create a new layer: Layer – New – Layer and place it under all the previous layers. The last one should be painted in black color with Paint Bucket Tool.
Open now the picture of a window (ctrl+o).
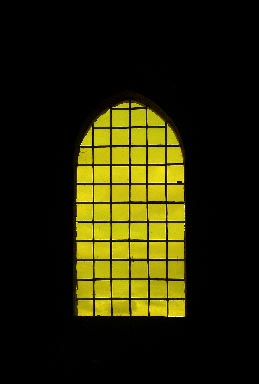
Insert it above the background’s layer. Because the picture is situated on a black background, it may be marked out with Rectangular Marquee Tool and not with Polygonal Lasso Tool specially.
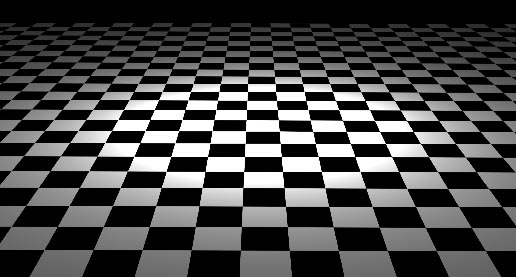
Now
we have to open in a new window the picture of tile floor, looking like
a chess table. It maybe drawn for yourself also with Rectangular Tool and clicking on the shift button, then distorting it with Edit – Transform – Perspective and Edit – Free Transform (ctrl+t).
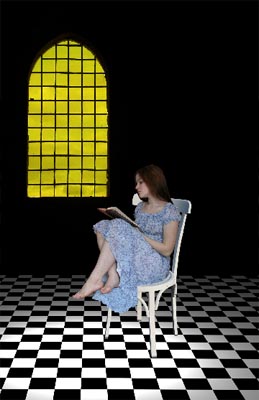
Insert
it also on a new layer, above the window’s layer. Don’t forget to make
the necessary corrections on its size and the distort level (ctrl+t).
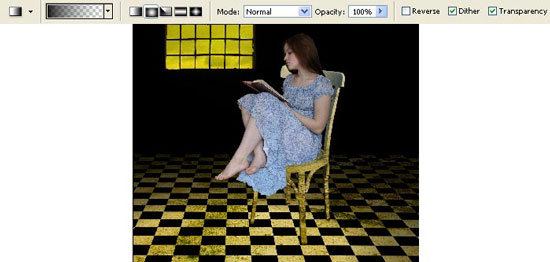
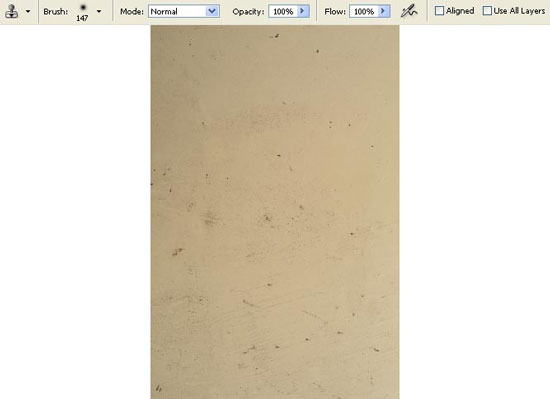
When making the floor looking older than it is, we have to insert on a new layer a kind of texture, like that one shown below:
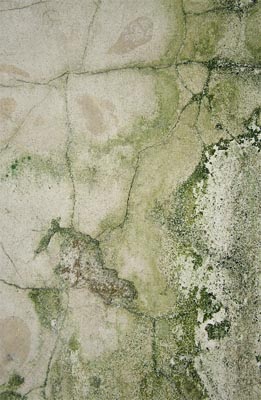
Group out this layer with that one the floor is situated on: Layer – Create Clipping Mask (ctrl+g). Distort the texture’s perspective to make it look exactly like that one of the floor. Use the next selection: Edit – Transform – Perspective:

Change the layer’s type on Multiply:
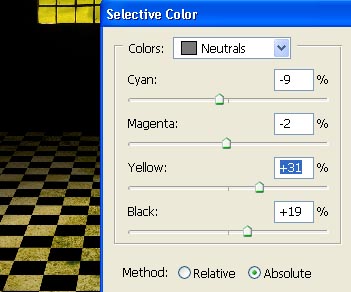
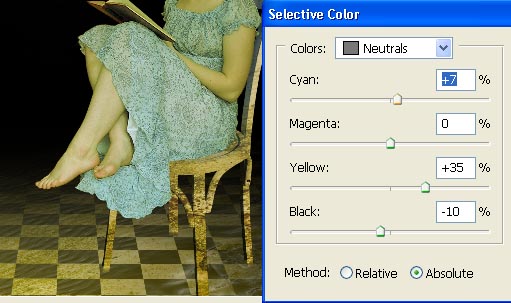
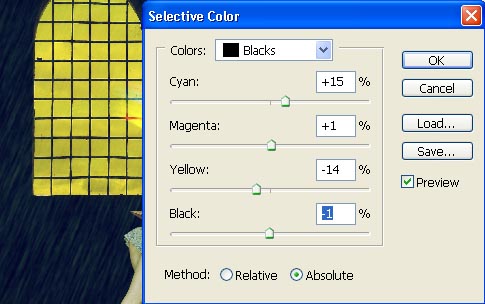
The texture we have looks too dimly, that is why we’ll change a little its color with Image – Adjustments – Selective Color.
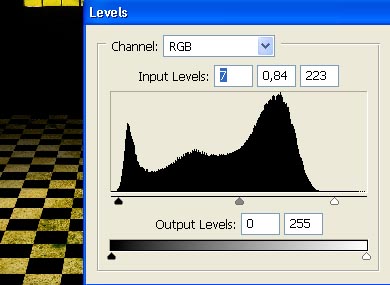
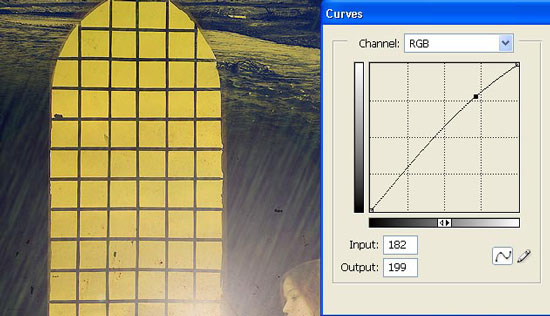
Now we have to change also the brightness and the contrast, applying Image – Adjustments – Levels (ctrl+l).
I’ve decided to make look old the chair too. We have to copy in this case the texture’s layer: Layer – Duplicate Layer (ctrl+j) and combine the copy with the layer the chair is situated on (ctrl+g).
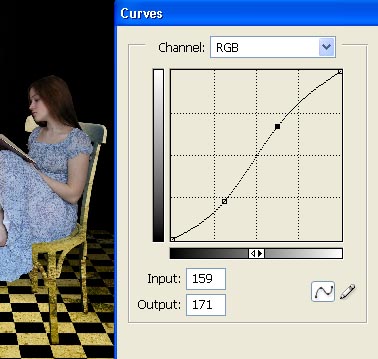
Create after that the layer’s mask: Layer – Add Layer Mask – Reveal All, using the Gradient Tool of black color and hide the upper part of the layer.
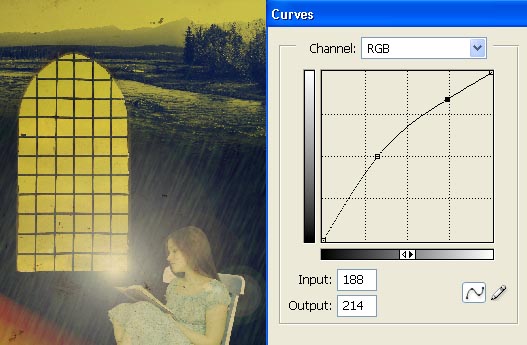
Apply also this command: Layer – Remove Layer Mask – Apply and make the layer look brighter a little, using Image – Adjustments – Curves (ctrl+m).
Combine the texture’s layer and the chair’s one: Layer – Merge Down
(ctrl+e) with the texture and the tile, by two. We have to insert above
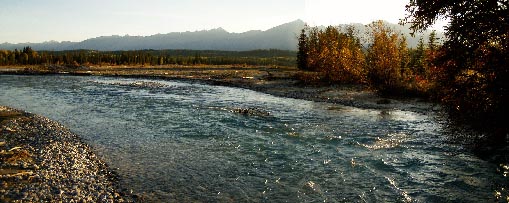
the chair’s layer the picture having pictured the water on it:

Mark out the chair now, clicking on its layer, having pressed in the same time the ctrl button. Select the Polygonal Lasso Tool
to erase the markings from the chair’s legs to have the impression that
a part of the legs is situated in the water. Erase the marked zone with
the delete button on the keyboard:

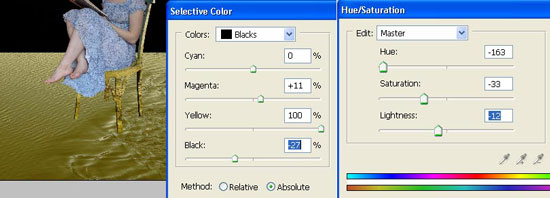
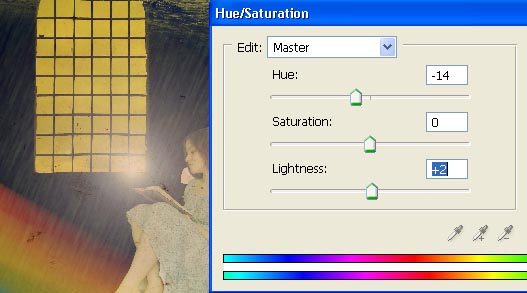
Move off the marking: Select – Deselect (ctrl+d) and change the water’s color with the next selections: Image – Adjustments – Hue/Saturation (ctrl+u) and Image – Adjustments – Selective Color.
Change the layer’s type on Screen firstly, then on the Normal again. Using the Gradient Tool and the layer’s mask, hide a big part of the water:
We should have Blending Mode Normal:
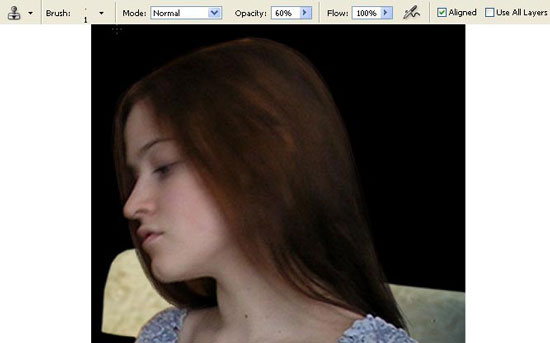
Continue by processing the girl’s layer. Make use of the Clone Stamp Tool to make the girl’s hair look livelier:
Then we have to correct the layer’s colors (Selective Color).
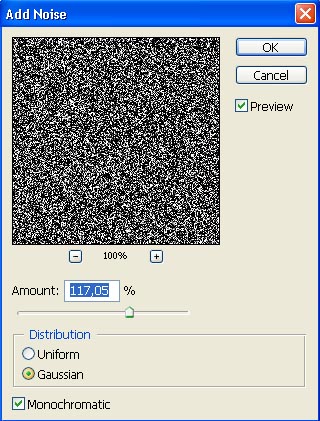
Create a new layer and place it above all the previous layers. Paint it in black color with Paint Bucket Tool and apply the filter that is shown here: Filter – Noise – Add Noise.
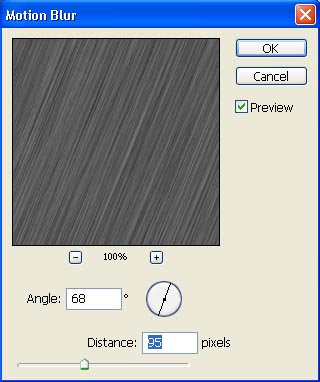
Selecting the Motion Blur, it’s possible to blur out this layer:
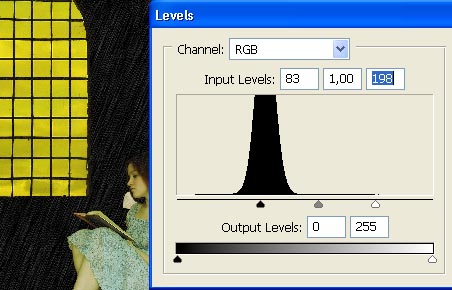
Change the layer’s type on Screen and make the appropriate corrections on its brightness and on its contrast (ctrl+L).
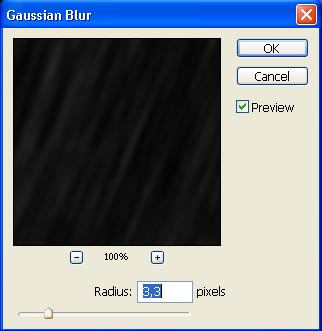
Blur it out also with Filter – Blur – Gaussian Blur.
Select the Layer Mask and Gradient Tool to hide the lowest part of the layer.
We have to represent now a rainbow on a new layer, using the Brush Tool.
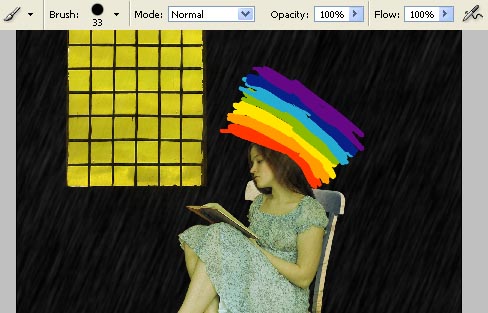
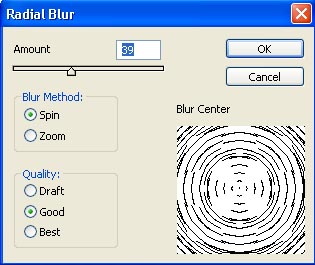
Blur it out also: Filter – Blur – Radial Blur.
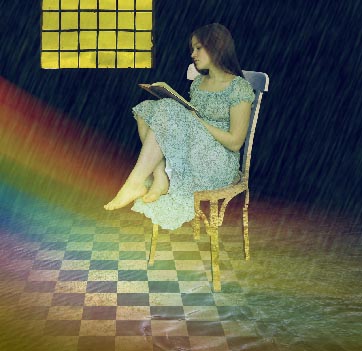
Turn it vertically: Edit – Transform – Flip Vertical and change the layer’s type on Linear Dodge. We have to distort it also, using the combination Edit – Transform – Distort. The layer’s Opacity should be situated on 50%.
Pass on the rain’s layer and correct the layer’s colors (Selective Color).
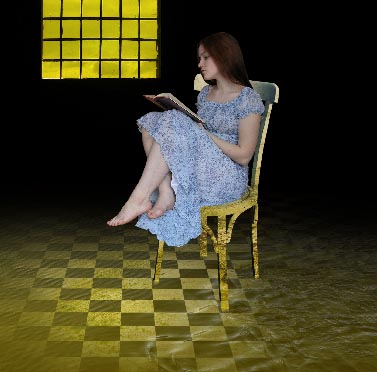
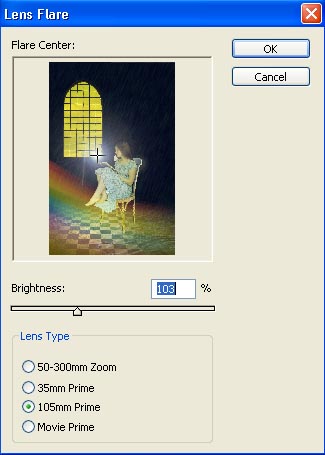
Merge down all the layers: Layer – Merge Visible (shift+ctrl+e) and now we have to apply the filter indicated here: Filter – Render – Lens Flare.
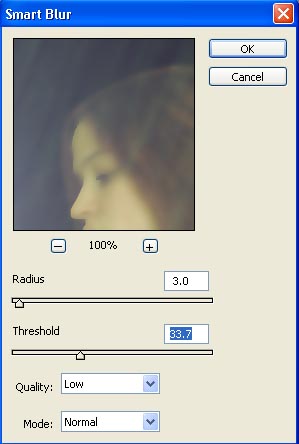
Make a copy of this layer and blur the copy out, making use of the next selection: Filter – Blur – Smart Blur.
Change the layer’s type on Darken this time and merge down the layers (ctrl+e).
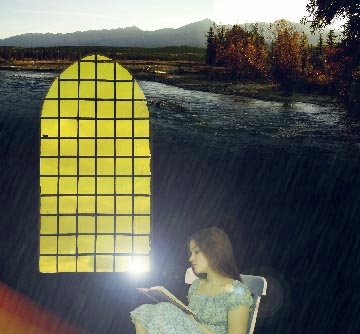
Insert on a new layer a picture having portrayed on it a water reservoir:
Choose all the options shown here (Free Transform, Layer Mask and Gradient Tool) and place the layer above the picture to have the impression that the rain is falling out of the reservoir:
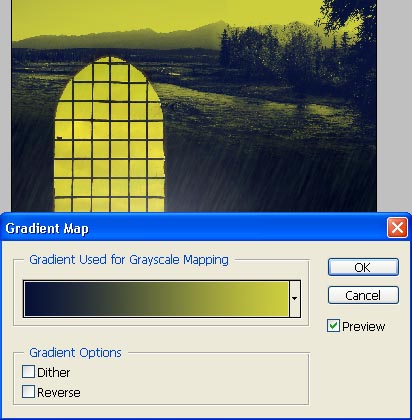
Apply to this layer the command Image – Adjustments – Gradient Map to select the same colors we have on the next picture:
Insert on a new layer the texture of an old wall:
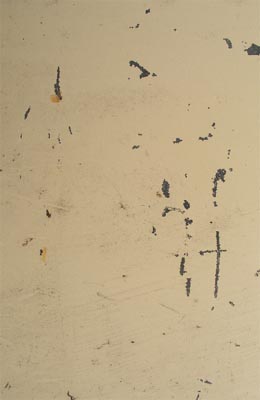
Select the Clone Stamp Tool to hide all those exfoliated zones on the wall, just not to make dirty our picture.
Change the Blending Mode on Multiply and make the corrections on the brightness firstly (ctrl+m).
Then make the corrections on the color (ctrl+u).
We have to merge down all the layers (shift+ctrl+e) and make the picture a little brighter than it is now (ctrl+m).
If that is necessary we may apply the command Filter – Sharpen – Sharpen.
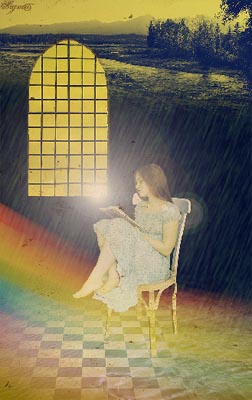
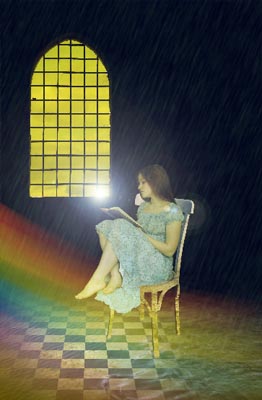
Finished!
Made by Sigma
Comments