
Exporting a QuickTime Movie with Alpha Channel in Premiere
Exporting a QuickTime Movie with Alpha Channel in Premiere
Now that you have keyed out the green screen in Premiere, you can create the QuickTime file that will be used later by the Flash 8 Video Encoder:
-
Click the Monitor window and select File > Export > Movie. When the Export Movie dialog box opens, navigate to the folder where you want to save the video and name the video TalkingHead (see Figure 14).
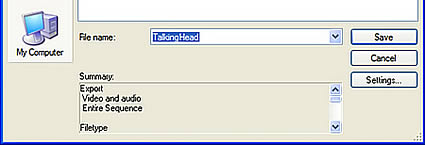
Figure 14. Naming the movie
- Click the Settings button to open the Export Movie Settings dialog box. This dialog box is key to successfully completing this exercise. Here you choose the file type for the video and select the appropriate codec that renders the alpha channel.
-
Click the General category and make the settings shown in Figure 15. Select QuickTime as the File Type. Also select the Export Video and Export Audio options. Selecting Add to Project When Finished ensures that you can return to these settings should you need to make changes after the video file is created. Select None for the Embedding Options; embedding a project in the file does nothing more than add information to the file’s metadata by letting QuickTime know that the video is part of a Premiere project.

Figure 15. General category settings in the Export Movie Settings dialog box
-
Click the Video category and make the settings shown in Figure 16. Select Animation as the Compressor codec and select Millions+ of Colors as the Color Depth setting. These two choices are important for creating video with an alpha channel. Selecting Millions+ of Colors will include the alpha channel created by the filter in the video. By contrast, selecting Millions of Colors will create a video with sufficient color but without the alpha channel.
Figure 16. Selecting Millions+ of Colors as the Color Depth setting to retain the alpha channel
- Click OK to close the Export Movie Settings dialog box. When you return to the Export Movie dialog box, click Save. This opens a small dialog box showing the progress of the compression. It will close when the compression is finished.
-
Select File > Save to save the project file and the work you have done so far, and then quit Premiere.
If you open the TalkingHead.mov file in the QuickTime player, you will be in for a surprise. The green screen is still there. Don’t worry, however, because the alpha channel is there too. You just aren’t using it—yet.
Once you have a video with an alpha channel, you need to convert it to the FLV (Flash video) format so it can play in Flash Player. You can accomplish this in one of two ways. The first is to use the Video Import Wizard in Flash Professional 8, which not only creates the FLV file but also lets you add the controls—called a “skin”—to the player. The second way is to use the Flash 8 Video Encoder. This stand-alone application appears when you install Flash Professional 8 and includes the ability to encode several videos at once.
Comments