
Elements Basics Page2
If you click on New View in the View menu, a copy of your image will open in another window. You can have the two windows at different magnifications, which can be very useful if you’ve zoomed way in to edit details, but would like to see what things look like at 100 %.
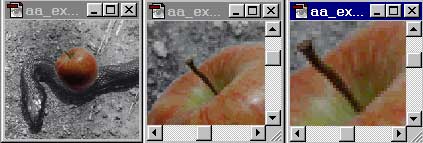
An example of three views of the same image, all open at the same time, is shown under the menu, below. The view on the left was at 33.33 % magnification, the center view was at 150 %, and the view on the right was at 300 %

The Zoom In, Zoom Out, Fit on Screen, Actual Pixels, and Print Size commands all affect magnification and should be self-explanatory.
When you make a selection in Elements, the selection outline shows up as a animated dotted line usually referred to as the “marching ants.” If you can’t see what you’re doing because of them, choose Selection Edges from the view menu to toggle it off. When checked, the selection outlines are shown; when unchecked, the marching ants will not be shown.
Do be sure and turn these on most of the time, otherwise you will have no way of telling when something is selected without the visual reminder of the marching ants.

If you choose Show Rulers you will see rulers across the top and left sides of your image. To change the ruler origin, drag on the little square in the top left corner.
If you choose Show Grid, you will see a mesh of regular rules superimposed on your image. These are useful when trying to position items precisely. You can change the color of the lines, and the increments by choosing Edit > Preferences > Grid. I chose a green color in the illustration below, in hopes it would show up better on this page.
When the rulers or grid are showing, the View menu item will change to Hide Rulers, and Hide Grid. Click either to hide the option. You can use the ruler icon on the Shortcut bar to toggle rulers off and on.
The Snap command, in the View menu is the one I find most annoying. When turned on, as it is by default, selection outlines, including crop outlines will snap to the grid, and to edges, including the image edge. This makes it almost impossible to shave off small amounts when cropping. I keep this turned off (unchecked) almost all the time.
When used in conjunction with the grid, Snap can be useful for fast, precise positioning.
Comments