
Drawing in Flash: Drawing a House
Drawing a House
Open a new document by selecting File > New, selecting Flash Document, and clicking OK.
You’re ready to begin. I’d like you to begin by making sure both your Tools panel and Property inspector are open. You will need them both for this exercise.
- Click the Fill Color control (the paint bucket) and select a fill color of gray.
- Click the Stroke Color control and select a stroke color of black.
If at any time you’re confused as to which tool you’re using, you can roll over the tool and wait a few seconds; the name of the tool will appear.

Figure 17. Identifying the tool by displaying the tool tip
- Draw a rectangle on your Stage.
This is the foundation of your house. Save your file.

If you ever used a drawing program in the past, you’re probably used to drawing shapes and having both shapes retain their original states. Flash treats this a bit differently. Flash treats this much like the artist is working on a real canvas or actually sketching on a piece of paper. (It’s important to understand this entirely, so I’m going to take a minute to explain.)
Here’s an example. Right now, your rectangle is broken up into little pieces. If you were to drag to select a part of the rectangle, only the part you drag your arrow over will be selected. It’s a lot like what I showed you before when I changed the fill color and stroke color of the red circles. I’d like you to draw another triangle on top of the original one. Like this:
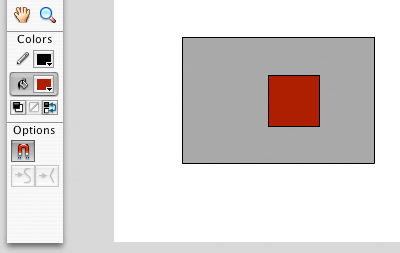
Figure 18a. Shapes overlapping other shapes
Next, delete the red square. Notice that on the gray triangle below, the area where there was once a red square, the color is now missing or “punched out.”
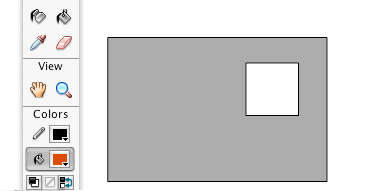
Figure 18b. Deleting shapes from ungrouped objects.
This is how Flash works. A good way to think of it is like using real paint. Say you drew some grass, and then drew a ball on the grass. Later, you decide that you no longer want the ball and decide to erase it. The grass would no longer be there. When you erase the ball, the grass below it would be gone as well. Think of it this way.
So, you have your gray rectangle and you know you want to keep that gray rectangle just as it is. Using the Selection (black arrow) tool, click and drag to select the gray rectangle. Include the stroke—you don’t want to lose your black outline.
After you have selected the triangle and its stroke, select Modify > Group.

Figure19. Grouping your objects
This makes that shape nearly indestructible. You can now draw on top of your rectangle while preserving its original shape.
Now that you have drawn a rectangle and grouped its parts, I want you to try and give your house a door. After you draw it, it doesn’t show up. In Flash, all vector drawings appear below groups. I’m not entirely sure why it’s done this way, but it’s important to know that your shape is there. It’s just set behind the grouped triangle. Therefore I need to introduce you to the Timeline.
- Go to Window > Timeline. Your layers appear, as shown in Figure 20.

Figure 20. The Timeline and layers
Layers let you place new artwork on the Stage while preserving any and all artwork below or above it. Think of a layer as a transparency on an overhead projector. You can lay as many down as you want and still see whatever lies underneath. Each time you draw a new shape or a group of new shapes (such as a group of windows or a herd of sheep), you should add a new layer. Let me show you how this is done.
Click the button outlined in red below.
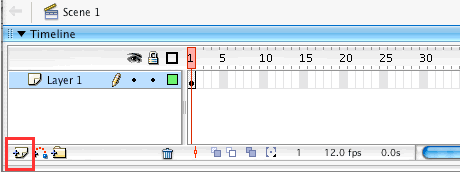
Figure 21. Creating a new layer
A new layer appears. To give this layer a name, double-click the layer and type over the default layer name. I suggest using very straightforward names such as “Windows” or “House”. Note: I know this sounds pretty straight forward, but it needs to be said. The items on the topmost layer sit on top of others on the Stage. It’s common to draw something and then not be able to find it. You might panic before realizing that your Window layer is lying below your House layer. The windows are there, but they might be hidden. Remember this while you’re drawing.
This is what your Timeline should look like:

Figure 22. Naming and organizing your layers
If at any point, something goes wrong and things don’t appear to be doing what you want them to do, use the Undo command by selecting Edit > Undo (Control+Z). Always remember that you can undo something. By default Flash allows 100 undo levels, however, you are able to change this number from 2 to 9999 using the Flash Preferences, but for this exercise, I’d like to just keep it at 100. I also recommend saving your work frequently. The last thing you want is for something to go wrong and you lose your work. File > Save (Control+S) should be considered your most valuable player when working in any program.
Time to draw the rest of your house!
Comments