
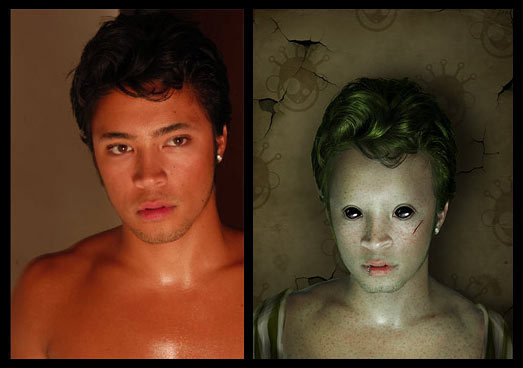
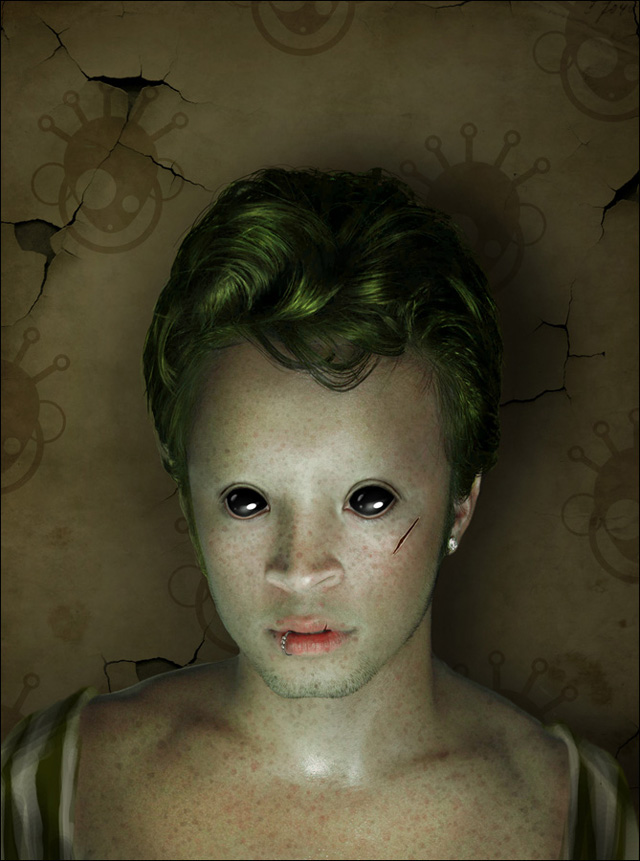
Doll Man
This lesson you’ll discover one of the methods of color correction. Also you’ll find out how to draw realistic freckles, to change the features, the hair’s color, insert the scratches on the skin, cut out the hair and represent the background out of the old wallpapers. Generally, you’ll find out how to represent a kind of the next demonstrated doll – man.
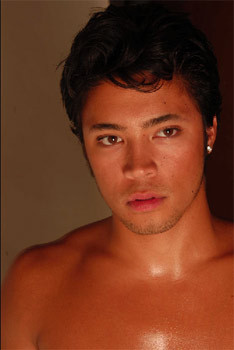
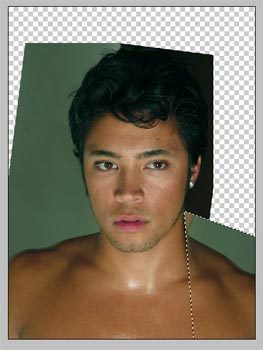
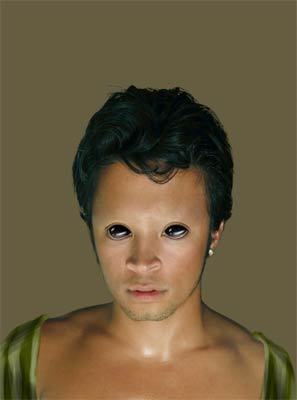
Find a stock photo, I used this photo from deviantart. I would like to thank the author of this photo:
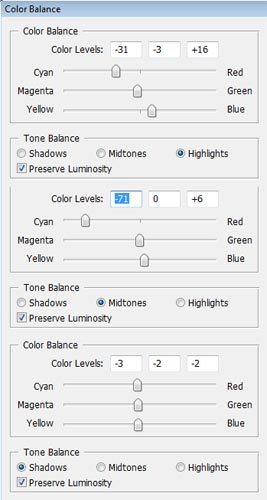
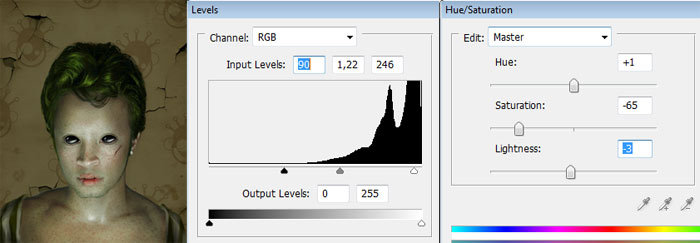
Make several color corrections, because it has an evident yellow – red tone, a very common effect when shooting with the flash. In this case we’ll select the option Image > Adjustments > Color Balance.

To continue working with this image we need to unlock the background layer. We can make a copy of the background layer (Ctrl+J) and delete the previous one or just make a double click on the left mouse’s button on this layer on the layers panel to unlock them.
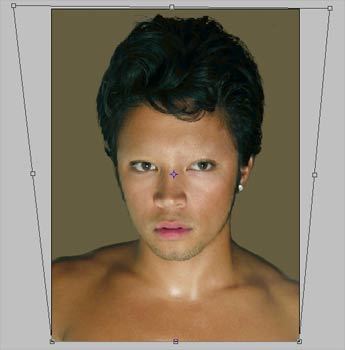
Next we’ll align the picture, because it is a little turned around. If the rulers are not visible, choose View > Rulers or press Ctrl+R and drag from the vertical ruler to create a vertical guide on the central part of the face. Then rotate the photo, using Edit > Free Transform (Ctrl+T).
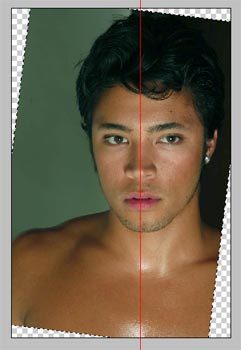
Remove guides from the image using View > Clear Guides. Next we need to insert for the boy his missing shoulder on the picture.
Choose Image > Canvas Size and increase the canvas size of image with a transparent background from right to insert the missing part. Then select shoulder from left using Polygonal Lasso Tool, make a copy of it on the new layer (Ctrl+J) and then select Edit > Transform > Flip Horizontal and turn it over, applying Free Transform, just for the shoulder to get its right position.
Put together the layers by pressing (Ctrl+E) to Merge Down. Then use Clone Stamp Tool to retouching a defect line after combining these two layers.
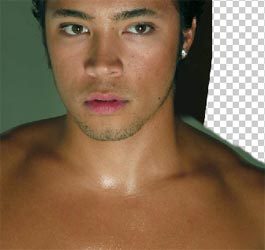
Next we need to accentuate the lighting and make the shoulders look not so the same. In this case we need to make lighter one of it, applying the Gradient Tool (G). Then change Blending Mode for this layer to Soft Light and minimize the Opacity till 60%.
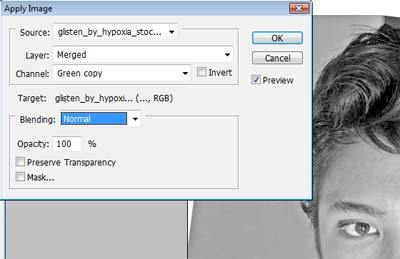
Next we need to get off the rests of the background. Because the most difficult thing is to cut out the hair, we’ll start up with it. Choose the Channels panel; examine the hair in the channels to see where it looks better. Usually the green channel is the most appropriate. Make a copy of the green channel. Then make the contrast between the hair and the background in this channel to be more intensive, by selecting firstly Image > Adjustments > Shadow/Highlight with default settings and then Image > Adjustments > Levels (Ctrl+L).

Back to the Layers panel and create a new layer (clicking on the icon Create a new layer). Then apply the next option Image > Apply Image, choosing the channel we made the corrections on it.
Select the background on the layer we’ve got, using the Magic Wand Tool set Tolerance to 20 in Options Bar and then make the inversions by Select > Inverse (Shift+Ctrl+I). This way we get selected the hair. Now make visible the colored layer and select Add Layer Mask in the bottom part of Layers panel.
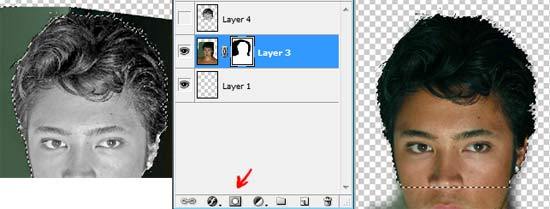
NSelect the Brush Tool (B) set the Hardness on 70% and paint in Layer Mask with black color the rest of the background.
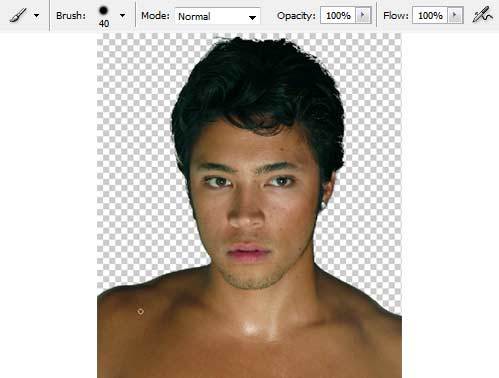
Drag this layer on Delete Layer icon at the bottom part of the Layers panel. Now we’ve got a new layer without background. Make the hair look more vital by drawing separate locks and hairs using a small size for the brush. Create a new background layer. Put it under the layer with the boy in Layers panel and fill it with appropriate color.
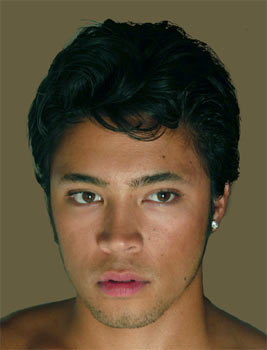
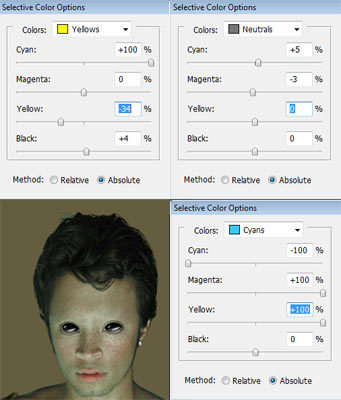
We may notice on the picture that the boy’s hair is of green nuance. We don’t need a kind of nuance like this, so we’ll make the necessary corrections, applying the Image > Adjustments > Selective Color.
Let’s start the transformation now.
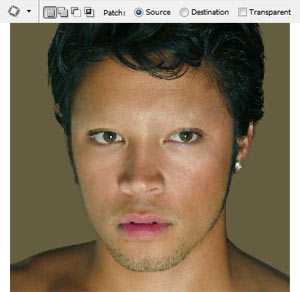
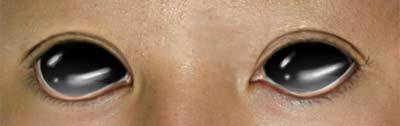
Firstly we’ll get rid of the eyebrows. In this case we’ll copy the skin near the eyebrows using Clone Stamp Tool (S) as if we intend to color them.

Choose now the Patch Tool (J), make copies of the skin’s texture on these places (select the fragment which is necessary to change and move the selected zone on the skin with the appropriate texture).
Now we need to distort the boy’s head, applying Edit > Transform > Distort.
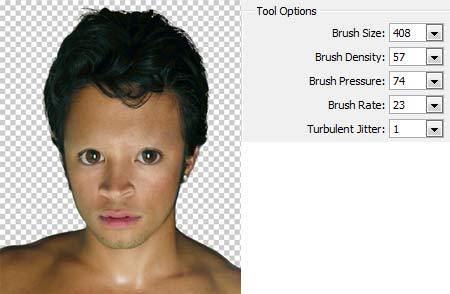
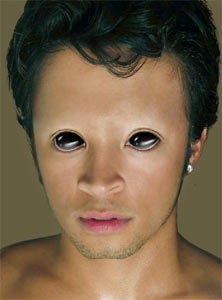
Pass on the Filter > Liquify (Shift+Ctrl+X), applying here the Turbulence Tool (the tool is not difficult at all, all you need is a little training), change a little the face’s features, not forgetting also to change the brush’s size. Choose the Bloat Tool to enlarge the eyes accurately.
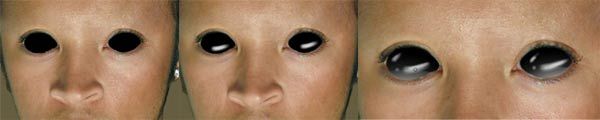
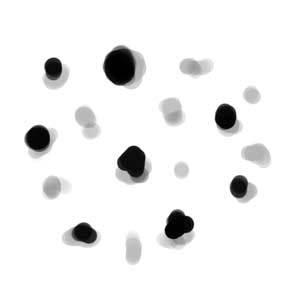
Next we’ll need the next demonstrated brush type:

Select the Brush Tool (B) on a new layer to paint the eyes in black color. Then select the white color, changing the Hardness and the Opacity for the brush to insert several highlights.
Now we’ll insert the thickness effect on the skin around the eye, because when applying the Bloat Tool, it was blurred out. In this case we’ll choose the skin’s color on the light zone, using the Eyedropper Tool and continue drawing it above the eye. Next using the Burn Tool and the Dodge Tool distribute it on the light shadows.
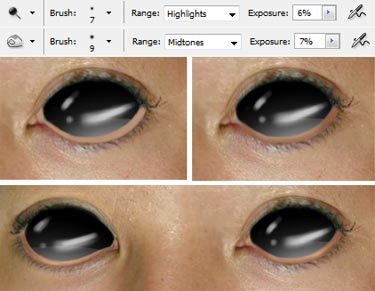
Insert now a little bit of white color on the inside edge, blurring it out with the Smudge Tool (Opacity on 40%) and paint the top eyelid, applying the Clone Stamp Tool and the Patch Tool
(the same way we did by moving off the eyebrows). Finally we’ll take the dark – brown color to accentuate the fold and the eye’s contour.
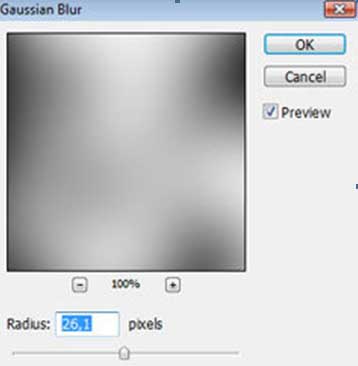
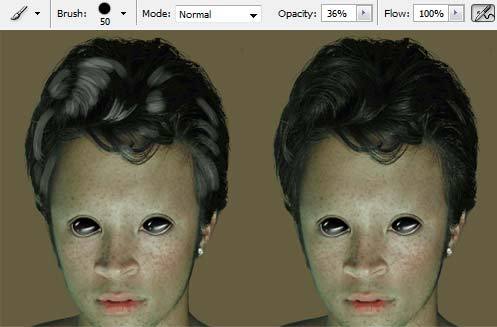
We need to retouch the skin. In this case we’ll make a copy of the boy’s layer and apply for it the layer’s mask. Make sure that the mask is of black color (if it is white all you need is to invert it: Ctrl+I) and select a white brush with smooth edges to paint the forehead, cheeks and the chin and all the open parts of the skin. Pass from the mask on the layer by clicking on it, using here Filter > Blur > Gaussian Blur.
Now change the Blending Mode of this layer to Luminosity, set the Fill to 50%.
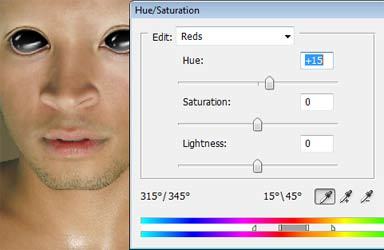
Put together the layers by pressing Ctrl+E to Merge Down and change a little the lips color, as for their contour to be not so evident, applying Image > Asjustments > Hue/Saturation (Ctrl+U) in the Reds channel.
I wanted to insert some air on the lateral parts. That is why we need to increase the canvas size and as for the shoulder not to look so cut, we’ll drawing on them a robe with big strokes, making the color lighter and darker by turn. Change also the brush’s Opacity.
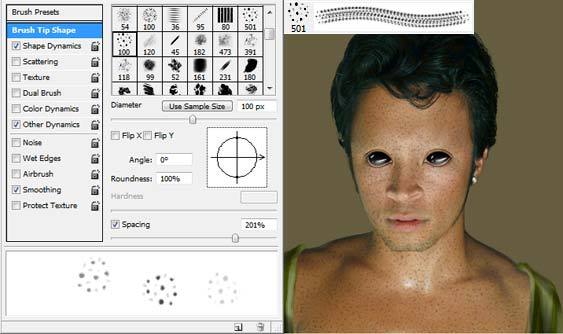
Now we need to put some freckles on the face. We’ll choose the brush made by myself. If you know how to create different brushes, you may do it by yourself – it’s a procedure of inserting different brushstrokes of different Opacity.
Minimize the Opacity to 30% and change the brush’s size to cover the boy’s skin with small spots.
Then change the Blending Mode for this layer to Multiply and set Fill to 50%. Generally I don’t see the difference between Opacity and the Fill options on the layer, which is why I minimize them by turn, depending on the mood.
Insert several bigger spots and then put together the layers (except the background’s one), Make the corrections on the skin’s color, selecting Image > Adjustments > Selective Color.
Now we’ll accentuate the highlights on the hair. In this case we’ll put some brushstroke of white color above the highlights and change the layer’s Blending Mode to Overlay.
Changing the color of the hair is possible if apply Select > Color Range.
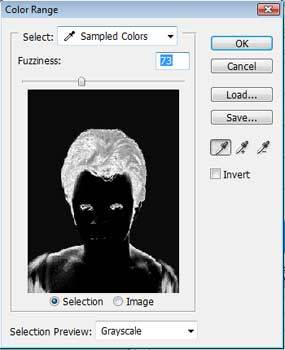
Then paint it out, using a brush with smooth edges on a new layer.
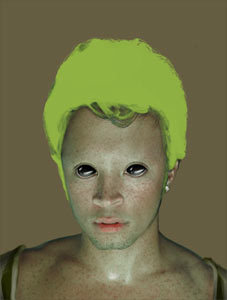
Change the layer’s Blending Mode to Overlay. If necessary we may also minimize the Opacity. If wanting to change the nuance of the hair, it may be done with the next selection: Image > Adjustments > Hue/Saturation. Getting a more interesting effect is possible if drawing the hair with a more different color (warmer or colder nuances) on the highlights’ zones. Now we’ll start representing a mystic atmosphere on the picture. Firstly we need to insert more shadows on our character. Use also the brush with smooth edges of bigger size.
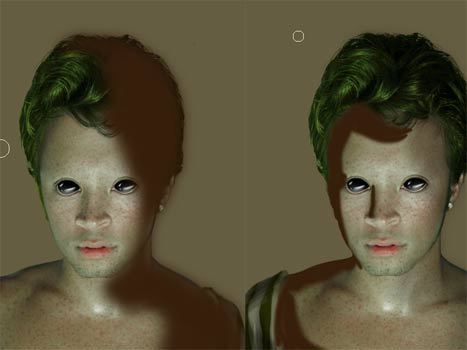
Blur out the shadow with the selection from here: Filter > Blur > Gaussian Blur (Radius – 34 pixels). Change the layer’s Blending Mode on Multiply and minimize the Fill.
This way we may accentuate the light too, but this time we’ll change the layer’s Blending Mode on Overlay and minimize the Fill to 20%.
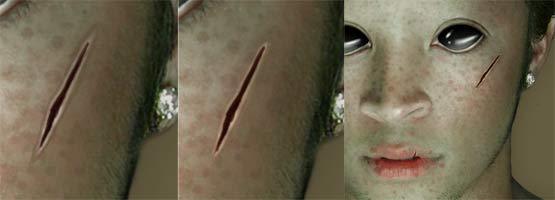
Insert the scratches now. In this case we’ll apply three colors: dark – claret for the scratch’s shape, the black one for the thin stripe inside and the white one for accentuating the edges. Then change the layer’s Blending Mode on Overlay.
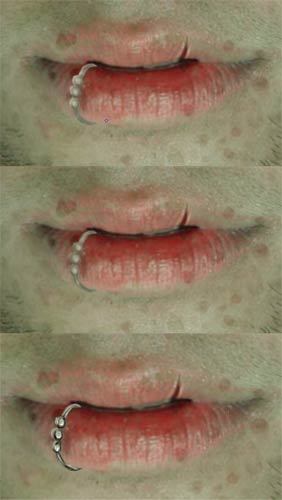
Drawing the silver earring is possible if choosing the white color for the element’s shape, then insert the shadows with the grey color which must be blurred by applying the Smudge Tool. Then select a hard brush of 1 px to insert very precisely the shadows and the highlights.
We may continue with the background (all the new layers will be created above the background’s one, but under the character’s layer). I represent the necessary ornament for the wallpapers, using the Pen Tool

Then we need to place it uniformly on the background and change the layer’s Blending Mode on Overlay.
Representing the fissure on the wallpapers is possible if opening in a new window the appropriate texture (Ctrl+O).
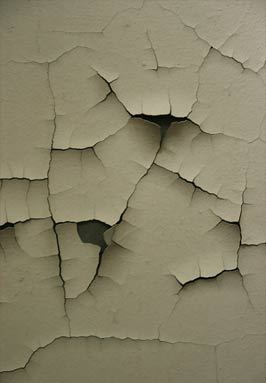
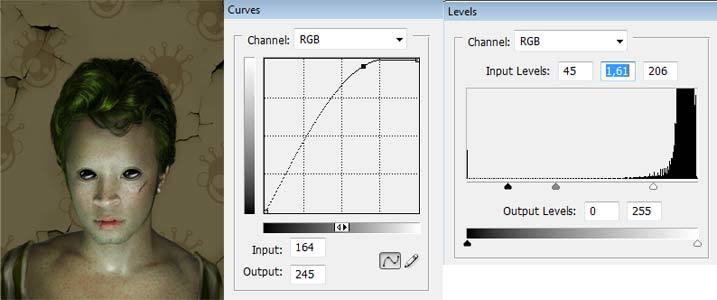
Select it out (Ctrl+A), make a copy of it (Ctrl+C) and get back to our file, placing it on a new layer (Ctrl+V). Change the layer’s Blending Mode on Multiply. Using the mask, try to paint the unnecessary part of the texture with black color, applying a brush with smooth edges. Get back from the mask to the texture, increasing its contrast, just for the mask’s edges not to be seen. In this case we may apply Image > Adjustments > Levels (Ctrl+L) ?? Image > Adjustments > Curves (Ctrl+M).
Now we have to make the wallpapers look dirty. In this case we’ll find the appropriate texture and put it on a new layer.
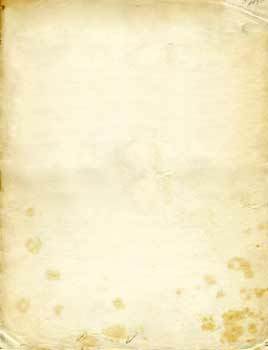
Change the layer’s Blending Mode on Overlay and then makes the necessary corrections on the layer’s contrast and color. Image > Adjustments > Levels (Ctrl+L) and Image > Asjustments > Hue/Saturation (Ctrl+U)
Now we’ll have to add the shadow we need. For this operation we’ll create a new layer under the layer containing the character. Press Ctrl button and click on the layer with the character (this way we’ll get the selection along the contour). Fill the selected zone with black color, applying the Paint Bucket Tool. Then make several copies of the shadow layer we’ve got, Blur each copy with a different intensity (Gaussian Blur). Set different percentage for the Opacity option, placing the shadows the way we need with the Free Transform option.
Also we may use a big brush with smooth edges too and black and white colors (or any color on your wish, depending on the picture) with a low Opacity to make the play of lights and shadows more interesting on the wallpapers. The blending mode may be chosen by you. In this case it is Multiply for the black and the Overlay for the white one.
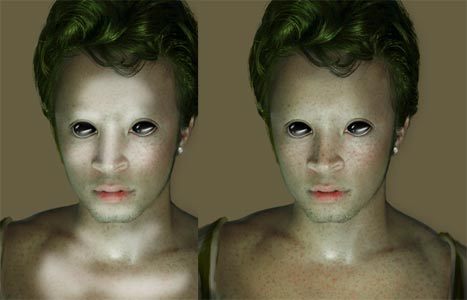
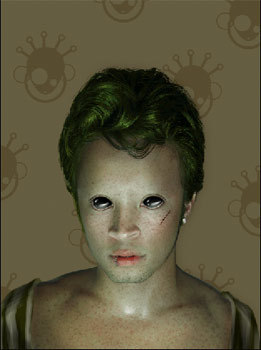
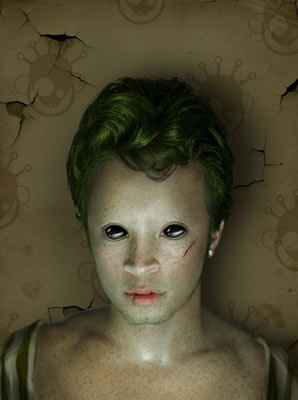
In the end I’ve decided to change the highlights in the eyes and the eyes shape too, applying the same methods, described above.
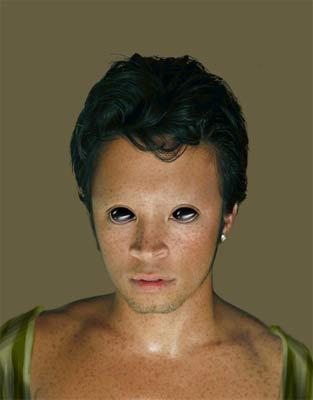
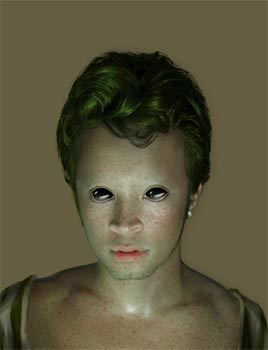
The picture is finished!
Made by Sigma.
Comments