
Design studio – web page layout
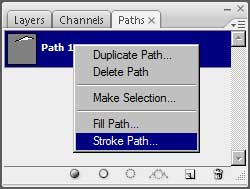
Next create a new layer and select the Paths option on the layers’ palette, make a double click on it and press OK. After that make a right click on the made layer, choosing the option indicated next image:
As a result we’ll get the next line:

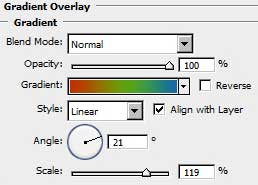
Get back to the layers and select the Blending Options>Outer Glow on the line’s layer:


Blending Options>Gradient Overlay
Gradient Editor
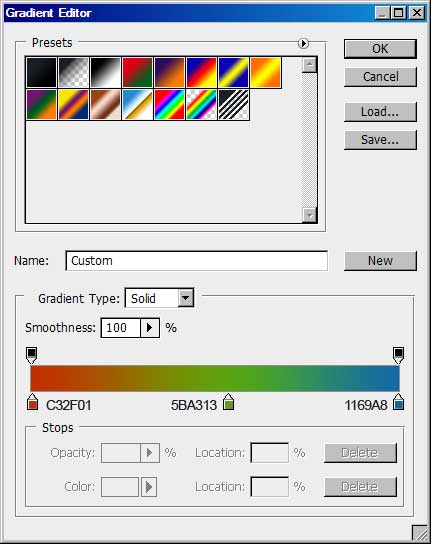
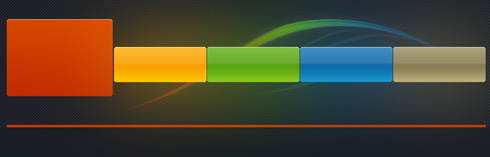
In this case we’ll obtain a rainbowed line.

This way we can draw several small lines more, without Blending Options.

Place the layers on our picture under the rectangles, made earlier. Using the Rectangle Tool (U), try to make a thin line on the bottom part of our site, choosing the color #262B31

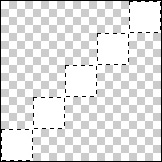
Create a new file of 5×5 px and 72 dpi. Applying the Pencil Tool (B), try to put on the new file a diagonal line.
Select on the main menu Edit>Define Pattern…. Our pattern is saved now. Get back on the first file and select there Edit>Fill and find our saved pattern in the Custom Pattern option, pressing OK here. This operation should be done on a new layer.
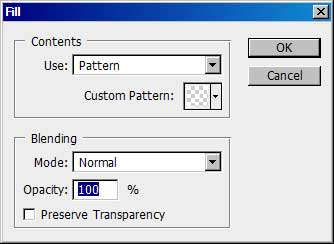
Take the Rectangular Marquee Tool (M) and the Eraser Tool (E) to erase the unnecessary elements, placing this layer under the rectangles. Select on the layers’ palette the option Fill 10% and in this case we must get the same thing from below:

Next we need to create an orange line, having the color’s code #C53300. Later we’ll represent a grey one on the bottom part.
Start inserting the logo.

Comments