
Dancing Santa Claus and Christmas Tree
Blending Options>Stroke
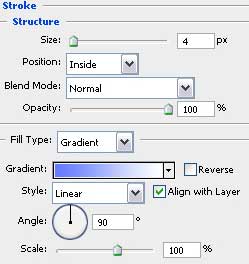
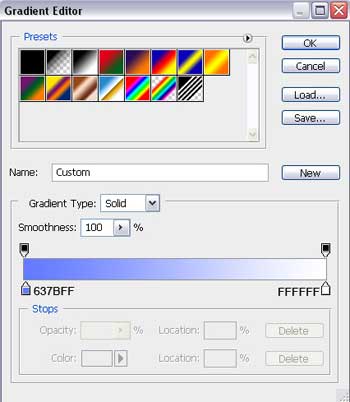
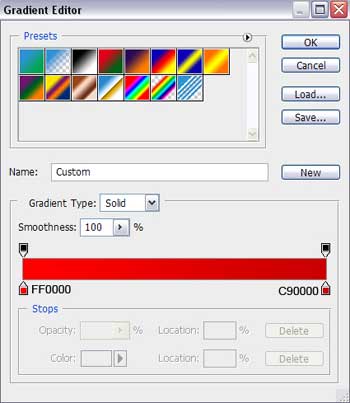
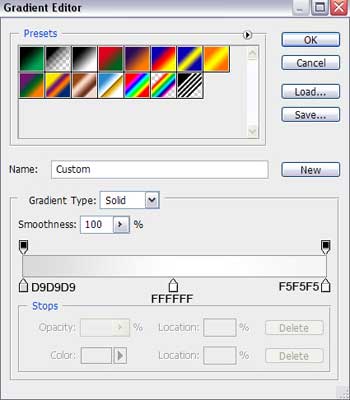
Gradient’s parameters:

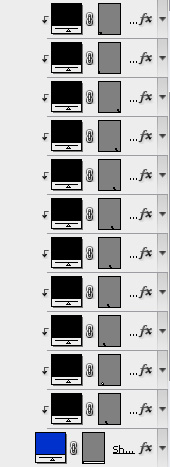
Make ten copies of the layer that has on it the inclined line and choose Free Transform option to place the copies as it is done on the next picture.


Press Alt button and make a mouse click between the layers containing the inclined lines and the layer containing the horizontal line (on the layers’ panel). In this case the layers with the inclined lines will be applied in the limits of the horizontal line.
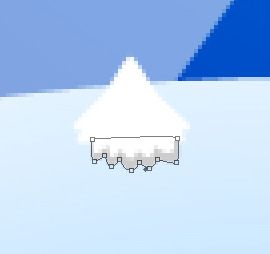
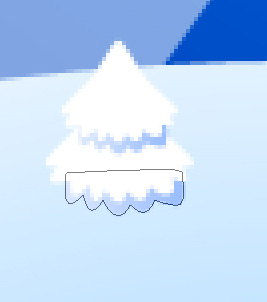
 Next we’ll start representing a small fir tree on the hillock from the left side. Start by choosing the Pen Tool (P) to represent the top of the tree of white color, making the corrections on the element with the Convert Point Tool.
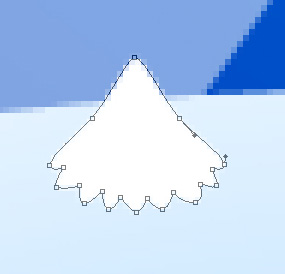

Using the same instrument, try to make now the tree’s top shadow. This layer should be placed lower than the layer with the fir tree’s top (on the layers’ panel).
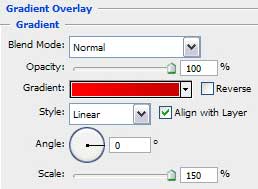
The layer’s parameters: Blending Options>Gradient Overlay
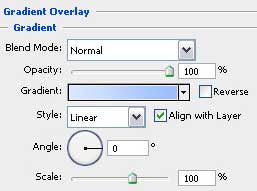
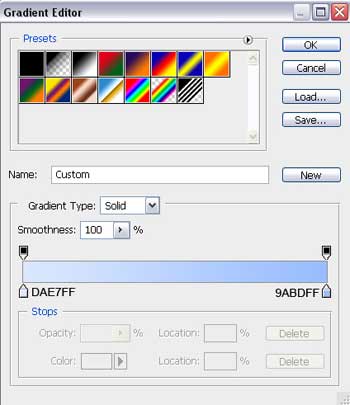
Gradient’s parameters:

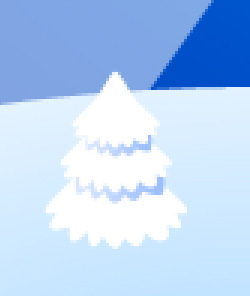
Make a copy of the earlier made layer, containing the fir tree’s top and select the Free Transform option to enlarge the copy a little. The layer should be placed lower than the previous one (on the layers’ panel).
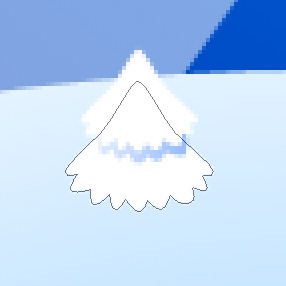
Make a copy of the shadow’s layer and choose again the Free Transform option to enlarge the copy a little, placing this layer lower than the previous one too (on the layers’ panel).
Make one more copy of the tree’s top layer and select the Free Transform option to enlarge it, placing it as below. This layer we’ll situate also lower than the previous one on the layers’ panel.
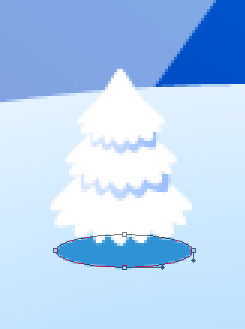
Next step includes drawing the shadow on the bottom part of the small fir tree, an operation done with the Ellipse Tool (U) and the color #2F92D4
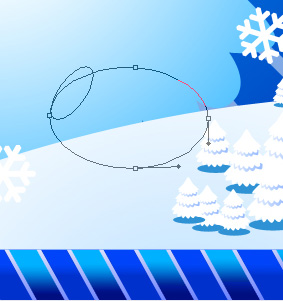
Combine in a group all the layers containing the small fir tree (press Ctrl button to mark out the necessary layers and hold on the left mouse’s button to take the marked layers on Create a new group option). Make twelve copies of the small fir tree and make the necessary changes on the copies’ sizes. The Free Transform selection will be helpful in placing the copies as below:


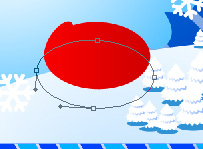
Next we have to represent Santa’s character. Represent firstly his body and then take the Ellipse Tool (U) to represent a big ellipse. Press SHIFT button to insert another smaller ellipse on the left side.
 The layer’s parameters: Fill 0%
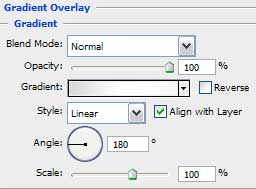
Blending Options>Gradient Overlay
Gradient’s parameters:

Next we’ll introduce on the picture the fur, applying the same tool. Its layer will be placed also lower than the previous one on the layers’ panel.
The layer’s parameters: Fill 0%
Blending Options>Gradient Overlay
Gradient’s parameters:

Next we have to represent the Santa’s trousers, colored with #FF0000. The operation needs the Rectangle Tool (U). The shape can be changed with the Convert Point Tool. The layer must be placed lower than the previous one on the layers’ panel.
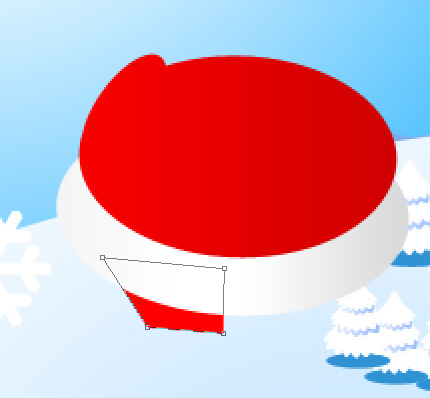
Take the Pen Tool (P) to represent Santa’s boot of black color. Make the corrections on its shape with the Convert Point Tool.

Combine in a group the layers having on them the trousers and the black boot (press Ctrl button to mark out the appropriate layers and hold on left mouse’s button to take the marked layers on Create a new group option). Make a copy of the group and select the Free Transform option to turn around the copy and place the copy the way indicated below.

Use now the Pen Tool (P) to draw the black Santa’s belt, making the corrections on the element with the Convert Point Tool.

It’s time to represent the buckle on the belt. Choose white color for the element. For the beginning select the Pen Tool (P) to represent the element’s zone and then press Alt button while using the Ellipse Tool (P) to cut out an opening on the buckle. Make the necessary changes on the buckle with the Convert Point Tool.

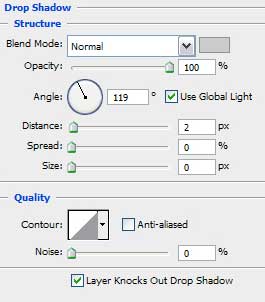
The layer’s parameters: Blending Options>Drop Shadow

Comments