
Customizing the Background Graphics
Customizing the Background Graphics
One of the easiest changes to make to the template is modifications to the look and feel of the background graphics. Changing the color of the chrome (gradient) graphics in the background can really go a long way in creating a unique-looking template that fits your company’s branding and tone. Simple changes to the template may include:
- Changing the graphic which frames the video and video controls
- Changing the background graphics and logo
Changing the Video Background Graphic
As you’ve seen in previous sections of this article, the playback component and the video controls are separate. This makes customizations easy by enabling you to move the controls to any location, swap different types of controls in and out of the template, and create any background graphic you like. For the purposes of this template, I created a simple custom background inside the VideoFrame symbol in the Library (see Figure 12).
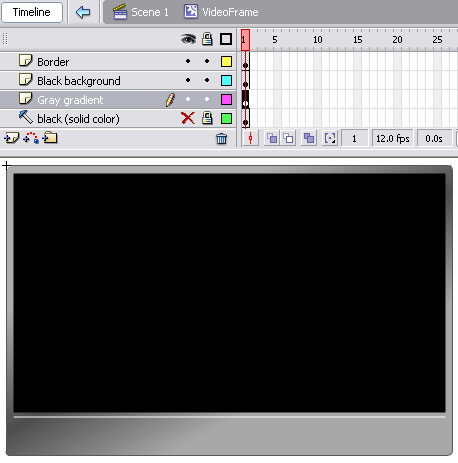
Figure 12. VideoFrame symbol editing area in the Library
To edit the video background graphic, follow these steps:
- Hide the video components that overlay the background graphic. You can do this by hiding the FLV Controls layer on the main Timeline.
- Double-click the video background graphic to enter its editing mode in the Library. You should see a similar view to the image in Figure 12. The edit bar shows that you are now editing the VideoFrame symbol. You can return to the main Timeline by clicking the Scene 1 button in the edit bar.
- Take a quick look at the layers provided. The Black (Solid Color) layer is currently turned off from exporting using a guide. This layer holds the basic shape I used for the background. The Gray Gradient layer shows the same shape with a chrome gradient applied to it for effect. You can edit the gradient using the Color Mixer panel if you like. The Black Background layer displays a black rectangle that’s the same size as the video. It creates the illusion that the video is in place before it actually loads to the screen. Finally, the Border layer applies a thin stroke around the gradient shape.
- Feel free to add and remove layers as needed. Use the existing graphics or add your own. When you’re finished, click the Scene 1 button on the edit bar at the top of the Timeline to return to the primary editing area for the templates.
Changing the Background and Logo
This is the easy part. Edit the layers contained in the Background Graphics Layer folder (see Figure 13). You can add and remove layers and graphics as needed.

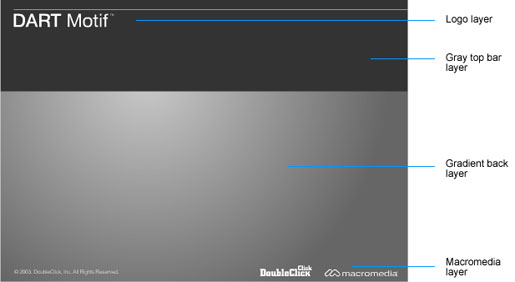
Figure 13. Background graphics with the video controls hidden for clarity
To change the background and logos, follow these steps:
-
To make things easier on yourself, hide the video controls by hiding the Controls folder. To do this, click the dot below the Eyeball icon on the Controls folder. The resulting view of the Stage should look like Figure 14. You may want to collapse the Controls folder to get those layers out of your way.
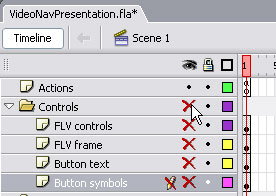
Figure 14. Hiding the video control layers while editing the background graphics
- Click the Logo layer and delete the existing logo. Add your own logo graphics as desired. You can import new graphics by selecting File > Import > Import to Stage from the menu.
- You may want to delete the Macromedia layer or update the copyright information to suit your needs.
- Edit the graphics on the Gray Top and Gradient Back layers. Feel free to change the colors and gradients or delete them entirely and add new graphics that match your project.
Comments