
Creating Animations That Continue Endlessly
Creating Animations That Continue Endlessly
You can even make an animation continue animating back and forth along the X-axis without stopping. The Tween class also accommodates this kind of animation with the aptly named yoyo() method. The yoyo() method waits for the onMotionFinished event handler to execute, and then it reverses the begin and finish parameters. The animation begins again, as demonstrated in the following example.
- Select File > New and create a new Flash document called yoyo.fla.
-
Select the Rectangle tool, and set the stroke color to No Color and the fill color to red in the Tools panel. Draw a rectangle on the Stage that is approximately 20 pixels wide and the entire height of the Stage (see Figure 3).
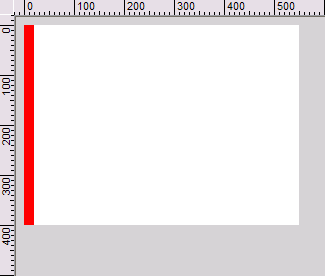
Figure 3. Draw a rectangle on the Stage.
- Select the Selection tool, and click the rectangle to select the fill. Press F8 to convert the shape into a movie clip. Name the symbol box, set the behavior to Movie Clip, and set the registration point to the upper-left corner. Click OK when you are finished.
- Select the rectangle on the Stage, and use the Property inspector to give the rectangle the instance name box_mc. Before you deselect the instance, set both the X and Y coordinates to 0 pixels to move the shape to the upper-left corner of the Stage.
- Insert a new layer in the Timeline above Layer 1. Rename the layer stroke.
- Select the Rectangle tool, and change the fill color to No Color and the stroke color to black in the Tools panel.
-
Draw a rectangle on the stroke layer, and then select the stroke using the Selection tool. Change the width of the rectangle to match the width of the Stage (550 pixels by default), match the height of the rectangle to the height of the Stage (400 pixels by default). Then set the X and Y coordinates of the stroke to 0 pixels so the stroke outlines the Stage dimensions.
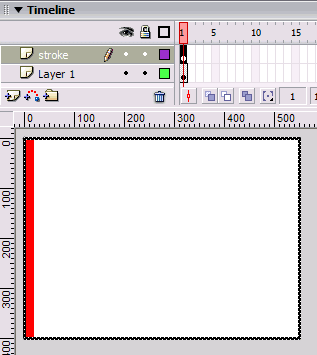

Figure 4. The fill-less rectangle outlines the Stage.
-
Insert another new layer above the two existing layers, like you did in step 5. Rename the new layer actions. Add the following ActionScript to frame 1 of the actions layer:
import mx.transitions.Tween;
 import mx.transitions.easing.*;
 var box_tween:Object
  = new Tween(box_mc, "_x", Regular.easeInOut, 0, Stage.width, 3, true);
 box_tween.onMotionFinished = function() {
      box_tween.yoyo();
}; - Select Control > Test Movie. The box animates from left to right, and back. If the animation isn’t smooth, you might want to increase the document’s frame rate from 12 fps to 24 fps.
-
As the box approaches the right edge of the Stage, you’ll notice that the box animates outside of the stroke that you create in step 7. While this might not seem like a huge deal in the authoring environment, if you view your animation in a web browser (File > Publish Preview > HTML) you see that the rectangle disappears when it approaches the right edge of the Stage. To fix this, you need to animate the rectangle from 0 pixels to the width of the Stage minus the width of the
box_mcmovie clip. You can see this in the following revised code from step 8:import mx.transitions.Tween;
import mx.transitions.easing.*;
var box_tween:Object
= new Tween(box_mc, "_x", Regular.easeInOut, 0,
Stage.width-box_mc._width, 3, true);
box_tween.onMotionFinished = function() {
box_tween.yoyo();
};
Now test the animation, and the box stops easing before it exits the boundaries of the Stage.
Comments