
Create interactive 3D documentation
One of the biggest challenges facing technical illustrators is the need to convert complex CAD designs into the form necessary for documentation, such as service, maintenance, and other manuals. Adobe® Acrobat® 3D helps the technical illustrator increase productivity, save time, and reduce costs, by providing simple access to 3D assets, and by slashing the need for design engineers to create graphic files.
Note:
Download the Acrobat_tutorials.zip file to your hard disk from from http://download.adobe.com/pub/adobe/tutorials/acrobat/acrobat_tutorials.zip to follow along with this tutorial. Alternatively, you can substitute your own CAD files of a similar type.

Simplify the 3D model
A typical CAD design file may contain much more information than necessary for documentation. You can simplify a model by removing unnecessary parts.
1 Start Acrobat 3D Toolkit, and drag Catia_landing_gear_opt1 from the Tutorial_files folder into the window.
2 In the Scene Tree, reveal the list of parts by clicking the plus sign next to Landing_Gear_Assy. Select Hub_Cap(Hub_Cap.1), and then scroll down and Shift-click 16rod(16rod.1) to select the entire range of parts.
3 Right-click the selection and choose Delete Objects, leaving only the brake assembly.
4 Right-click in the viewport window, and choose View To All Objects. Acrobat 3D displays the brake assembly at its maximum size.
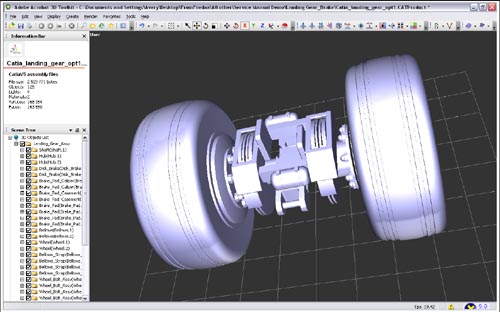
Use simple contextual menu commands to quickly narrow the view of the model from hundreds
of parts to only the ones you need for the current illustration.
Comments