
Create Dynamic Lighting Effect Using Custom Brushes in Photoshop CS5
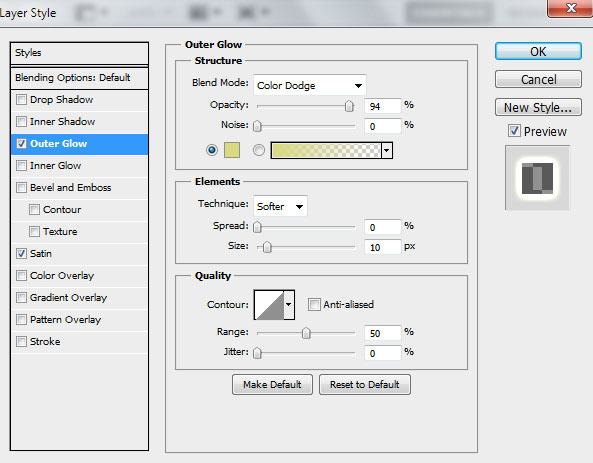
Click on Add a layer style icon from bottom part of the Layers panel and select Outer Glow.
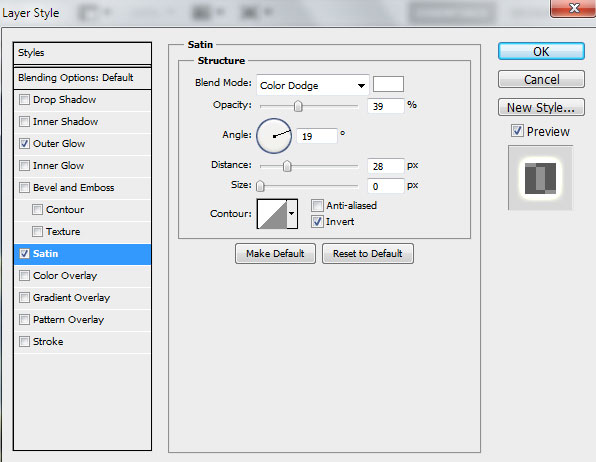
Add Satin
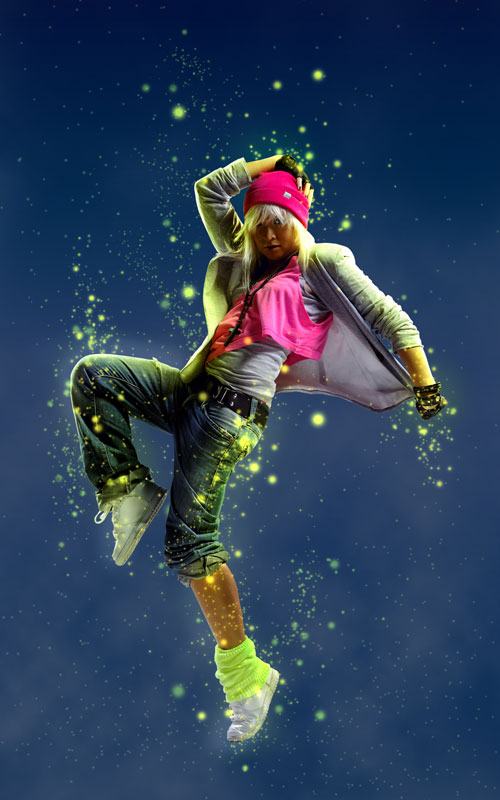
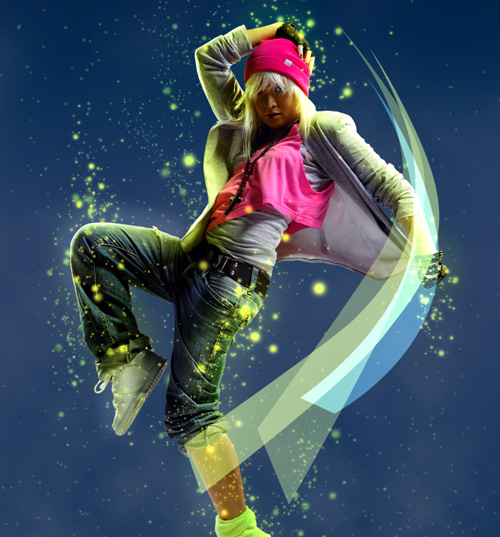
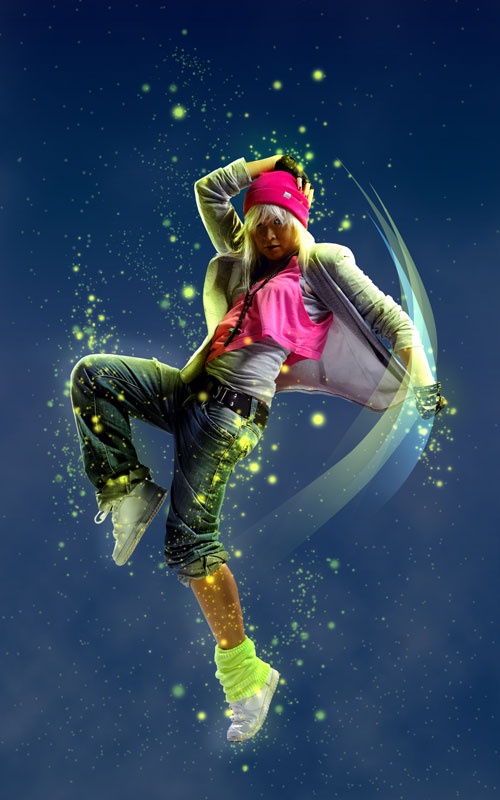
We’ve got the next result:

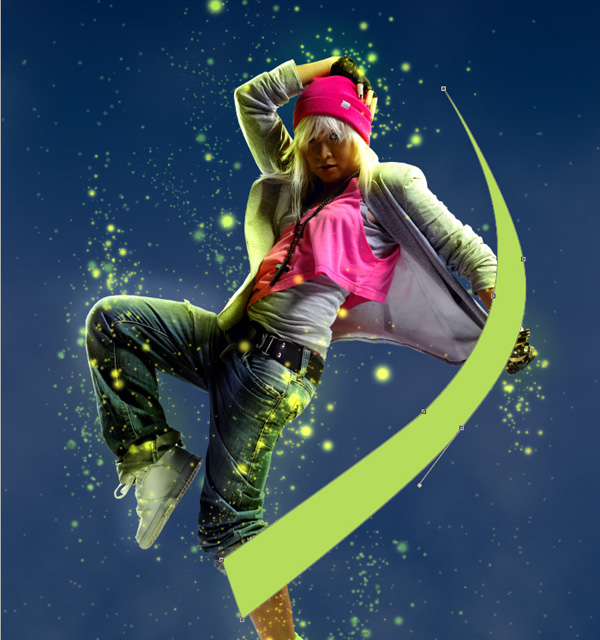
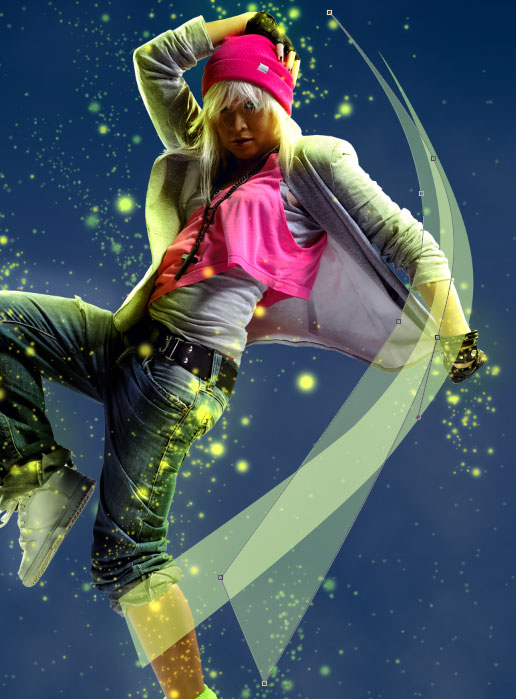
Choose the Pen Tool (P), set the drawing mode on Shape Layers in Options bar and draw the next shape of #B5DC5B color as shown.
Set Fill to 63% for this layer and change the Blending mode to Screen.
Use also the previous tools to represent one more shape of the same color. Set Fill to 43% for this layer and change the Blending mode to Screen.
Using the same tools (Pen Tool (P)) we have to represent the third shape of the color #76E4FF.
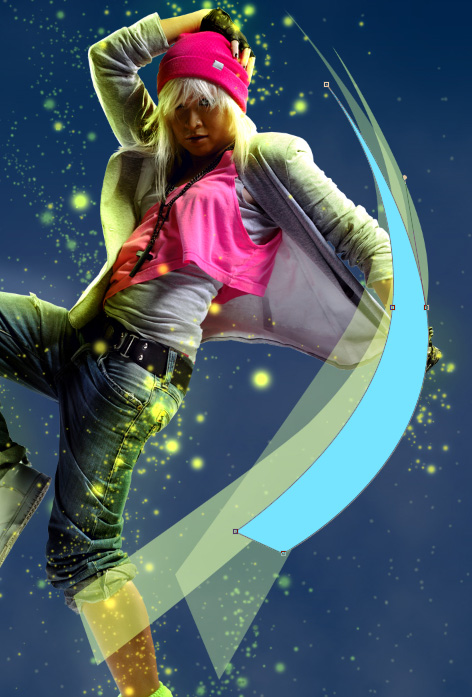
Set Fill to 36% for this layer and change the Blending mode to Linear Dodge.
Insert the mask on each of the layers containing the shapes by choosing Add layer mask on the bottom part of the Layers panel and choose the Soft Round brush of black color.
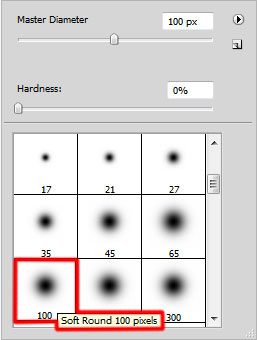
Use this brush to paint in the mask to clean the edges of the shapes.
Combine in a group all the shapes layers (press CTRL button to select the necessary layers and hold on the left mouse’s button while dragging the selected layers on Create a new group icon from bottom part of the Layers panel).
Make a copy of the got group and use the Free Transform (Ctrl+T) command to change the copies’ sizes, placing them as on the next picture.
Now we have to represent more shapes, applying the already described method above.
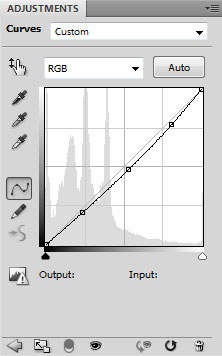
Click Create new fill or adjustment layer from bottom part of the Layers panel and click to Curves to adjust the curve shape as shown to make a little color corrections.
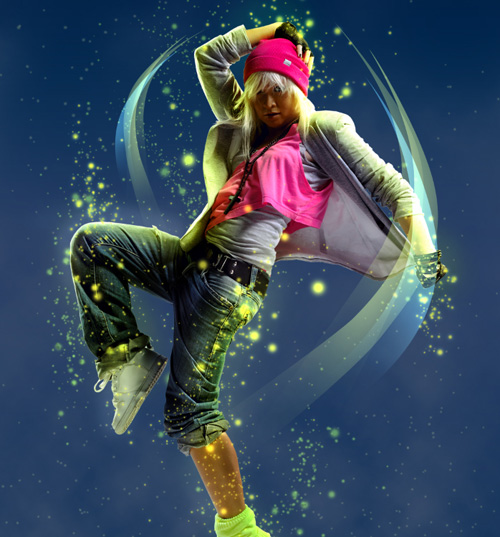
We’ve got the next result:

Create a new layer and select the Paint Bucket Tool (G) to fill the new layer with black color.

Insert the mask on the layer by choosing Add layer mask on the bottom part of the Layers panel and choose the Soft Round brush of black color.
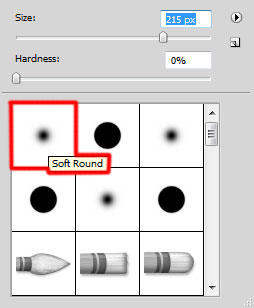
Use this brush to paint in the mask to clean up the central part of the canvas, leaving shadowy only the edges.
Combine in a group all the layers (press CTRL button to select the necessary layers and hold on the left mouse’s button while dragging the selected layers on Create a new group icon from bottom part of the Layers panel).
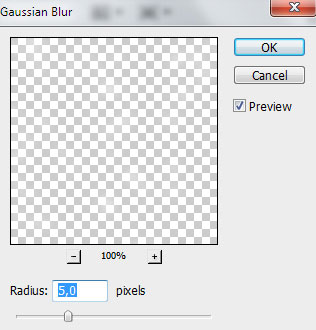
Make a copy of the got group. Rasterize te group’s copy (press CTRL+E to Merge Down). Apply on the rasterized layer the next filter Filter > Blur > Gaussian blur.
We’ve got the next result:

Set Fill to 29% for this layer click on Add a layer style icon from bottom part of the Layers panel and select Linear Dodge.
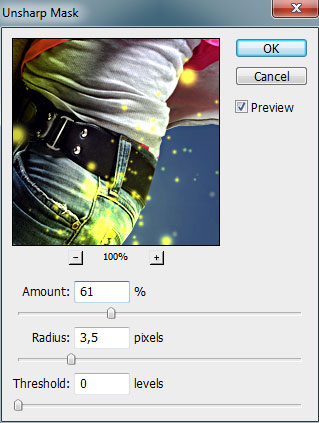
Put together all the layers (including the rasterized layer of the group’s copy and the main group, rasterizing it also preliminary). Apply on the rasterized layer the next filter Filter > Sharpen > Unsharp mask:
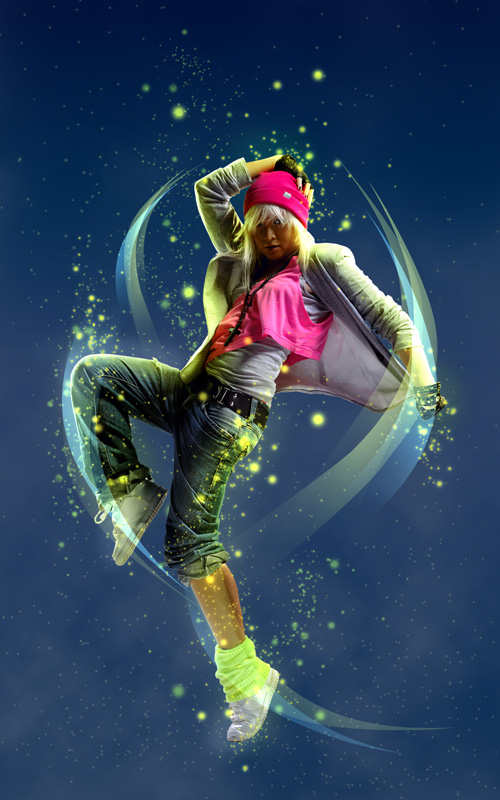
We’ve got the next result:

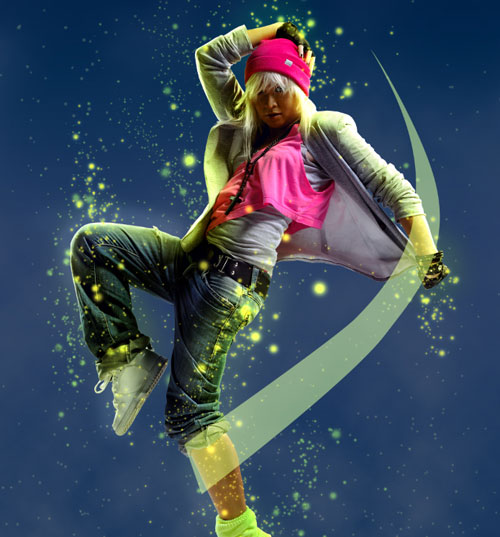
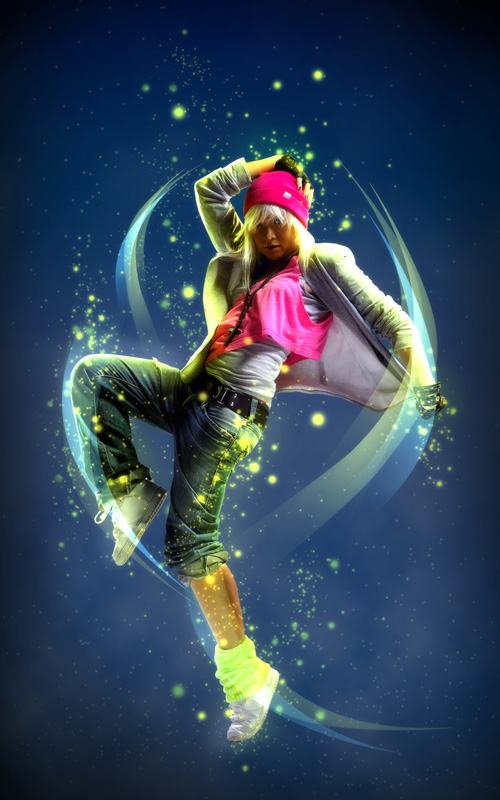
Our Dynamic Lighting Effect Using Custom Brushes in Photoshop CS5 is finished!
View full size here.
Comments