
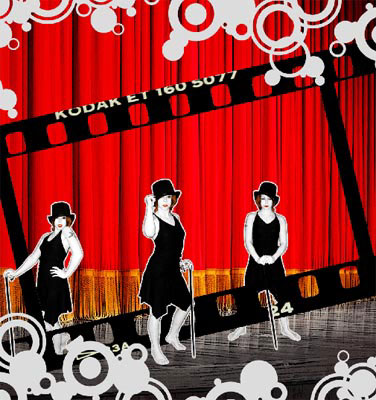
Cabaret Effects
The new lesson we’ll try to represent
a styli illustration (a poster), dedicate to a certain topic, in this
case – to the musicals. We’ll see also how to erase the effect of “red
eyes”, decolorize only a part of the object and use different layers.
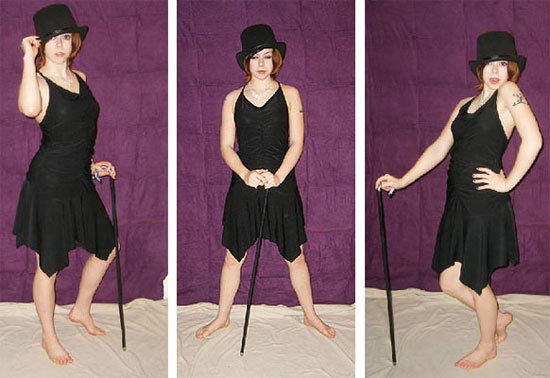
Open
three pictures of a girl on different positions, each of them in a new
window: File – Open (ctrl+o).
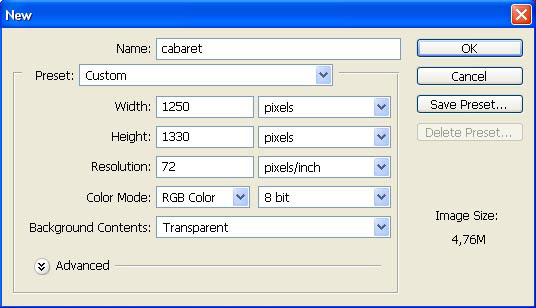
Then create a new file with the necessary sizes: File –
New (ctrl+n).
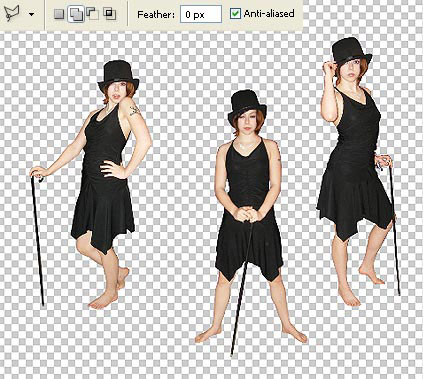
Make use of the next instrument (Polygonal Lasso Tool)
to mark each girl along the contours. Then copy them: Edit –
Copy (ctrl+c) and insert them in the created file, each girl on
a new layer: Edit – Paste (ctrl+v). Make the
corrections on the size and the placement, applying the next command: Edit
– Free Transform (ctrl+t)

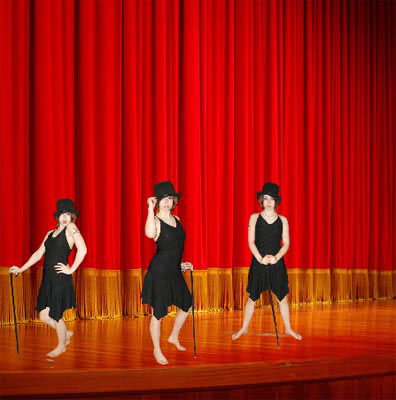
Insert now on a new layer the picture of the curtain, which in
this case will serve as a background.
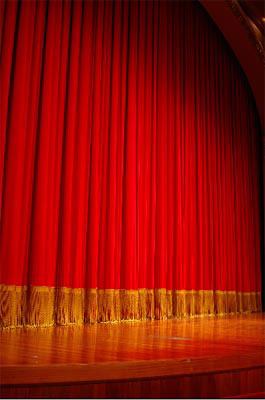
Move it lower than the girls’ layers and correct the size of
the layer and its distort level, using this options: Edit – Free
Transform (ctrl+t) and Edit – Transform – Distort.
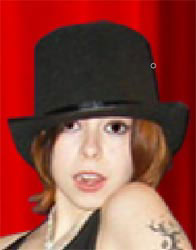
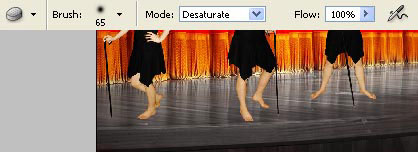
Take the Brush Tool of black
color and small size to paint the girl’s eyes’ pupils, to erase the
effect of red eyes, but be attentive not to make them too black.
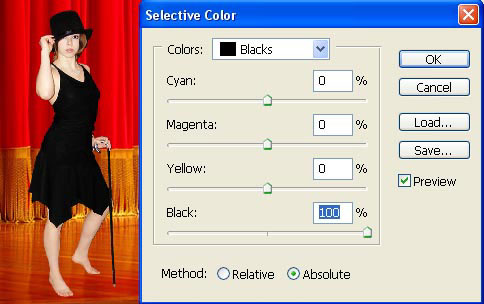
Merge down the layers containing the girls: Layer –
Merge Down (ctrl+e) and correct the color of the new layer,
selecting Image – Adjustments – Selective Color.
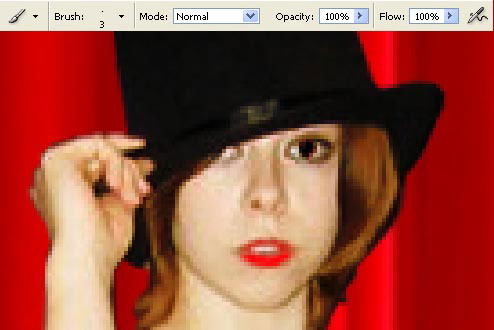
Now we should create a new layer: Layer – New – Layer
and paint the girls’ lips on it, using the appropriate color, selecting
the same Brush Tool.
Change the layer’s Blending Mode on Multiply
and combine this layer with the previous one (ctrl+e). The Sponge
Tool will help us to decolorize the floor on the stage.
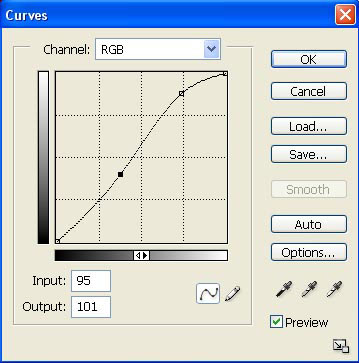
Make the corrections on this layer’s brightness: Image –
Adjustments – Curves (ctrl+m).
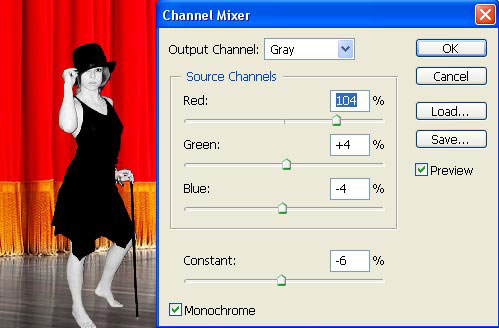
Copy the girls’ layer: Layer – Duplicate Layer
(ctrl+j) and decolorize the copy, applying Image – Adjustments –
Channel Mixer.
Create a mask out of this layer: Layer –
Add Layer Mask – Hide All and choose the Brush Tool
of white color to paint the girl’s skin as if it would have a make –
up. It means to avoid painting the eyes, lips and the clothes.
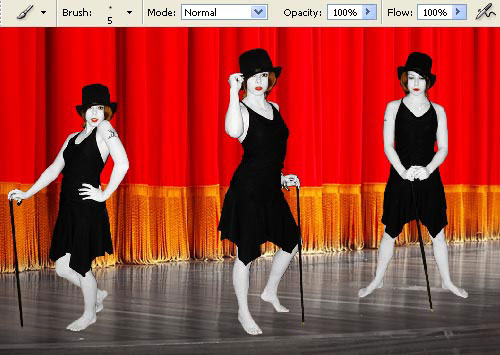
Combine this layer with the previous one (ctrl+e) and increase
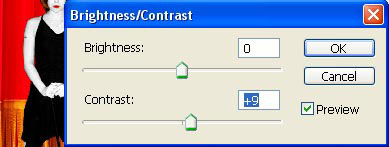
its contrast a little, making use of the next selection: Image –
Adjustments – Brightness/Contrast.
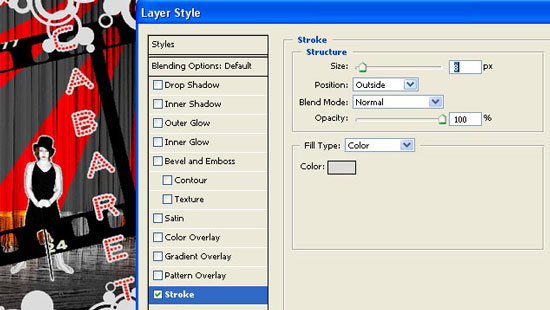
Apply the next command Layer – Layer Style – Stroke
to outline the girl, along her contours.

We have to create a new layer now to make the outlining a part
of the layer. Place it under the girls’ layer and then merge them down.
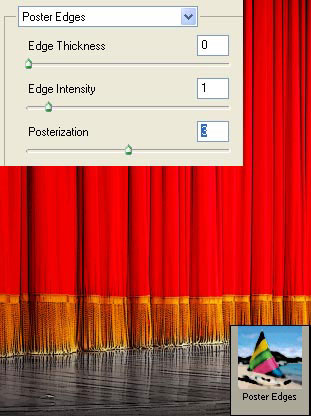
Apply the next options for the stage’s layer: Filter – Artistic –
Poster Edges.
Insert on a new layer the picture of a photo camera’s film:
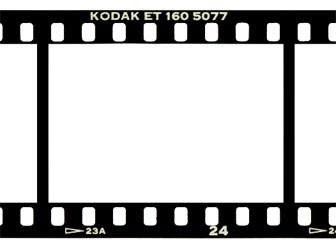
Correct the size and the level of the film’s
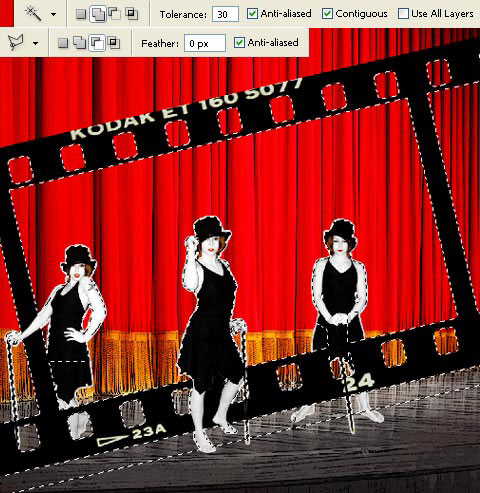
turning, using the Free Transform option. Mark out and
erase the background after that the film is situated on. Use the Magic
Wand Tool for this operation. Click on the girls’ layer and
click on the ctrl button to mark them out. A part of the markings should
be erased with the Polygonal Lasso Tool. Erase also
the marked zone of the film.
Insert several of vector ornaments, having the set of ready to
use brushes that may be downloaded here: http://www.akpro.net/downloads2/AK-VectorBrushPack01.zip
.
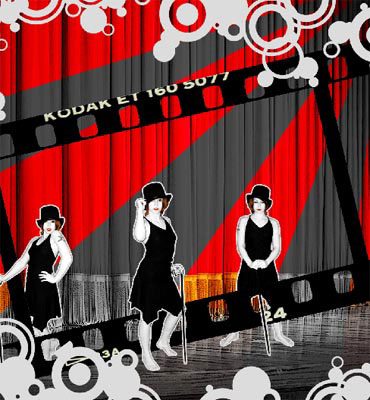
Represent on a new layer several rays as if they were of a
projector, selecting the Polygonal Lasso Tool. Paint
them in any color you want, using the Paint Bucket Tool.
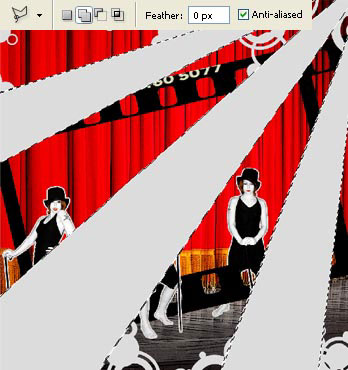
Move off the markings: Select – Deselect
(ctrl+d) and place the layer above the curtain’s layer, then change the
layer’s Blending Mode on Saturation.
Choose the Type Tool to insert the necessary
inscription and turn it a little (ctrl+t).
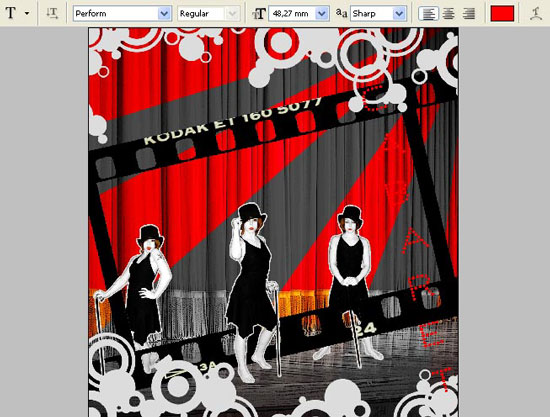
Apply
the next combination Layer – Rasterize – Type to
outline the letters too: Layer – Layer Style – Stroke.
Merge down all the layers: Layer –
Merge Visible (shift+ctrl+e). The next instruments: Crop
Tool and Rectangular Tool will insert the
picture in a frame. The new picture should be processed also with Filter
– Sharpen – Sharpen:
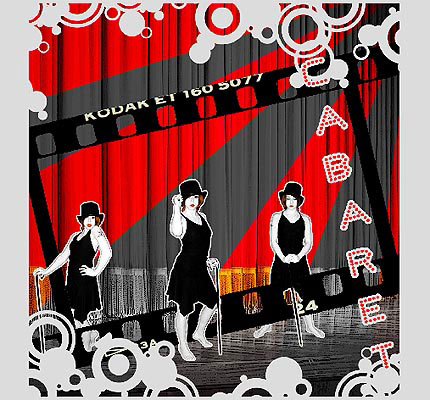
The illustration is finished!
Made
by Sigma
Comments