
Bring the Colors to B/W
The light and tones are the backbone of photography, so do not destroy them by desaturate or grayscale your pics. This tutorial will take you to another stage in the creation of professional B/W images with two easy techniques . The whole edition should take 4 minutes
>> Why I can not get those cool professional B/W pics with Desaturate or grayscale tools ?
Usual desaturated image
We tend to rely all the process of B/W on the Photoshop tools “Desaturate” (image / adjust / desaturate) and “Grayscale” (image / mode / grayscale) However , even when this process works for certain pics , in most times it does a dull work and far from those professional B/W pics , because basically Photoshop is mixing all the tones and colors together with an specific and an unchangeable proportion. how ever we can gain control of this process !!. In the next tutorial we will learn two really easy techniques to keep these tones and play with them

So Lets Get Started !!
You will need Photoshop (this works in old PS versions ) and a picture, you can download the one I’m using or edit one of yours
This is the first technique is achieved by “adding a channel mixer layer “
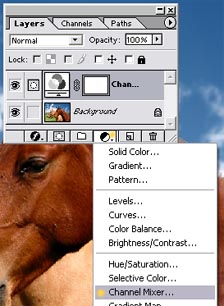
>> Step 1
Add a color mixer layer
Open the image in Photoshop and , Click the black and white circle at the bottom of the layer palette (The Adjustment layer icon) . And then click “Channel Mixer” in its menu
>> Step 2
Modify the channel mixer ,
Double click in the channel mixer layer , in our layer palette

In this new panel we have to click in the monochrome box at the bottom and then play with the channels ( it is good to start with all fields in 0 ) and then mix it , until you get the desired result , there are millions of possible combinations and results !!

And “ce est fini ” we’ve finished , Easy isnt it ? But if you think this is good … Is because you havent read the next technique
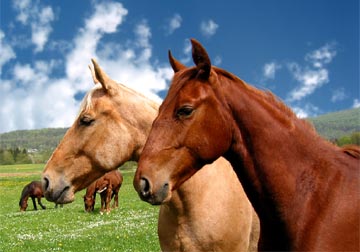
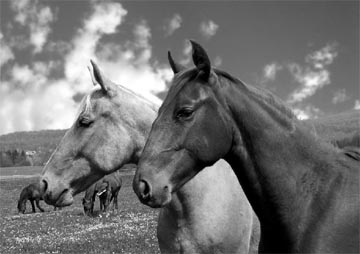
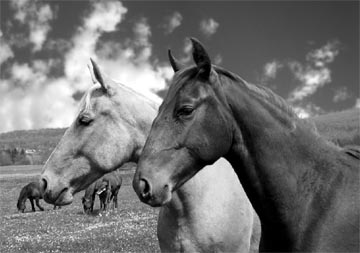
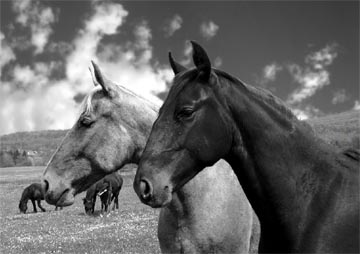
I liked these tones, the sky gives a lot sense of space and the horses are well lighted .. I like those contrasts :

Compare with the Desaturated one.
Second Technique
When we used the channel mixer (the previous technique ) , we had a very broad range of mixes wich is good but in certain images or desired results , it may be not easy to get the tone you want , In this 2nd technique we will add a “hue/sat layer” that will change the general tones of colors and we also will be able to change the saturation and hue of each color individually , you will be amazed with the results
Lets get started !
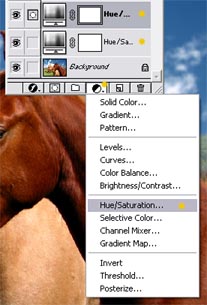
>> Step 1
Add “two” “ Hue/Saturation layers “ by clicking in the (Adjustment layer icon) ( the white/back circle at the bottom of your layer palette) and then click “hue/saturation”
>> Step 2
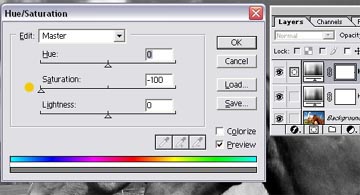
Double click the top hue/saturation layer and desaturate the image , by dragging the saturation arrow to the right
>> Step 3
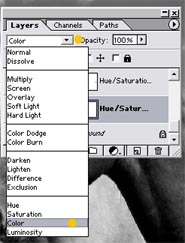
Double click the bottom “hue/saturation layer” and and blend it to “color”
>Step 3b
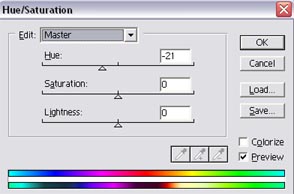
Double click the selected layer to open the hue/saturation panel , now feel free to move everything and enjoy , the hue will give you great new variety of tones and mixes ….also we can add play with the light and contrast by adding saturation and lightness
And this is the best part of this technique by modifying each channel you can modify each color without mesing the other ones .

Here there are some other tones I liked
>> Personally I love this technique , it is really easy to modify each color , but both techniques will take you to a new great stage of B/W edition !!!
Comments