- From your Project Window, drag the ramp composition into your shatter composition. Turn off the visibility for the new ramp layer (we don’t need to see it, and the shatter effect can still use it as a reference).
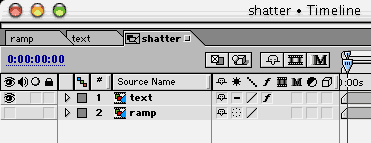
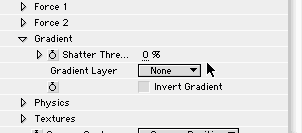
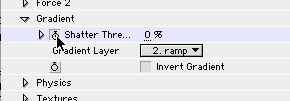
- In your shatter Effect Controls window, under Gradient, change the Gradient Layer from None to ramp:
- RAM preview your composition, and you will see that nothing happens. Don’t panic. This is perfectly normal.
- In order to create shattering once you have introduced a gradient, you have to animate the Shatter Threshold value. A Shatter Threshold of 0% (the default) means that nothing has shattered, and 100% means that everything has shattered.
- At 0 seconds, set a keyframe for Shatter Threshold at 0%.
- Advance to about 3 seconds, and change the Shatter Threshold to 100%.
- Change Wireframe + Forces back to Rendered, and RAM preview your animation:
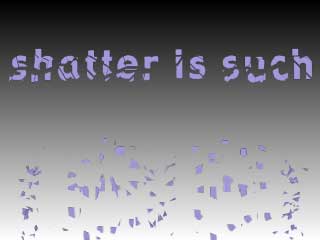
- When shatter is uses a gradient layer, it shatters the lighter parts before the darker parts. (Remember, it doesn’t shatter the gradient layer itself; it uses the gradient layer to tell it in what order to shatter the layer):

shatter threshold at 38% (I’ve turned on the ramp layer momentarily so we can compare)
shatter threshold at 78%
- On the next page, we will play around with various gradient layers….
|


Comments