
Blending Modes: Dissolve
Photoshop has what it calls “Blending Modes.” In the Layers palette, these options show up in the drop-down that is usually set to “Normal.” You can also set the blending mode (and access more options) by going to the Layer Style dialog box.
Many amateur Photoshop users—myself included—might go years without ever changing the blending mode. But when you discover what each one does and how it works, you will be excited to try using blending modes to achieve different effects.
In my next several posts, I’ll go over each blending mode—with more detail, hopefully, than Photoshop Help gives—and provide an example for how you might use the blending mode in “real life.” (This will be a challenge for me, too, because frankly, I haven’t used probably 1/3 of the modes in a practical application before! So, as usual, I welcome all constructive comments, especially those of you who have found other cool ways to use the blending mode of the day.)
(And a note for those who care: I’m using Photoshop 7.)
Just a quick intro to blending modes for those of you who haven’t tried using them before:
1. Blending modes need two or more layers for any effect to work—you need at least two layers to “blend” together.

2. A layer with a blending mode specified will “blend” with all other colors from layers underneath it. We call those original layer colors the “base colors.” The colors on the top layer (with the blending mode selected) is called the “blend colors.” The result—what you see as a result of the “blending”—is called the “result color.”
And finally: Dissolve Mode…
According to Photoshop Help: Dissolve Mode “edits or paints each pixel to make it the result color. However, the result color is a random replacement of the pixels with the base color or the blend color, depending on the opacity at any pixel location.”
Say what?
Worded in a way that makes more sense to me, and maybe you, too:
The result of Dissolve Mode looks “speckled,” kind of like when a PowerPoint slide, or movie scene, “dissolves” into another (hence the name!). Dissolve Mode only produces this result when there are partially transparent pixels by taking the partially transparent pixels and randomly choosing some to display at 100% opacity for a speckled effect. (The higher the original opacity, the more “solid” the result is.)
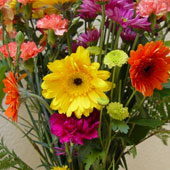
This is where an example comes in handy. Let’s start with a picture of a bouquet of flowers that I got for Valentine’s Day:
Now, I’ll add a custom shape layer and set the blending mode to “Dissolve”:
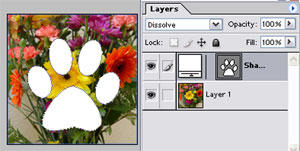
Hmmm, doesn’t look much different from the “Normal” mode! That’s because this layer doesn’t have any partially transparent pixels. When I set the opacity to 60%, the Dissolve blend does its magic:
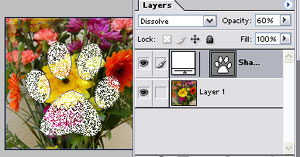
Note that Photoshop takes those 60% pixels and displays them, randomly, either at 0% or 100%.
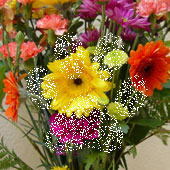
If I change the opacity to 20%, the resulting image shows less speckles from the pawprint layer:
Comments