
Banner Spot Shape
Open Photoshop, start a new document dimensions 400×400.
Select the polygon tool (U), then click on the same button shown in the image below.
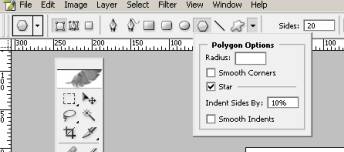
The first one is the Shape layers and should be already selected when you draw the shape. Then follows Polygon Tool, and then little triangle. Click on it and you’ll more options that’ll allow you do draw the desired shape.
1) Set a radius of 110, set Sides on 20, like in image, check “Star”, be sure that both “Smooth Corners” and “Smooth Indents” are unchecked. Go to the canvas click in the center and draw our 20side star polygon.


This is what you obtain after this step [we’ll hide this level at a certain point]
2) Now CTRL + click on Shape 1, without loosing the selection click on create a new layer (see image).
![]()
3) Than, select the Paint Bucket Tool (G) and fill the floating selection with this color ECF64B.
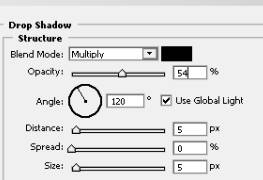
Always in the layer tat click “Add a layer style” and choose “Drop shadow” with these settings.
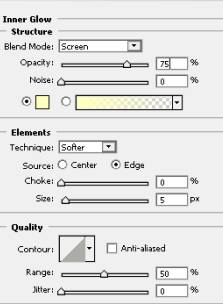
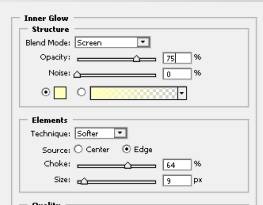
Then click on Inner Glow and use these settings
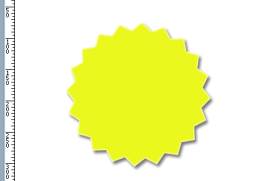
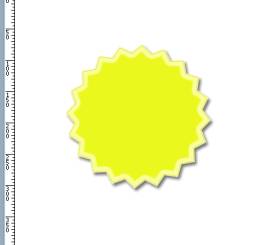
You should obtain a shape and effects like these
4) At this point you can hide the layer with “Shape 1”
5) CTRL + click in the layer tab the filled shape already done, create another lever over this one, then go to Select > modify > contract and set Contract by 2 pixel
6) Fill the contracted shape with EBF81D color. This is just to create a slight difference from the two shapes, like a 2 pixel border.
7) With the new layer still selected click “Add a new layer style” click on “Inner glow” and use these settings
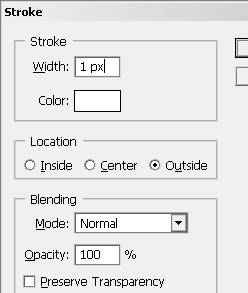
Then click on “Stroke” and copy these settings
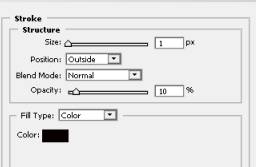
Now you should have something like this
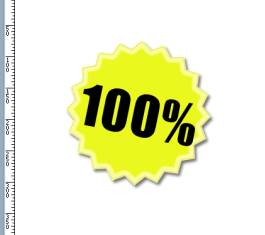
8) We need a text to complete our shape, choose Text Tool (T) and click into our shape, Photoshop automatically creates a new layer for your text. Choose Impact as font or any other well rounded type and black as fill color. Type 100%. Then Edit > Transform > Rotate and Scale your text like in image.
9) CTRL + click on your text, create another layer than go to Select > modify > contract, use a value of 2 pixels and settings like in image.
For Color use a color that you like, The result.
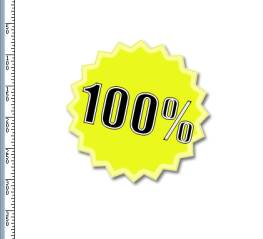
Add text, backgrounds of your choice and a main message for your image.
Comments