
Background Masking Techniques in Photoshop part 5
Pen Tool Technique
My final technique will be to use the Pen Tool to create a path that outlines the object, then use the path to create a selection for a Layer Mask.
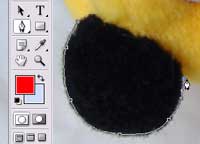
Choose the Pen Tool. In the horizontal options bar, make sure that “Paths,” not “Shape layer,” is selected. Then, start using the Pen Tool to create a path around the object. I find that it’s helpful to zoom in for greater detail.
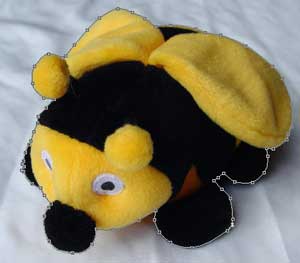
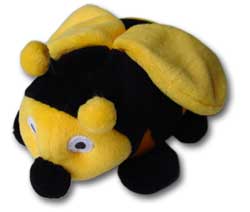
Here’s my completely outlined bee. You can see all the different points that I created using the Pen Tool, as well as the resultant path.
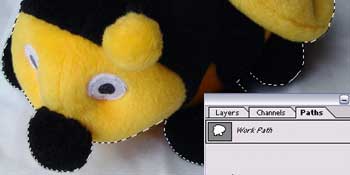
Open the Paths palette and Ctrl-click (Command-click for Mac) on the path layer. This creates a selection from the path. In the diagram, you can see the dotted line that shows the selection.

If you have a pretty solid-shaped object, you can skip the next step. Because I have a fuzzy, plush object, I’m going to feather my selection slightly so that the edges will be a little blurred. I choose Select > Feather and make a Feather Radius of 1 pixel.

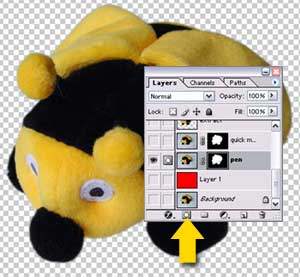
Finally, I click the Layer Mask icon in the Layers palette to create a layer mask from my selection. This hides the background and isolates the bee.
Here’s the final picture:
In summary:
Pen Tool Technique:
- Use the Pen Tool (set to “Paths,” not “Shape Layer”) to create an outline of the object.
- Ctrl-click (Command-click for Mac) the path layer to make a selection.
- Use the selection to create a layer mask.
My take: This method works for any object, regardless of the background, and is also quite precise. It’s reasonably fast if you’re comfortable with using the Pen Tool; otherwise, this method might take a long time! This method is probably better for objects that have crisp, hard edges, and, similar to Quick Mask mode, you may have a slight color halo if the object has picked up some of the background colors.
So, there you have it: five different ways to isolate an object from a background! Here’s a quick summary of the different methods and when I think they’re best used.
- The Magic Eraser Technique
Great for erasing backgrounds that are mostly all the same color that contrast with the object (set a high tolerance and use one click!), but may involve a bit of touch-up work at the end. No good for objects that are on multi-colored backgrounds. - The Background Eraser Technique
This technique would be great on a photo object that is already “isolated” but has a solid, contrasting background color. Even still, I might pass up this technique for the next method, as they’re essentially the same and I think the Extract method goes a little faster. - The Extract Filter Technique
Works best for erasing mostly solid-colored, contrasting backgrounds. Photoshop also does a nice job of getting rid of the color halo problem – but you may have to do some additional touch-up work at the end. - The Quick Mask Technique
Almost the ideal solution: relatively quick, pixel-perfect control over edges, and works with any kind of background. Plus, by using a layer mask, you don’t actually delete any part of the background. The only complaint I have with this method is that you may get a color halo. - The Pen Tool Technique
Fantastic technique for objects with hard edges, and it works with any kind of background. You can be as detailed as you want to get a perfect outline, and you can always go back and modify the path if you need to. Plus, you get lots of practice using the Pen Tool.
Comments