
Background Masking Techniques in Photoshop part 4
The Quick Mask Technique
If you’ve never used Quick Mask mode in Photoshop, you’re missing out on a huge time-saver! Quick Mask mode lets you use brush, pencil, paint bucket, etc. tools to paint an “inverse selection” using shades of grey and black. (Black identifies parts that won’t be selected; grey identifies parts that, when selected, will have some level of transparency.) When you switch back to Normal mode, the “clear” parts of your Quick Mask are selected so that you can apply changes. We’ll use Quick Mask mode to paint the background of the image, then apply a Layer Mask to hide the background.
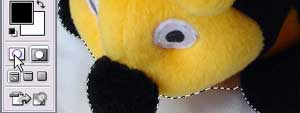
Click the Quick Mask icon in the tool palette to switch to Quick Mask mode.

Using a fairly large brush, with the foreground color set to black, I’ll start to block out the background. You’ll notice that the masked areas in which you paint will turn pink.
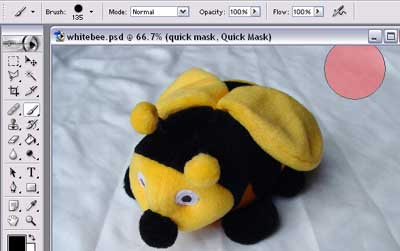
The large brush size allows me to color in the main areas of the background fairly quickly.

I can then use smaller brushes to fill in the details around the edges.
Eventually, I have the entire background colored in pink:
Tip: You may change the foreground color to white if you want to “paint back” parts of the object.
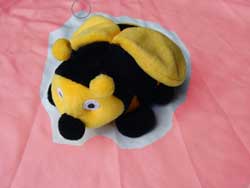
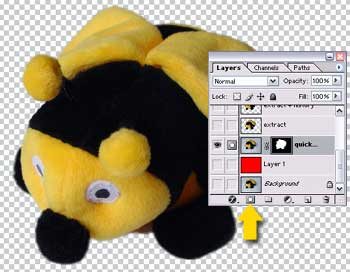
Switch back to Normal Mode, and you’ll see the selection. Because everything that’s painted in is not selected, the final result is that the bee is selected.
At this point, I click the Layer Mask icon at the bottom of the Layers Palette to create a layer mask, which essentially isolates the bee from the background.
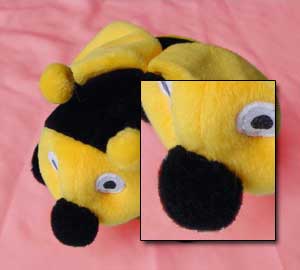
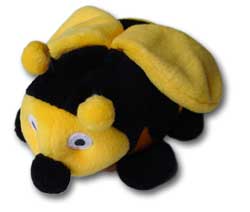
So, here’s the final picture:
And in summary:
Quick Mask Technique:
- Switch to Quick Mask mode and paint everything you want to get rid of.
- Switch back to normal mode and use the resultant selection to make a Layer Mask.
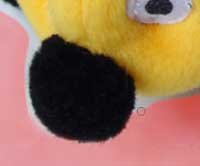
My take: A great method, because it gives you precision-control over what gets selected. This method works well for any picture — solid background color or not. The only unfortunate aspect of this method is that, for some objects, you may see a “color halo” where the edges have picked up on some of the background color. (One way to get around this is to take a little more time and paint around the edges with a grey airbrush to make the edges a little transparent.)
Note: This same type of effect can be achieved by creating a Layer Mask, then painting on the layer mask with black paint to hide the background. The two techniques are virtually identical — I just chose to write about Quick Mask because I’ve already covered the concept of Layer Masks in another article!
Comments