
Background Masking Techniques in Photoshop part 2
The Background Eraser Technique

The Background Eraser Tool (again, hold down the Eraser tool to access this option) is meant to be used along the edges of an object. The center of the brush determines which similar colors to erase. The Background Eraser Tool will also change the edges of an object slightly so that you don’t get a “color halo.” We’ll use the Background Eraser Tool to isolate and define the edges of the object, then erase the other pixels on the “outside.”
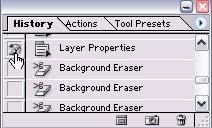
Before you progress very far with this procedure, open the History Palette and, in the left column, click on the state to which you’d want to revert if you needed to “clean up” later on. If you’re starting from scratch, this might be the only stage in the History Palette. In my case, I clicked on the state immediately before I started to use the Background Eraser (I got a little ahead of myself). We’ll refer to the state you choose as the “source” for the History Brush.
The next step is to select the Background Eraser tool and choose a brush size that isn’t too big, but will comfortably allow you to outline the image.
![]()

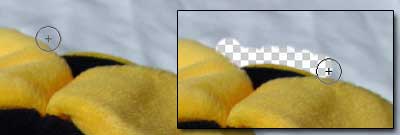
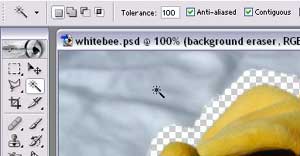
You’ll see a round cursor with a crosshair in the center. The important thing is to keep the crosshair from touching the actual object (if it does, the object will be erased). So, as you draw along the outside of the object, keep the crosshair just outside the object. You’ll see that the outside’s “similar colors” start to be erased.
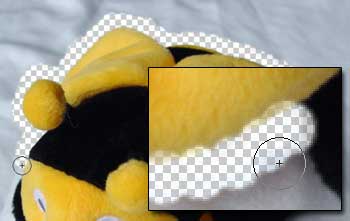
Continue around the entire object. You may notice that parts of the image get “eaten away.” Don’t worry – we’ll use the History Brush later to bring those parts back.
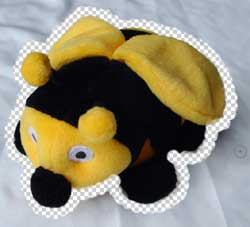
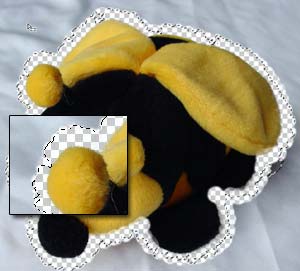
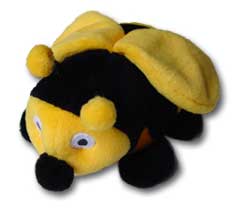
Here’s the bee after I outlined it completely with the Background Eraser Tool:
Now, let’s get rid of the rest of the background. Select the Magic Wand tool, set the Tolerance to 100, check the Contiguous box, and then click on the background.
Most of the background should be selected:
Go ahead and hit the Backspace key to delete the background. Use the Eraser tool to clean up any obvious stray pixels.
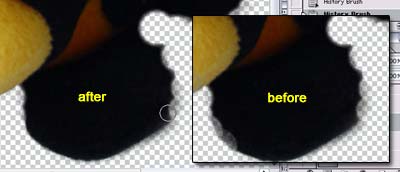
Now, select the History Brush tool. The History Brush allows you to paint over the image and “restore” the parts you paint to the “original state” that you selected in the History Palette.

Adjust the brush size of the History Brush as necessary for detail work. Then, start to clean up the inside edges of the object, being careful not to go outside those edges.
Finally, I use my red background trick again to catch some of the stray background pixels, then use the Eraser tool to get rid of them.

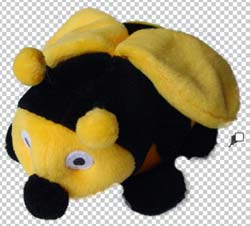
My final image, with drop shadow applied, looks like this:
Here’s the summary:
Background Eraser Technique:
- Set source for the History Brush in the History Palette.
- Used Background Eraser Tool to outline the edge (2 minutes).
- Used the History Brush Tool to touch up parts of the object that had been erased (1:30 minutes).
- Used the Eraser Tool to clean up the stray background pixels (2:23 minutes).
My take: This is my least favorite of the techniques because I had to zoom in a lot and use the History Brush Tool and Eraser Tool extensively. This technique would have worked better with an object that had solid edges (as opposed to the fuzziness of a plush animal), as well as a more-solid background color. A situation in which this technique might work well would be one in which you had a photo object that was already “isolated” on a white background, and you wanted to use it as a floating object in a layered composition.
Comments