
Autumn leaves wallpaper effects
May 16, 2007 | 0 comments
Tips about how I made the Autumn leaves wallpaper (see wallpaper).
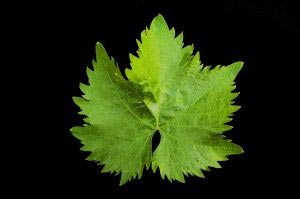
This wallpaper has been made with custom-created brush. To start, we need a leaf. Here is a leaf I found in Interned. You can also bring a leaf from the street and scan it 🙂
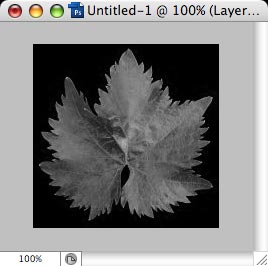
Crop leaf image as necessary, desaturate (Ctrl-Shift-U).

Invert (Ctrl-I) and adjust layers (Ctrl-L) to increase contrast.
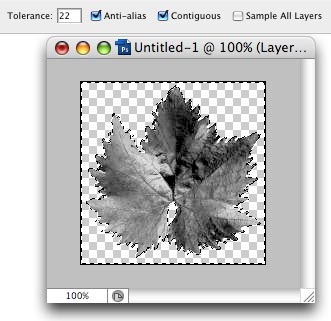
Use Magic Wand (W) to remove white background.

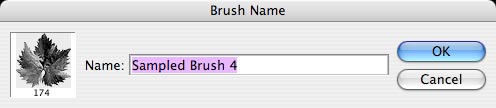
Go to Edit menu – Define Brush preset.
Now, when brush is ready, create new document (it will be our wallpaper). Fill it with solid color.
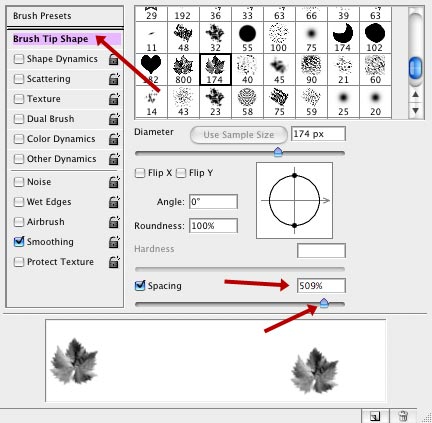
Create new layer, select Brush tool (B) and in Window menu, open Brushes tool window. Select our new brush, then go to Brush Tip Shape and increase Spacing to some 500-600%.
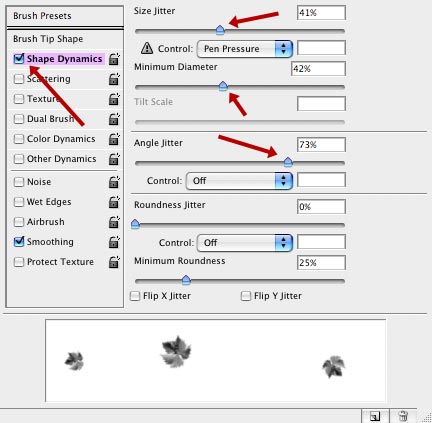
Then, enable Shape Dynamics, and increase Size Jitter, Minimum diameter and Angle Jitter.
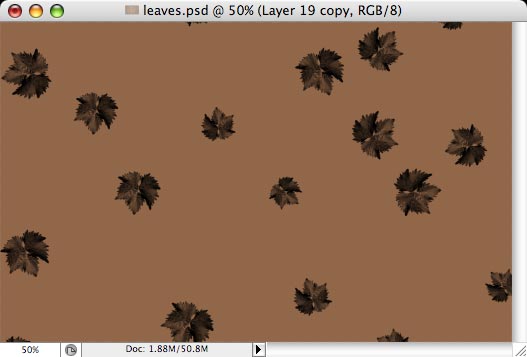
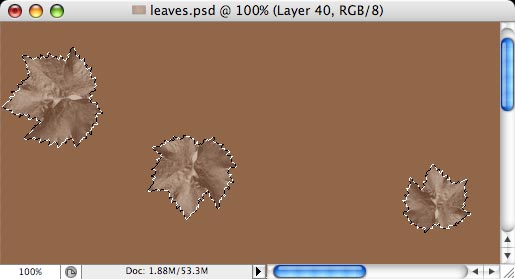
Then, with black brush, make some chaotic strokes to put some leaves nere and there. It is important that leaves are not overlapped.
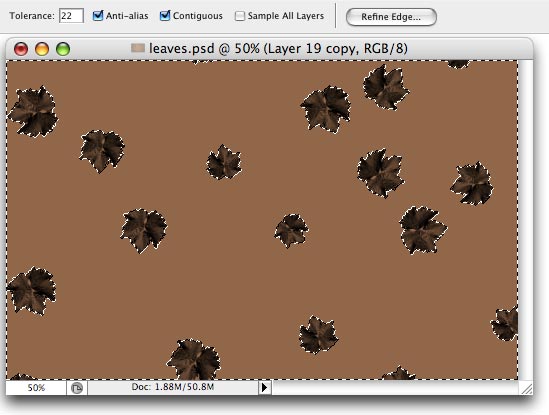
Now we have some black leaves, but I want brown ones. To fix that, use Magic Wand to select empty area of layer with leaves…
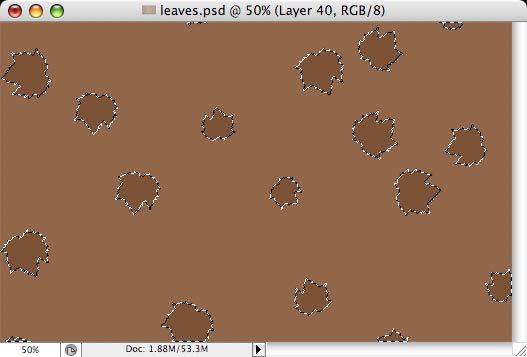
..then invert selection (Ctrl-Shift-I), create new layer, and fill selection with brown color.
…and then move this new layer BELOW the original layer with leaves. To finish, change blend mode of layer with black leaves to Soft light or Screen (whatever looks better). Merge down (Ctrl-E) to combine these 2 layers into one.
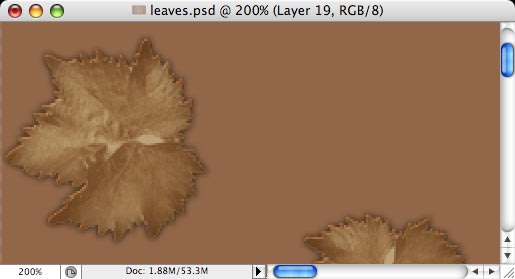
Apply the following layer effects:
– Outer glow: blend mode = multiply, color = dark brown, size = 6-7px;
– Inntr glow: blend mode = multiply, color = light brown, size = 20-25px;
– bevel and emboss: style = inner bevel, size = 1, highlight blend mode = color dodge, highlight color = light brown, shadow opacity = 0 (not needed)
– Outer glow: blend mode = multiply, color = dark brown, size = 6-7px;
– Inntr glow: blend mode = multiply, color = light brown, size = 20-25px;
– bevel and emboss: style = inner bevel, size = 1, highlight blend mode = color dodge, highlight color = light brown, shadow opacity = 0 (not needed)
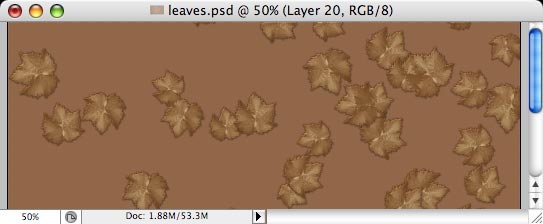
Create new layer, and repeat all steps to create more leaves….
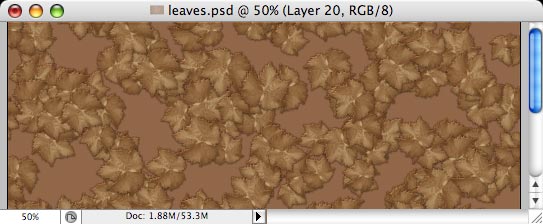
… and again, and again!
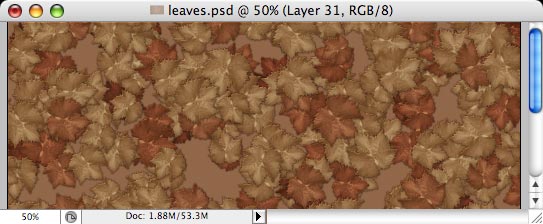
To make image more interesting, when you finish a layer with leaves, adjust Hue and Lightness (Ctrl-U) slightly, to make leaves more red or darker… or more green and lighter…
..repeat until entire image is filled.
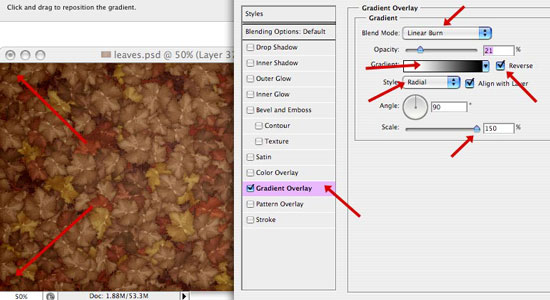
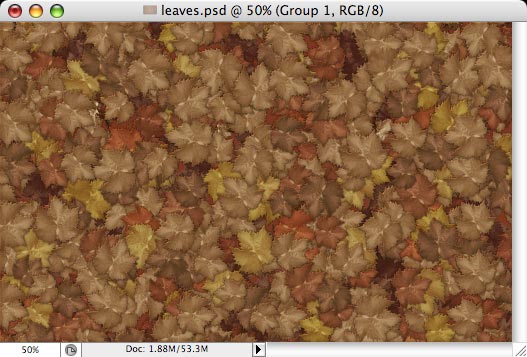
Now merge all layers (Ctrl-Shift-E), it is a good idea to save a copy of PSD file before that. For resulting single layer, open layer effects, and add Gradient overlay:
– blend mode = linear burn;
– opacity = about 20%;
– gradient = white to black (reversed);
– style = radial;
– scale = maximum.
– blend mode = linear burn;
– opacity = about 20%;
– gradient = white to black (reversed);
– style = radial;
– scale = maximum.
This will give us nice fading effect, where image is darkened at the edges.

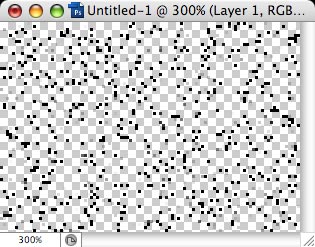
I thought it is nice touch to add subtle water drops to the image. Here is how to create them: make new document, pretty small (100×60 pixels as example). fill with grey.
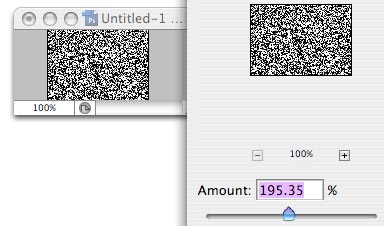
Go to Filters – Noise – Add noise, apply very big noise (200%).
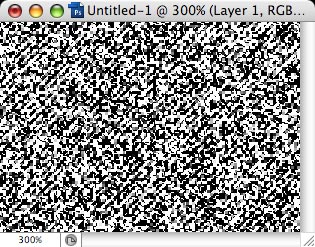
Here goes tricky part:
– switch to quick mask (Q)
– repeat noise effect (Ctrl-F)
– turn off quick mask (Q)
– delete selection (Del).
– switch to quick mask (Q)
– repeat noise effect (Ctrl-F)
– turn off quick mask (Q)
– delete selection (Del).
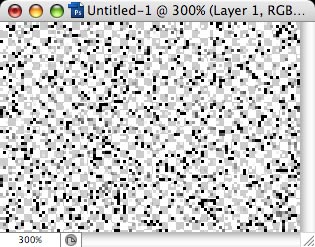
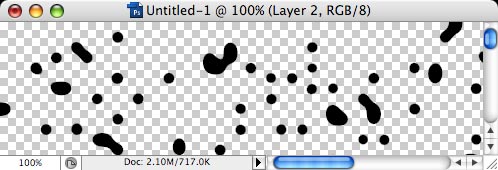
Repeat previous step again…
..and again, until black dots are not too close to each other.
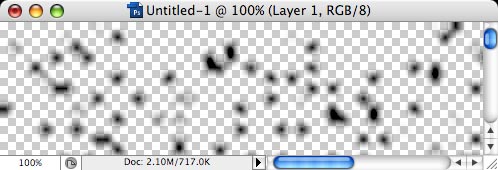
Resize image to match the size of our wallpaper (for me it was about 1000%).
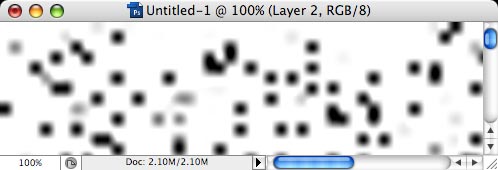
Create new layer, fill with white, move white layer BELOW layer with black dots, then merge all layers (Ctrl-Shift-E).
Go to effects – Blur – Gaussian blur, apply blur with about 3-4 pixels.
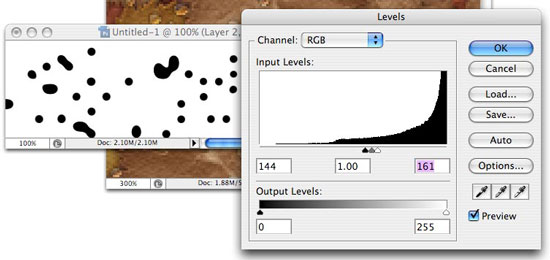
Open Levels (Ctrl-L) and adjust them carefully so that dots are sharpened and rounded. For me, the best result is 144 and 161.
Remove white. You might know how to do it from my previous tutorials, so in short:
– select all (Ctrl-A)
– copy (Ctrl-C)
– turn on quick mask (Q)
– paste (Ctrl-V)
– turn off quick mask (Q)
– remove selection (Del)
– make layer black (Ctrl-U, set Lightness to -100%).
– select all (Ctrl-A)
– copy (Ctrl-C)
– turn on quick mask (Q)
– paste (Ctrl-V)
– turn off quick mask (Q)
– remove selection (Del)
– make layer black (Ctrl-U, set Lightness to -100%).
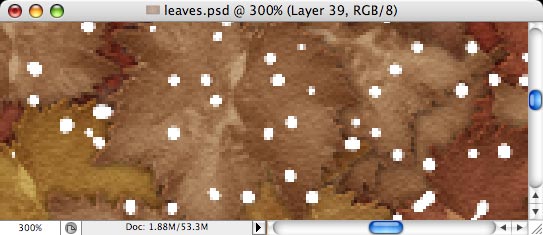
Now copy black dots to our wallpaper, and invert (Ctrl-I) to make dots white.
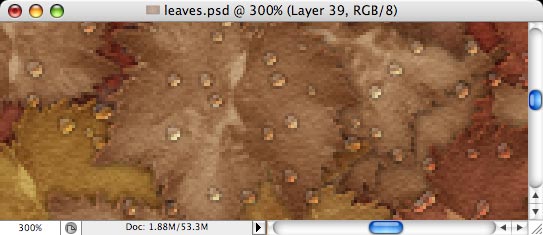
Apply the following layer effects:
– blend mode = multiply;
– drop shadow: distance = 1px, size = 2-3px
– inner glow: size = 1px; color = yellow
– bevel and emboss: size = 3px, both colors are white (highlight and shadow), highlight opacity = 25%, shadow mode = overlay, shadow opacity = 75%.
– blend mode = multiply;
– drop shadow: distance = 1px, size = 2-3px
– inner glow: size = 1px; color = yellow
– bevel and emboss: size = 3px, both colors are white (highlight and shadow), highlight opacity = 25%, shadow mode = overlay, shadow opacity = 75%.
These effects will make our dots look like waterdrops.
That’s all! Hope you’ll find it useful!
Autumn leaves wallpaper (see wallpaper).
Author: Vlad Gerasimov
URL: http://www.vladstudio.com
Comments