
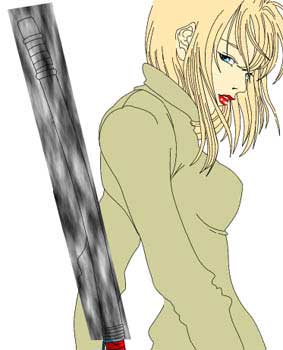
Anime Girl with Sword Picture
The next lesson we’ll see how is it possible to picture an anime character, to give a certain texture to metal in relief, to woolen clothes and to create in an easy way the background.

For the beginning we should open a new file: File – New (ctrl+n)
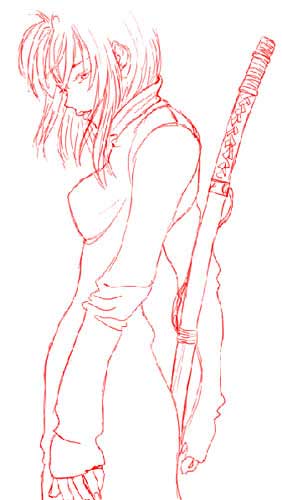
Choose now the Brush Tool (3-6 px) and try to outline the character to be. I’ve chosen for this the red color, just to be easier to outline very accurately the contours, which we’ll be of black color next.

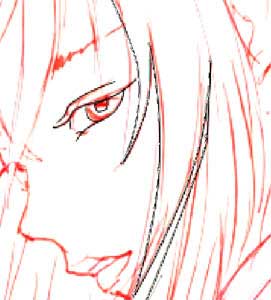
Change now the size of the Brush Tool in 1 px and select the necessary color for the contours. Open a new layer: Layer – New – Layer and use the Pen Tool to picture very carefully the contours on the new layer.
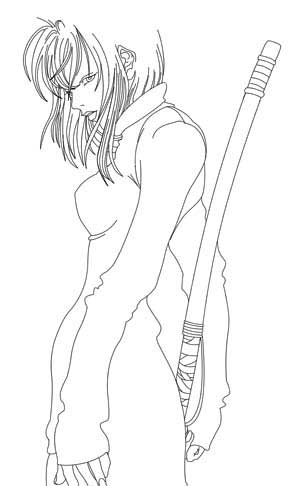
Erase the layer containing the outlines after that: Layer – Delete Layer. Create a new layer and place it under the layer containing the pictured contours. Paint it in white or grey colors with Paint Bucket Tool. In case that the contours seem to be dimly, you may copy the layer with them: Layer – Duplicate Layer and merge down the layers with contours again: Layer – Merge Down (ctrl+e)
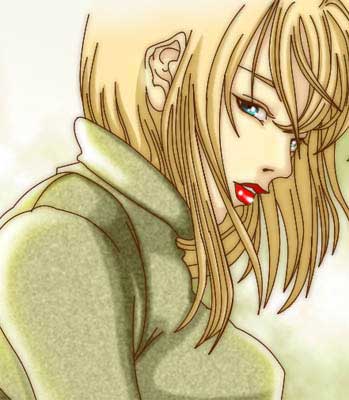
Just not to mix this layer with the rest of them you may entitle it by clicking on the right mouse’s button on the layer and choosing Layer Properties. I’ve decided to turn this picture horizontally, that is why I should select next command: Edit – Transform – Flip Horizontal. Select after that the Brush Tool and on a new layer under the contours’ layer color the picture with the main colors:

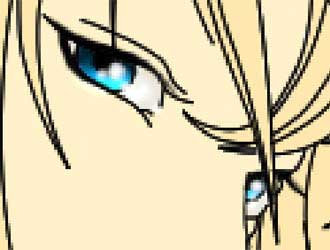
Continue picturing now. Start with the eyes. First you should select the Brush Tool of three nuances and paint the iris. Then take the Blur Tool with smooth edges of white color and insert the flares (they should be pictured on a new layer, above the contours).
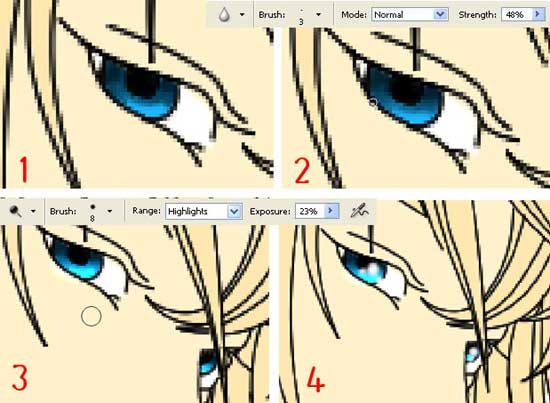
Dark out a little the white of the eye using the Brush Tool and the Blur Tool. Then apply only the Brush Tool to accentuate the outlining of the eye.
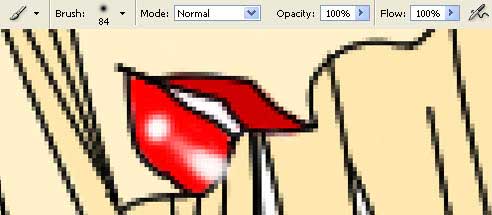
Continue with the lips. Paint in darker color the upper lip firstly, but on the lower one add the flare. It’s necessary for this to use the Brush Tool with smooth edges.
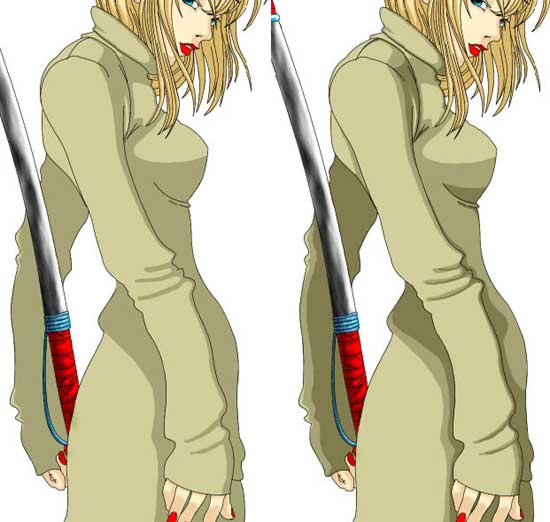
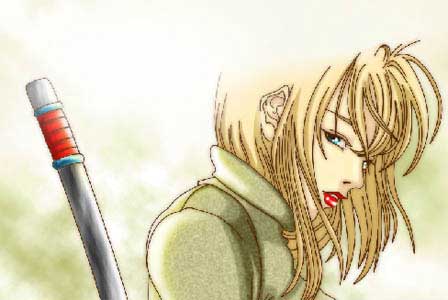
Introduce the shadow now on the girl’s instrument on her shoulder, selecting the same Brush Tool with the following adjustments.

Insert both the darker and lighter colors with easy motions. First you should introduce them on the textiles.
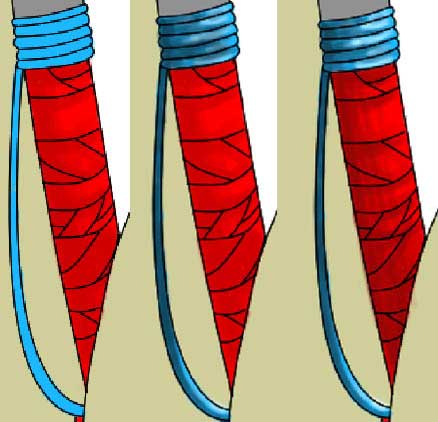
Then select the Dodge Tool to decolorize the lighter parts.
Select after that the Brush Tool and the Blur Tool to dark out one of the girl’s instrument’s metal part. The second part should be decolorized with the Dodge Tool.
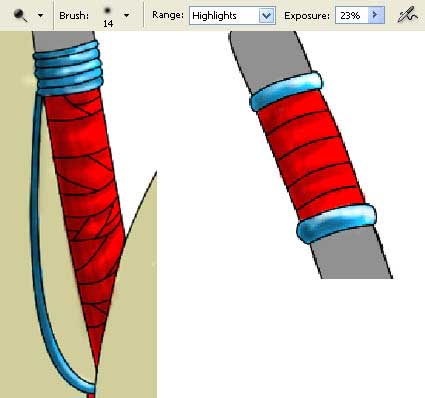
Give it a relief texture. It’s necessary to create a new layer, above the painted layer and then apply the filter (Filter – Render – Clouds). Select the white and the black colors.
Minimize
the size of the layer and change the angle of its placement also just
to be placed on that part we want to give it the texture. Select the
next combination: Edit – Free Transform (ctrl+t).
Group this layer with the layer that contains the painted girl: Layer – Create Clipping Mask (ctrl+g). Everything that is situated outside the metal contours should be erased by choosing the Eraser Tool. Change the layer’s type on Overlay and merge down both layers (ctrl+e).
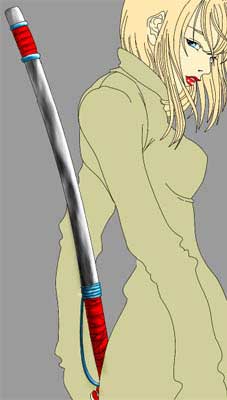
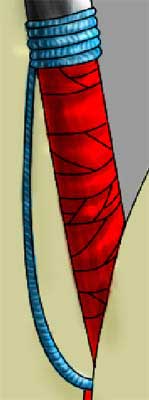
The lace also should be more textured. Select for this the Brush Tool of 1 px Hard Round and two colors: dark-blue and the white colors. Outline the lace.
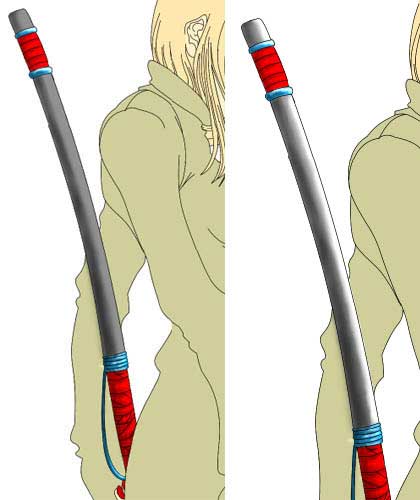
Insert the shadows on the girl’s hair (Brush Tool) and blur out also the hair’s edges.
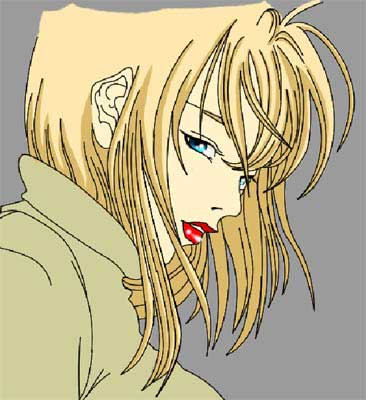
Add the mask to this layer: Layer – Add Layer Mask – Reveal all. Use the Brush Tool of black color and erase carefully the hair’s parts on that place the flare should be. Select the Gradient Tool to hide the bounds.
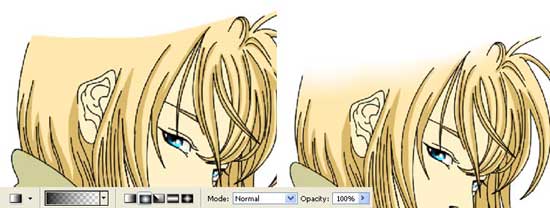
Apply the next command: Layer – Remove Layer Mask – Apply. Then insert the shadow on the girl’s skin by blurring the bounds too:
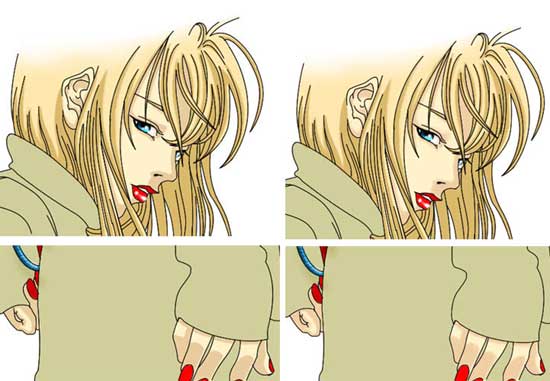
Choose the Brush Tool to insert the shadows on the girl’s clothes too.
The Smudge Tool will help us to smudge the bounds a little.
Giving
the necessary woolen texture to the textile is possible by copying the
layer with the coloring (ctrl+j). Erase everything on it, except the
clothes. First we should hide the visibility of the main colored layer
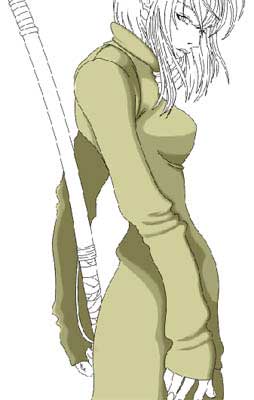
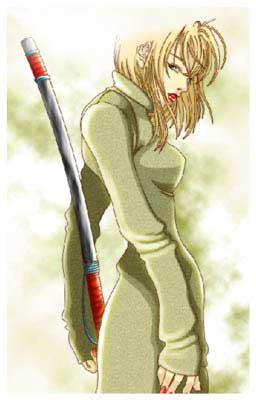
by clicking on the eye near the layer. That is what you should get:
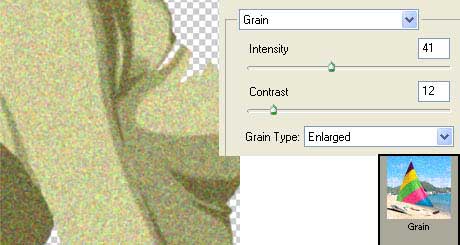
Select the next combination Filter – Texture – Grain with the following adjustments:
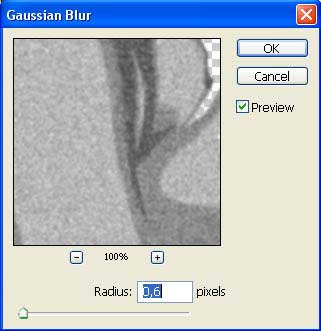
Then decolorize the layer: Image – Adjustments – Desaturate (shift+ctrl+u). Group it with the main colored layer (ctrl+g) and blur it out a little, selecting the filter (Filter – Blur – Gaussian Blur).
Change the layer’s type on Luminosity and minimize the Opacity till 75%.
Combine
these layers (ctrl+e) and create a new layer that must be grouped with
the colored layer (??trl+g). Choose now a brush with smooth edges and
white color and decolorize the edges of the clothes, the hair and the
girl’s instrument on her shoulder. Decolorize some places near the
contours.

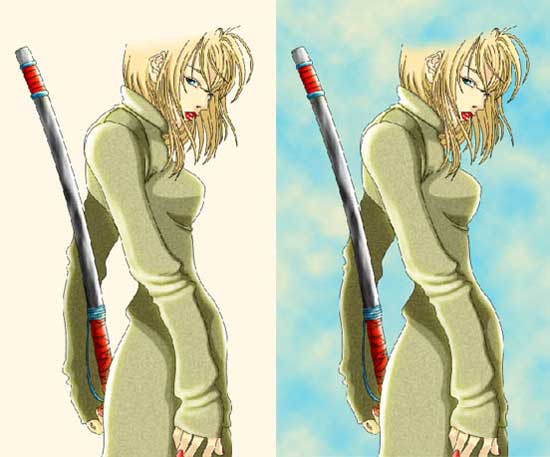
Copy this layer and move the copy under the layer with white stripes, blur it out (Gaussian Blur) and change its color into yellow one, using the next command: Image – Adjustments – Selective Color.
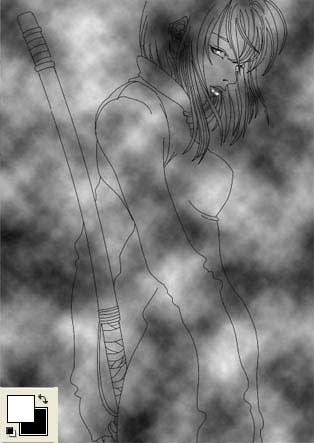
Continue
with the background’s layer. It must be painted with the same color,
the lightest girl’s hair is. Make a copy of this layer using eyedropper
tool and apply on a new layer above the previous one Filter – Render – Clouds.
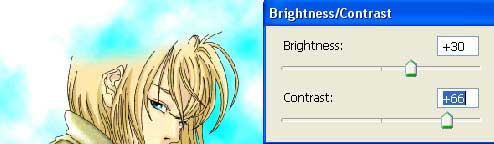
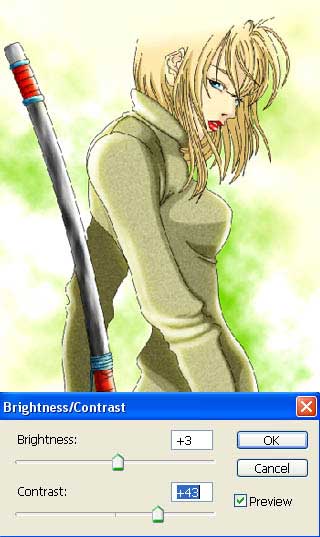
Process the upper layer now. Its brightness and contrast should be changed: Image – Adjustments – Brightness/Contrast.
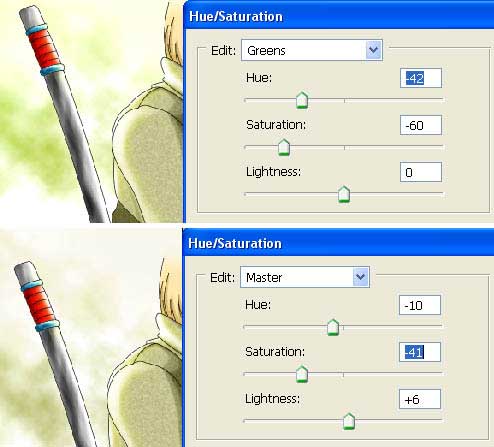
Then change its color with Image – Adjustments – Hue/Saturation (ctrl+u).

Select now the Eraser Tool of big size and smooth edges and erase partially this layer:
Change a little more its brightness, contrast and the colors, using the same commands applied earlier:
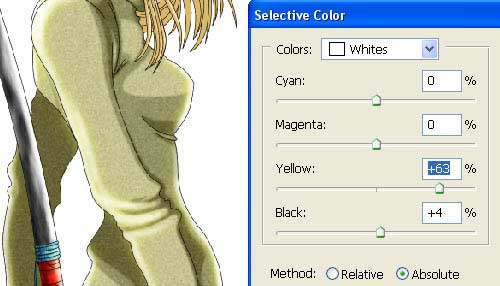
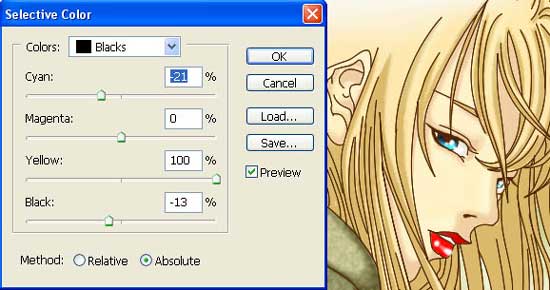
Pass to the layer containing the contours and change their color, selecting Image – Adjustments – Selective Color.
Copy the layer (ctrl+j) and blur the copy out (Gaussian Blur).
Minimize the layer’s Opacity till 90%.
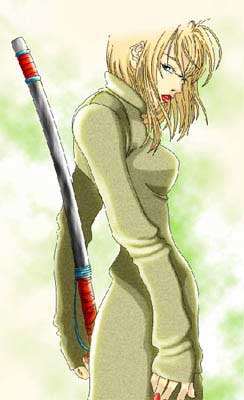
Picture
now an oval on a new layer, upper than the rest of them, in the upper
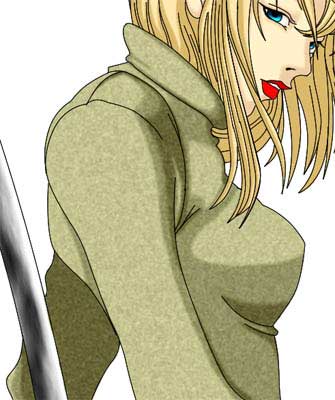
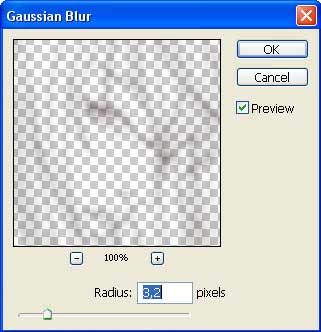
left corner. The oval should be blurred out very intensively (Gaussian Blur). You may see in the picture below how it should look finally:

On the picture it should look this way:
Combine all the layers: Layer – Merge Visible (shift+ctrl+e). Then apply the Crop Tool and Rectangular Tool, to insert the picture into a frame:
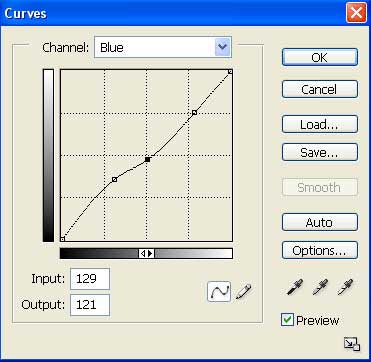
Correct a little more the colors, making use of the next combination: Image – Adjustments – Curves (ctrl+m).
Finished!
Made by Sigma
Comments