
Animation in Dreamweaver – Step 2
To animate the CompanyLogo layer you created earlier, we’ll have to add it to the Timeline. To do this, select the layer and drag it onto the Timeline. As you do this, a 15 frame long line appears in the Timeline Inspector with the name “CompanyLogo”. This is the length of time for the animation, which is currently 15 frames long. As the animation FPS is set to 15, this means the animation will play for 1 second. Select the AutoPlay and Loop check box as shown here:
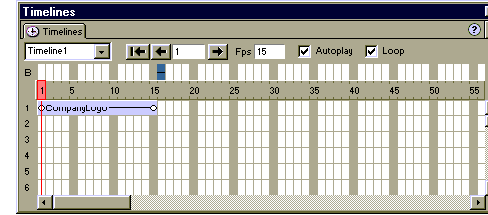
The Timeline Inspector displays the CompanyLogo layer, the length of time it will play, and that the Autoplay and Loop checkboxes have been selected.
The only thing left to do is the fun bit: the path of animation. Any animation must move from one point to another. This is done with a tool called KeyFrames, and again, Flash and Director developers will be familiar with this terminology. Two keyframes are automatically added to all layers on the timeline: the first and last frame of the animation.
A KeyFrame is identified as a circle placed on the timeline. In Figure B the final KeyFrame is on frame 15. Select the KeyFrame, and you’ll notice that the red vertical line moves to frame 15. On the page, select the layer “CompanyLogo” and drag it from the left hand side of the stage to the right. A gray line is added to the page — this line is called the Path of Animation, and it’s a visual place holder that shows you the animation (as shown below).
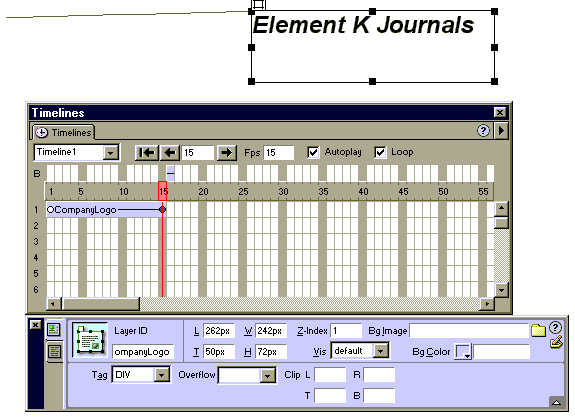

The gray line is the Path of Animation.
Now press F12 to view the animation in a Web browser (this animation will work in any Web browser — Microsoft or Netscape – version 4 and above).
To have written this simple animation by hand would have been an arduous task — it takes over 130 lines of HTML and JavaScript! But it took almost no time to complete in Dreamweaver.
Comments