
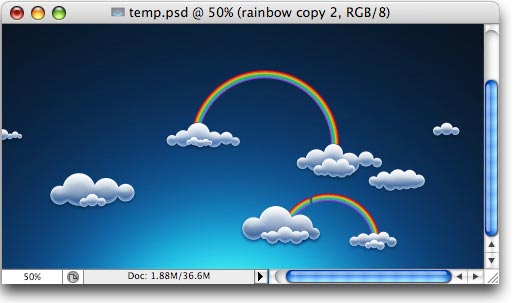
Animated Rainbow Wallpaper
Hello! In this tutorial, I will show how I created the
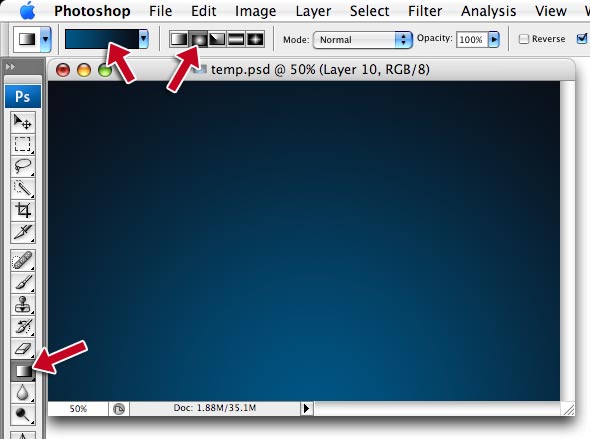
Rainbows wallpaper. First, create dark sky in the background. For that, set
forecolor to dark blue and back color to black, switch to Gradient tool (G),
change gradient type to Radial, and create gradient from bottom to top of
document.
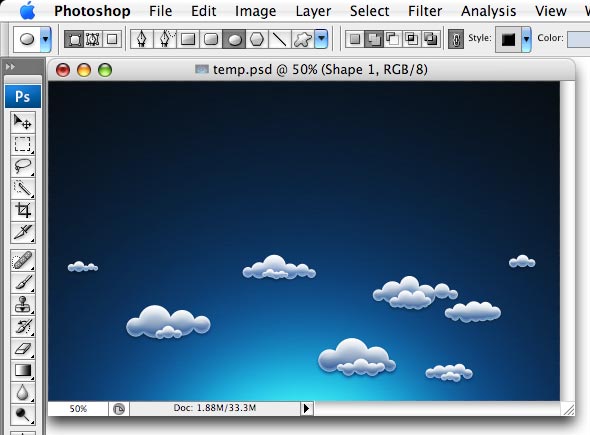
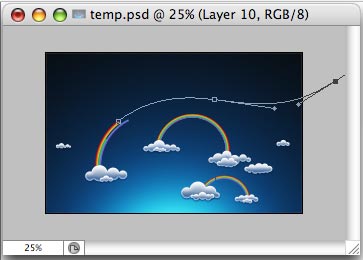
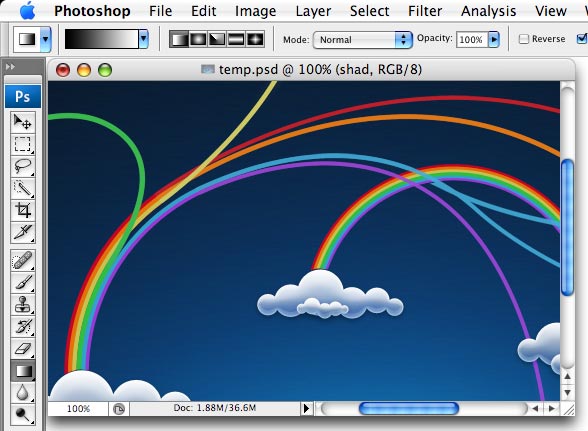
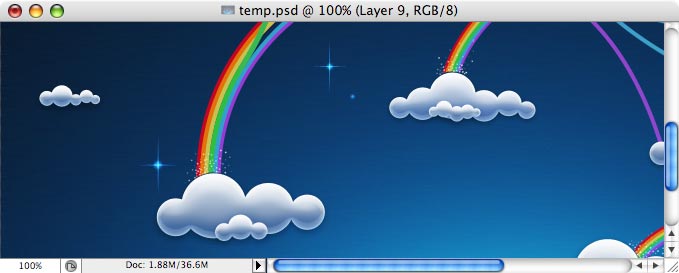
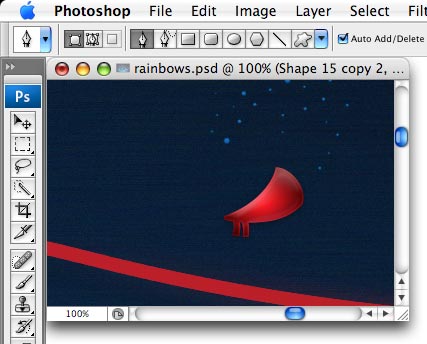
View full size Rainbow
Wallpaper.
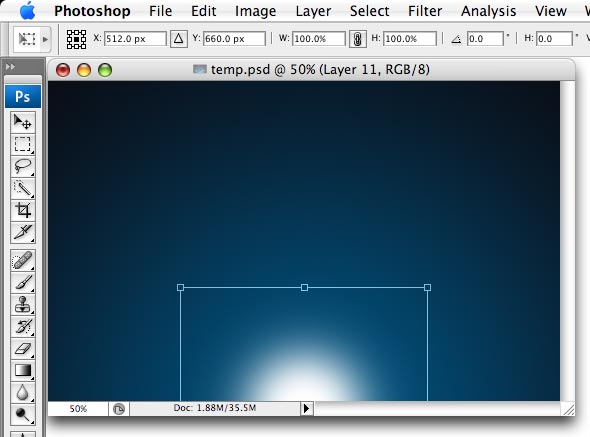
soft white brush to add a spot. Then, transform it (Ctrl-T) – stretch it
horizontally.
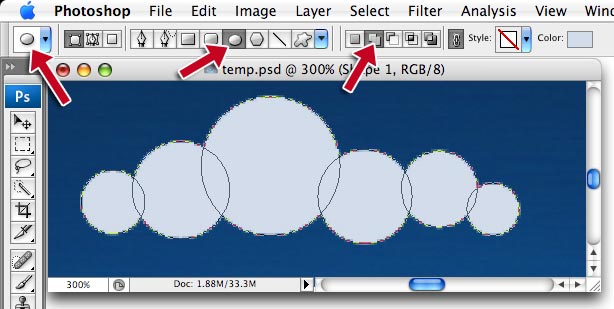
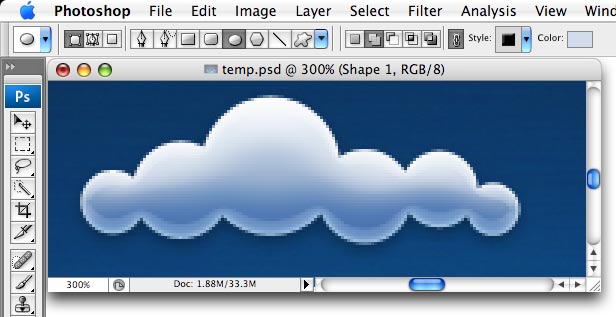
blue, switch to Shape tool (U), select Ellipse, switch to ‘Add to shape area‘
mode (2nd button in top row, so that all shapes you create are in single layer).
Then, holding Shift, add several circles, overlapping each other a bit.
mode = overlay, opacity 30-40%, distance 3-4px, size 10-15px)
– inner glow
(white, overlay, size = 5-6px)
– gradient overlay (black-to-white, mode =
overlay, opacity 75%, angle 90)
– bevel and emboss (size 30px, soften 5px,
highlight white 75% screen, shadow multiply 40% blue)
– satin (black, mode =
overlay, distance 6px, size 14px, try different contours)
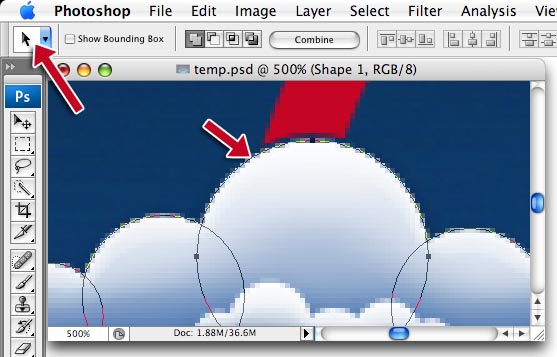
Our cloud is
ready!
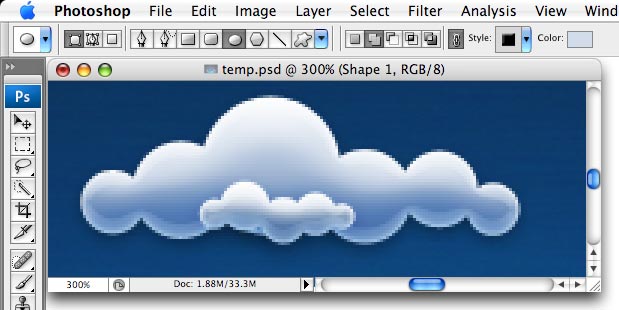
you add layer effects to smaller cloud, decrease all sizes and percents
accordingly.
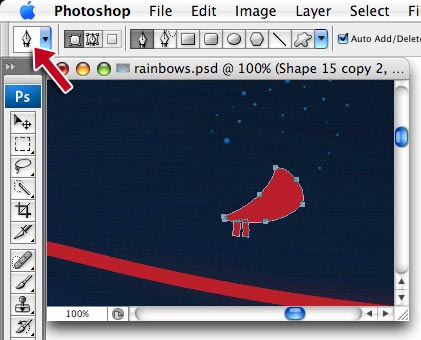
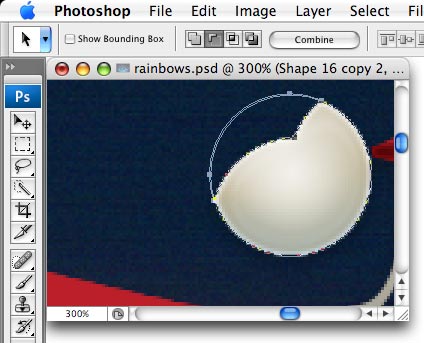
shapes, each color in one shape layer. Create new layer (behind layers with
clouds). Set forecolor to red, select ellipse shape tool (U) and make a red
circle (as always, holding Shift to preserve proportion)
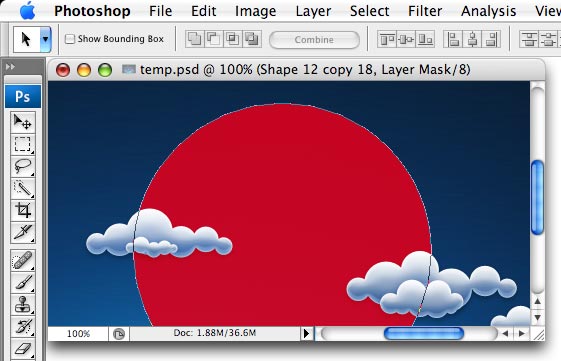
made, copy-paste it (Ctrl-C, Ctrl-V), scale down a bit (hit Ctrl-T and resize
with your mouse holding Shift). Then change path mode to Substract.
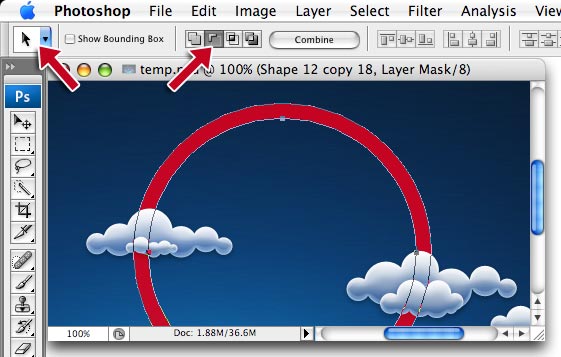
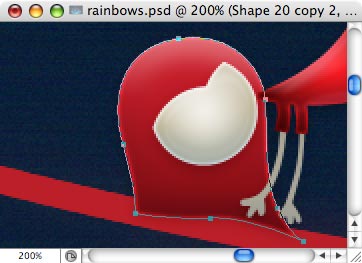
carefully add a shape that hides unnecessary part of circle.
connects to cloud. It is very easy to do: select layer with cloud, switch to
Path selection tool (A), select the circle that touches the rainbow, copy it
(Ctrl-C).
path to select it, paste (Ctrl-V), scale up a bit (Ctrl-T, then resize with the
mouse holding Shift), and finally, change path mode to Substract.

another color.

ready.
more?

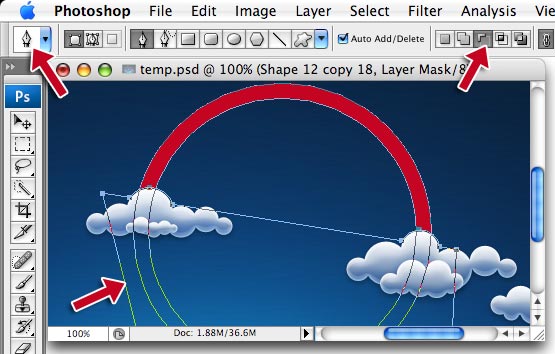
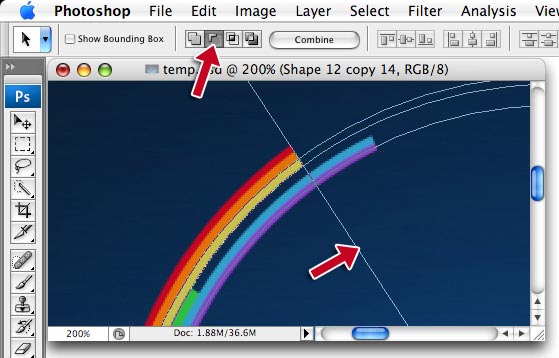
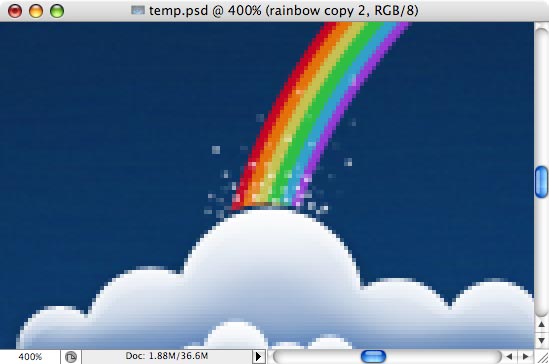
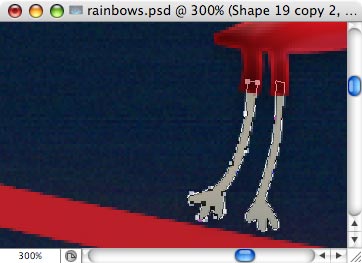
‘dissolve’ into separate lines, each color flying in separate direction. Here is
how to do it: for each layer with color, select the shape with Path selection
tool(A), then switch to Pen (P) or Rectangle (U) (does not really matter),
change shape mode to Substract, and add a shape that hides part of
the circle.
Repeat with each color of rainbow – it will look nicer if lines are cut in
different locations.
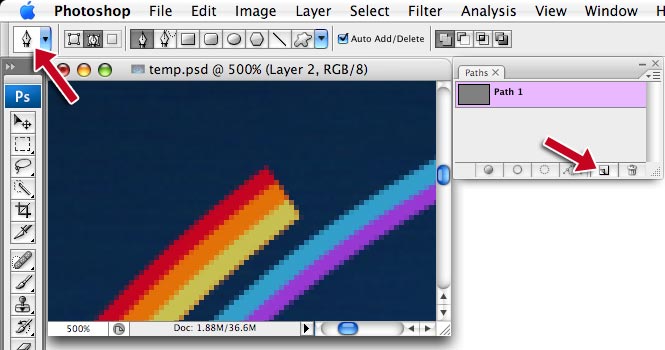
that with Pen tool
only, but unfortunately Photoshop does not have curved lines
with fixed width, or path offset (as Illustrator). And I wanted the lines to
have fixed stroke width. So we will have to add paths and then transform them
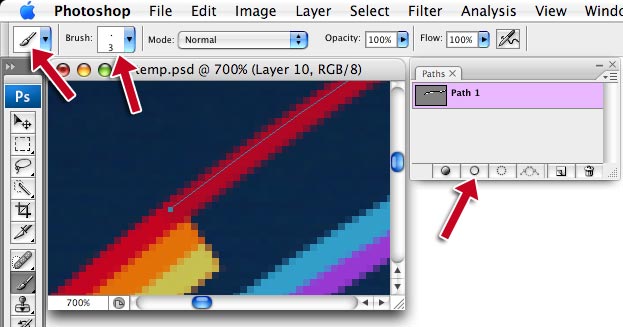
into pixels. So, open Paths
palette (from Windows menu), switch to Pen tool,
then on bottom of paths palette, click New button. New path will appear (called
Path 1).
red line is cut, and dragging (and releasing) the mouse continuing red line
direction.
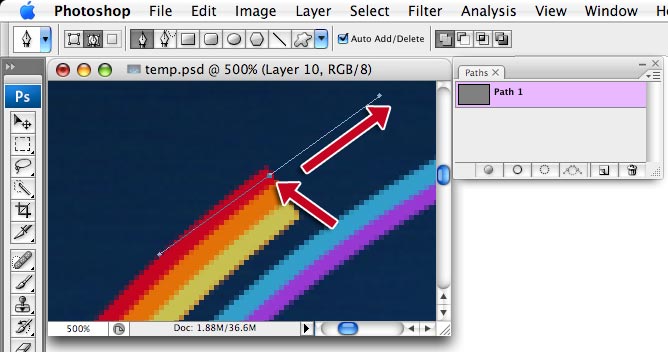
boundaries.
color as the rainbow red, then carefully choose brush size that matches size of
rainbow line (in my case, 3px). Then, hit Stroke button on bottom of Paths
palette (2nd in the row). You can click Stroke button several times
to make line
wider. If line does not match, undo and change brush size. You should be careful
and patient doing that 🙂
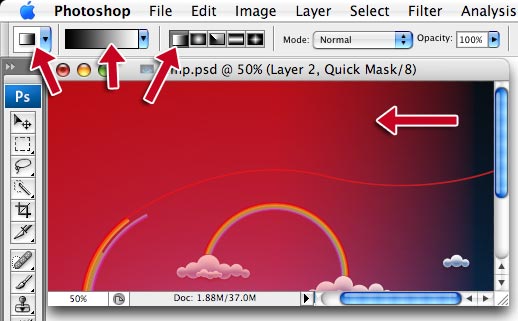
our artwork. Turn on Quick
Mask (Q), then switch to Gradient tool (G), select
black-to-white gradient, and apply gradient as shown here.
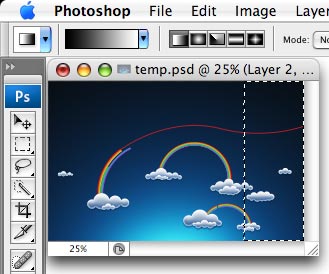
selection similar to this.
3-5
pixels
blur. You can also try Lens blur – it may look better (or not) but takemuch more time to apply.

each color.
white hard small brush (add some 1px dots, then 2px and 3px)
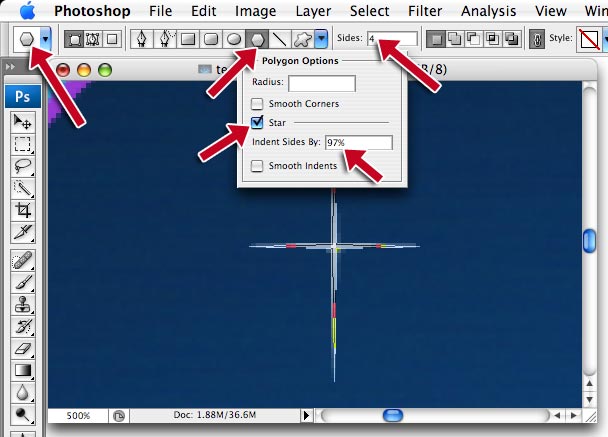
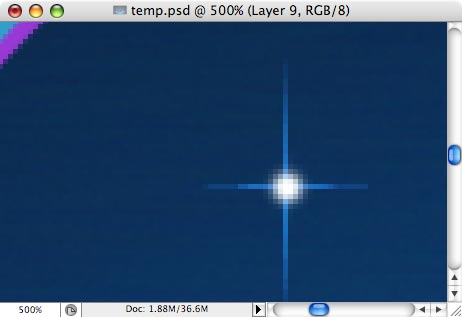
romantic if the stars glow with horizontal and vertical rays. To do such star,
switch to Shape
tool (U), choose Polygon, set sides = 4, then open Options
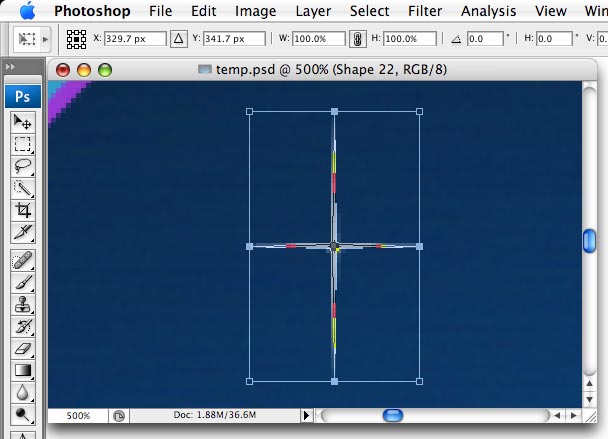
dropdown window, check Star, and set Indent sizes to 90-97%.
proportions), then
transform (Ctrl-T) to squeeze horizontally a little bit.
Pen tool! Apply same effects as to hair layer.
add a dot with white soft brush….
each color.
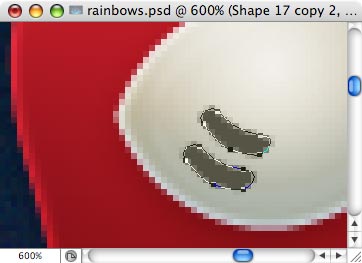
layers, with layer effects applied to each layer. Here is the shape of the body
(made with Pen tool).
Gradient overlay (black-to-white, radial, overlay 30-40%)
another shape in Substract mode, made with Pen). Add the same layer effects as
to body layer.
effects, but change gradient type to Linear.
to Multiply, no layer effects.
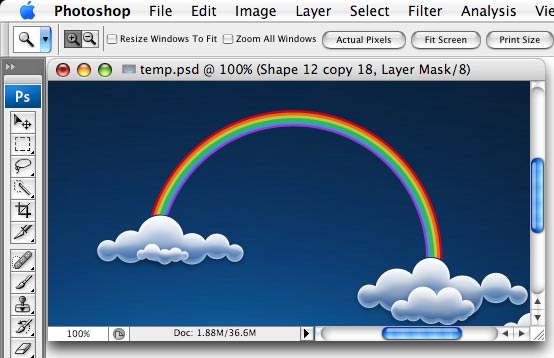
View full size Rainbow
Wallpaper
That’s all!
Thanks! I hope you found it
useful.
Author: Vlad Gerasimov
URL: http://www.vladstudio.com
Comments