Adobe Photoshop Elements 2.0 Pre-Beginner II.II
If you are going to be using Elements for anything more than quick edits of snapshots, you’re going to need (and love) the clone stamp tool. This tool used to be called the rubber stamp and most old timers still call it that.
Close the document that was used for demonstrating selections and layers. Don’t save. Go to File > New and choose Default Photoshop Size as before. Make sure Mode is set to RGB Color and for Contents, you have the White radio button selected. Click OK to create the new document.
Choose Edit > Fill. In the Fill dialog, from the Use menu, choose Pattern. Click on the Custom Pattern thumbnail to open the pop-up palette. From the palette menu, choose Nature Patterns. When that palette has loaded, click on the Leaves pattern. It’s the second thumb from the right in the top row (next to the Blue Daisies). Click OK to fill your document with the leaves pattern.
In the toolbox, choose the brush (formerly known as the paintbrush). It’s about half way down the left side of the toolbox.![]()
At the left end of its options bar, click on the brush thumbnail to open the brushes pop-up palette. Choose the Hard Round 19 brush (should be the last thumbnail in the first row).
Press the D key on your keyboard to restore the default colors and then press the X key to switch foreground and background colors. [Though I use capital letters for shortcuts, they are lowercase, i.e. you don’t need to press the Shift key.] White should now be your foreground color.
Click on five places on your document to add white spots anywhere on the pattern. Placement doesn’t matter. Just click once on five separate locations.
Click on the zoom tool in the toolbox to select it. It’s the last tool on the right side, just above the color squares.![]()
Click repeatedly on one of the white dots that you just added until you’ve zoomed in very close. A quicker way to zoom in is to press and hold the left mouse button and then drag a box with the zoom tool over the area that you want to zoom to. When you release the left mouse button, your screen will fill with the boxed area.
Click on the clone stamp in the toolbox to select it. It’s near the bottom of the toolbox, on the left side just above the hand tool.![]()
Note that the clone stamp is grouped with the pattern stamp tool. Their icons look very similar, but the pattern stamp only paints with patterns. Be careful not to pick it instead of the clone stamp. You can tell the pattern stamp’s icon by the little bit of checkerboard on its left side. Don’t pick the one shown below; pick the one shown above.![]()
Once you have the clone stamp selected, deselect the Aligned option on its options bar. Check (select) the Use All Layers checkbox. For details on what those choices do, please see my page on the clone stamp in the Tools section of this Web site.![]()
Click on the brush thumbnail at the left end of the options bar. Make sure the Default Brushes palette is chosen from the menu at the center top of the pop-up palette. From that palette, choose the Soft Round 9 brush. It should be on the left side of the second row with the number 9 under the thumbnail. If you’re not sure which brush that is, hover your cursor over the brush thumbnails to see the brush names in the tool-tip.
Open the Layers palette (Window > Layers). Click on the New Layer button at the bottom of the palette.![]()
Once the new layer appears, double-click directly on its name (Layer 1) and name it to something descriptive such as “My Clones.” Make sure that layer is always selected in the Layers palette as you are cloning.
In the future, whenever you do clone edits to an image always, always, always do them on a separate layer. Then make sure you have Use All Layers checked on the tool’s options bar. By cloning to a separate layer you are free to make as many mistakes as you like without ever harming your picture. You can also turn off visibility for the clone edits layer to see how you’re doing. And if you make a big mess, you can delete the whole layer.
Look carefully at the white dot that you have zoomed in on. Pretend that this is an image that has been damaged. You need to remove the white spot and make it look like it was never there. To do this, you need to copy bits of the surrounding picture and use them to cover the spot.
Find a spot next to the white dot that looks like it was the same color and texture as the part of the image that is covered by the white spot. Press and hold the Alt key and click on that color. When Alt-clicking with the clone stamp, you’ll see a special crosshairs cursor. The Alt-click is the copy step of clone stamping. You always start by Alt-clicking to pick up your ‘sample.’ The sample is the bit of copied image data that will be applied to cover the blemish (the white spot).
Release the Alt key. Move your cursor over the white spot where you think the color that you just clicked on should be applied. Left click to apply the copied data to the spot. While you can stroke (press and hold the left mouse button as you drag), I recommend that you always use clicks to apply your clone edits. If you want to cover a larger area, use a bigger brush. Resample (Alt-click) often to avoid visible repetition of the same copied spot.
This leaf pattern is not an easy picture to clone over. It’s filled with lines and abrupt color changes. If you can do a good job of covering your white spots, you are doing very well. Take some time to practice. Remember that the clones are on their own layer. You can use the eraser to remove mistakes (or use Undo).
When you are trying to cover an area that looks like it would contain the continuation of a hard edge or line, try to Alt-click so the copied hard edge crosses exactly the center of your brush cursor’s circle.
Then when you click to apply, make sure the center of the brush cursor edge lines up with the existing line end.
By centering the same part of the brush circle on the line end and applying the sample, you can continue the edge in a convincing manner.
Ideally, for cloning, you want to use a brush that is not as hard as the default hard brushes in the pop-up palette, and not as soft as the soft ones. The former have Hardness of 100 % and the latter’s Hardness is 0 %. In Elements 2, you don’t have access to the Hardness settings while using any tool other than the brush, but you can use the keyboard shortcuts of Shift with the square bracket keys (to the right of your P key on the keyboard) to change brush hardness. Shift with the left bracket softens; Shift-right-bracket hardens. There are three intermediate hardness settings that you can get with this shortcut combo (so pressing the shortcuts four times gets you to the other extreme of hardness/softness).
A very soft brush loses texture and detail in the copied image data. A very hard brush leaves visible round edge marks when you apply your clones. The last topic in this tutorial is vector objects. When you open a digital image that you have scanned into your computer or uploaded from your digital camera it’s a raster image. Your computer has recorded the color data (hue, saturation, brightness, and color depth) for each pixel as well as its exact location in the array of square pixels that make up the rectangular file image file.
There are a number of compression schemes that can be used to try and make the recording process more efficient (for example the computer can look for blocks of pixels that are colored the same and record the block rather than each pixel within it) but in general, image files are relatively large, often very large depending on the pixel dimensions and amount of detail in the picture.
When you use Elements’ painting or editing tools to alter the color data, your computer duly updates its records for each affected pixel.
If you change the number of pixels in your file by making your document’s pixel dimensions larger or smaller, your computer has to invent (by a best various “best guess” techniques known as resampling) what the color data should be for the added pixels or which pixels to throw out when subtracting pixels. Depending on the degree of resizing, this can result in significant loss of quality in your picture.
Vector objects are entirely different. In Elements, all of the shapes found in the shapes tool group (fourth tool down on the left side of the toolbox) as well as type created with the type tool (fourth tool down on the right side) are vector.
Each vector object is recorded as a discreet unit. Your computer saves a mathematical description of the outline of the object, and a definition of what is used to fill that outline. Fill can be a solid color, a gradient, or a pattern (use Layer > Change Layer Content to get gradients or patterns). As with the outline, the fill has to be something that can be generated from a logical description. Vector files are basically blueprints from which an object is built on demand.
Because the outline is mathematically generated, it is hard edged; it cannot have any blurriness at the border. A color is either in the shape or not in the shape. There is no in-between.
For regular geometric shapes, for example, a red circle, when saved on your computer, a vector file is tiny. It contains only the definition of the outline (draw a circle of X diameter) and a description of the fill (fill with RGB colors of 255,0,0).
If you resize a vector object, it never loses quality. The only thing that is changed is the mathematical description of the objects dimensions. The outline is redrawn and the new, resized object filled with the same color. And the file size remains tiny.
If you think about what I’ve just told you, you’ll understand why the painting and editing tools as well as filters and most of the image edit commands in Elements will not work on vector objects (on type or shapes). In a vector object, the color and position of individual pixels is not recorded. The only description in the file is of how to generate the outline, and what fill should be “poured” into that outline. If you use paint or edit tools, you would be asking Elements to alter individual pixels within the object. Elements doesn’t know anything about individual pixels within the shape. It knows only about the outline and the kind of fill.
If you still have your clone document open, zoom back out to 100 % by double-clicking on the zoom tool’s icon in the toolbox.
With your clone edit layer selected in the Layers palette, choose Edit > Fill and choose White from the Use menu. Click OK.
Press the D key on your keyboard to make black your foreground color, then choose the shape tool in the toolbox. It’s the fourth one from the top on the left side of the toolbox. On its options bar, choose the ellipse. Then click on the ellipse icon at the extreme left end of the options bar. Choose Reset Tool from the menu that appears.![]()
Drag a nice big ellipse on your document. Creating a shape is the same as creating a selection—drag diagonally across the dimensions of the desired ellipse.
When you first create a shape, it is selected. A selected shape has a slightly iridescent outline (though it doesn’t show color against the black that I’ve used) and is jagged looking.
If you’re using one of the more complicated custom shapes, it’s easier to see what you’ve got if you deselect (click on another layer). The edge ‘grittiness’ will then go away.
To reselect a shape, you use the black arrow that is part of the shapes group (find it on their options bar or from the flyout in the toolbox).![]()
To select type, use the type tool as you would in a word processing application.
The other selection tools (the lassos, marquees, magic wand or selection brush) have no effect on vector objects. They ignore regular ‘marching ants’ selections. You cannot alter any limited part of a vector object. You can only alter the whole object. So what’s the point in using the black arrow? You can transform a shape by selecting it, and then choosing Image > Transform Shape. Using the transform bounding box, you can size, and distort the object.
Also, if you create more than one shape on a single layer, you can use the black arrow to select one of the shapes in order to reposition or otherwise transform it. Find out more about shapes on my shapes page in the Tools section.
If you try to edit a shape with any of the regular tools, you get an alert asking if you want to Simplify the layer.
You get a variation of that message if you try to use any of the tools or filters on a type layer.
If you click OK, your vector shape layer that you can see in the Layers palette with its sharp outline—![]()
—will be turned into a regular raster layer that can be edited like any other image layer, but which loses the vector advantages of resolution independence, crisp edges and small file size.![]()
As written in the type alert, shown, you also lose the ability to edit your type. Once simplified (or rasterized), your computer sees the type as just a bunch of colored pixels, not letters and words.
There’s one last peculiarity that I’ll mention about vector shapes and type. You can’t ever really get rid of them except by deleting their layer. To demonstrate, choose the crop tool in the toolbox. It’s the third tool from the top on the right side of the toolbox.![]()
Drag a crop box that includes only a part of the vector ellipse that you created a moment ago. Click the big checkmark on the crop tool’s options bar to accept the crop.
If your shape has been deselected, click with the black arrow on what you can see of the shape in the image frame to reselect it.
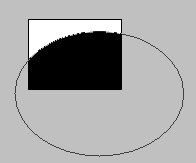
Now, click on the bottom right corner of your document window and drag to enlarge it so you can see the gray area outside the image area. The shape is still there, in its entirely. Even if you use the move tool to drag the shape completely out of the image and drop it in the gray area, out of sight, it’s still there.
If you deselect it, you can’t see it, but it’s still there. Don’t believe me? Try it. Use the move tool to drag your ellipse completely out of the frame. Deselect by clicking on another layer in the Layers palette. Then choose the crop tool in the toolbox and drag a crop that completely surrounds your remaining image. Press both the Alt and Shift keys and drag outward on a corner handle of the crop box to enlarge box to be big enough to include where you think you dropped the shape (you won’t be able to see it at this point). Click OK to accept the crop (that’s a quick way to increase your canvas size). There is your shape, good as new.
Type layers are even more fun. If you crop them, they really look like they’re gone. Try adding some large type. Crop the image. Click on the remaining type with the move tool and drag it back into the image frame. Ah. It’s gone! You’ve succeeded. Check the Show Bounding Box option on the move tool’s options bar. Uh oh. The bounding box encloses all of the original type, even though you aren’t seeing the cropped part. Choose the type tool and drag over the empty part of the box. The cropped type pops back into sight, good as new (fun for idle minds).
Vector objects are like those monsters in horror movies that are never really dead. The only way to get rid of them is to kill the whole thing by deleting the entire layer. Then it’s gone. As I keep repeating, with vector shapes, it’s all or nothing.

Comments