Adobe FrameMaker Tutorial – Simple Graphics
Drawing
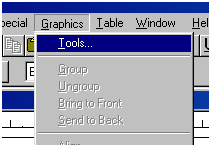
If the “Tools” window is not already open, open such by choosing the “Graphics” menu, and clicking “Tools.”
 |
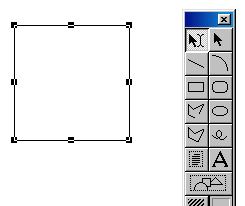
A tall window will appear. With these tools, you can draw things such as rectangles on your document. If you wanted to draw a rectangle, choose the rectangle tool, and click and drag in your document window. After you let go, it will appear. You can draw circles, lines, etc. with their respective tools. If you hold “Shift” (on the keyboard) when drawing an object, it will enlarge by keeping the sides equal (good for drawing things such as a perfect square).
 |
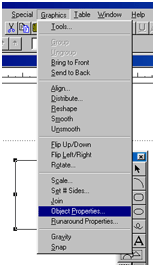
After you have drawn something, it should remain selected on-screen. While selected, go to the “Graphics” menu and choose “Object Properties.” You can manually adjust the height and width of the object you’ve drawn on this screen. You can also change the color, and other properties.
 |
If an object is selected, you can also drag the sides (with little squares) to as large or as small as you would like the object to be.
If your object is not selected, you must choose the arrow key (“Select Arrow”; see graphic) from the graphics toolbar. Once this is done, you can simply click on an object to select it.
To move the object, make sure it’s selected. Rather than dragging the squares, click on part of the object that is not a square to drag, and then drag it to the desired location.
Copying & Grouping Objects
Rather than trying to manually duplicate an object, you can do so by holding down the “Control” button on your keyboard, clicking on the object, and dragging away from it. You will see an exact copy of the object being dragged away.
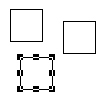 |
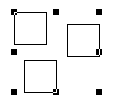
You may want to treat multiple objects as if they were one. This is useful if you want to move several objects at the same time to a similar location. To do this, select all objects you wish to group. After selecting one, to select one or more others, hold the “Control” key on the keyboard as you click them. You will see them all appear as “selected.” To group them, choose “Group” from the “Graphics” menu. Now, if you were to choose one of the objects, you will notice them all selected. They have been successfully grouped.
 |
Changing Object Properties
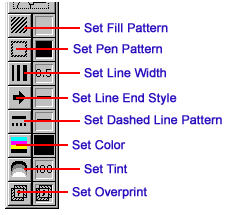
You can fill in your drawn objects with colors and patterns, if you wish. Select the object you wish to format. Now, pick the “Fill Style” pop-up menu from the graphics toolbar. If you wish to fill in with a solid color, pick the solid black choice. If you wish to fill with a pattern, pick one of those. You’ll notice the box next to the “Fill Style” menu changes to your selection; this is an easy way for you to see what choices you have made. This applies to all menus going down the side of the graphics toolbar. To change the fill color, select the color menu and pick the color you choose. The color will change according to the pattern you chose, as well. You can also change the line weight of your objects by using the respective menu.
 |
Important Note: At any point during your graphic/image work, FrameMaker may display things on the page in an odd manner, even though you may think you have placed them correctly. For example, an image may appear to be half-cut off after moving it. Try pressing “Ctrl+L” (hold the “Control” button on the keyboard, press the letter “L,” and let go of both). This “refreshes” FrameMaker’s display on the screen, and will probably fix the problem you may have.


Comments