
Adding Headers and Footers To Your Project
Adding Headers and Footers To Your Project
Headers and footers behave almost exactly like those in Microsoft Word. Use them to easily share a common layout in different project files. For example, you could use a header to display your corporate logo and company name, or a standard footer that contains copyright and contact information.
Following this template approach can be very useful because it means you don’t have to manually enter that information on every page, which can quickly become a disaster if you want to change that information in the future.
In the RoboHelp Project tab, you see a folder called Templates. You can double-click any of the templates to see an example. You might discover an existing template that works for your specific application, or you can create your own custom template to use with your project. In the following example, you create a very simple layout for the FlashFAQ project that (for the time being) contains a copyright notice.
- Right-click within the Templates folder in the Project tab.
- Select New Topic Template from the context menu.
- In the New Template dialog box, type FlashFAQ into the Name text field.
- Give the new template a description, or leave it at the default value of the template name.
- Click the Appearance tab and confirm that the style sheet is set to default.css.
- Click OK to apply the changes.
It is a simple process to define a header and footer for the newly created template:
-
Click the Create or Edit Footer button in the View toolbar.
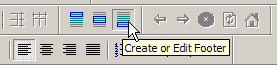

Figure 7. The Create or Edit Footer button
-
The main text is disabled, and you see a dotted box at the bottom of the current template. Within the text field, type the following text:
copyright 2004 – FlashFAQ
- With the text selected in the HTML editor, click the Align Center button in the formatting toolbar at the top of the application.
- Click the Apply Bold button to make the text style bold.
- Move the cursor to the beginning of the footer.
- Select Insert > Horizontal Line from the main menu to make the footer stand out a bit more.
If you want to tweak the layout, you can add images, links, or even change the source code directly using the TrueCode tab near the bottom right corner. For example, if you want to replace the copyright text with a copyright symbol, then switch to the TrueCode tab and replace the string copyright with © and then switch back to the WYSIWYG tab to see the modifications. To switch back to editing the template’s topic body, click the Edit Topic Body button in the View toolbar. Click the Create or Edit Header button to modify the header instead.
Now that you have a customized footer, you can apply it to all of your pages. Right-click the Introduction page and select Properties. If you deleted the Introduction page, then select any one of the other templates instead. Notice that the General tab has a menu called Template, which contains a list of available templates for this project. Select the new FlashFAQ template, and click the pair of glasses to the right of the menu to view the template. Or, click the Apply button to view this template applied to your currently selected topic page. After you’re finish reviewing the template, click the OK button to apply your changes and close the dialog box. Repeat the process to assign a template to the other topics that are currently in the project.
Click the TOC tab and click the Auto-create TOC in the lower left corner to Auto-create the table of contents again. Reorder the new pages after you create the table of contents. You can do this two different ways:
- Drag and drop them to the desired position
- Move them using the arrow buttons above the TOC pane
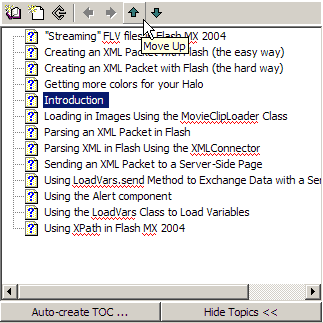
Figure 8. Reorder topics in the Table of Contents: drag the topics to their new position, or click the Move Up and Move Down buttons.
Once you’ve finished organizing the new pages, click the Save All button to save your project, and then click the Generate Primary Layout button to view your changes. When prompted, click the View Result button to view the project in your Web browser. All of the pages should now use the fancy default footer that you created earlier, and share the same cascading style sheet (CSS) file. Therefore, the entire site should have a consistent look.
Another interesting thing about the RoboHelp framework is that you can click the small black X in the contents frame to hide the navigation component (or in other terms, “hide the navigation frame”). This allows the actual topic page to use 100% of the page’s width, which makes it easier to read a help entry, tutorial, or article. If you click any one of the three main buttons (Contents, Index or Search), the navigation frame appears again. You can also make the navigation frame appear by performing a search from the top frame, and click the Go button.
If you want to modify a header or footer for your pages, you do not have to manually change every topic within the project. All you have to do is change the code for the header or footer, and these changes reflect in every topic that uses that particular template.
- In the Project tab, right-click the FlashFAQ template you created earlier.
- Select Edit to modify the template.
- Click the Create or Edit Footer button to modify the existing footer.
- Modify the footer by typing the text Print this Page either on a separate line or by typing it after the copyright notice.
- Select the text with your mouse after you type it in.
- Turn the text into a link. Click the Insert Hyperlink button (or Edit Selected Hyperlink button) from the Objects toolbar at the top of RoboHelp. Alternatively, you can select Insert > Hyperlink.
- In the Hyperlink dialog, add the following code into the Link to text field:
javascript:this.print();
Very simple! Generate the files again (File > View Primary Layout), and then test the new link in your browser to check that the code works.
If you want to track how many hits that some, or all, of the pages receive then you could add a counter to the footer. This counter lets you monitor the sections that are the most frequently visited, and other details about how the site is used. Adding most counters to websites is straightforward. You can find a basic counter such as Sitemeter (www.sitemeter.com) that lets you embed HTML and JavaScript code into your footer and check limited statistics on their web page. A more robust and professional solution is available using RoboHelp Office Pro. You can use the server technology included with RoboHelp Office Pro to analyze feedback reports about how your online documentation is used, such as usage statistics, trends, and errors.
Comments