
Adding a Navigation Button to a Slide
June 28, 2006 | 0 comments
Adding a Navigation Button to a Slide
Without something to hold the playhead in place, the user will see the text for a couple seconds and then be dropped into the simulation. A navigation button would serve two useful purposes:
- Hold the playhead in place, thereby letting the user jot down the necessary information
- Navigate, when the button is clicked, to the next slide
Follow these steps to add a navigation button to a Captivate slide:
- Select Insert > Button to open the New Button dialog box.
- Select the Go to Next Slide item from the On Success pop-up menu.
- In the Button Type area, select Text Button from the Type pop-up menu.
-
Select the text in the Button Text field and enter Continue (see Figure 17).
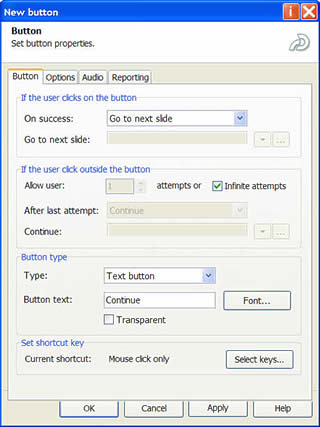
Figure 17. Setting buttons and their actions in the New Button dialog box
- Click the Font button to open the Font dialog box. Change the font to 12-point Arial Bold. Set the color to 128 Red. Click OK to close the Font dialog box.
- Click the Options tab. The only item that should be selected in the Options area is Pause Movie Until User Clicks. Deselect everything but that item.
-
Click OK. The button will appear on the slide. If the text does not seem to fit the button, select the button and drag the handles to adjust the button’s size (see Figure 18).

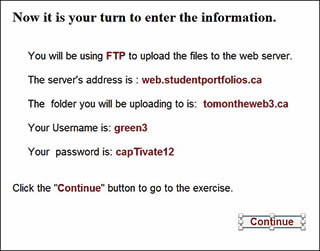
Figure 18. The complete slide; drag the handles on the selected button in or out to adjust a button’s size
- Save the file.
Comments