
Winter Postcard Design
This task we’ll learn how to create a New Year illustration, having just a picture with green grass and a girl’s picture. We’ll see how to use also several filters.
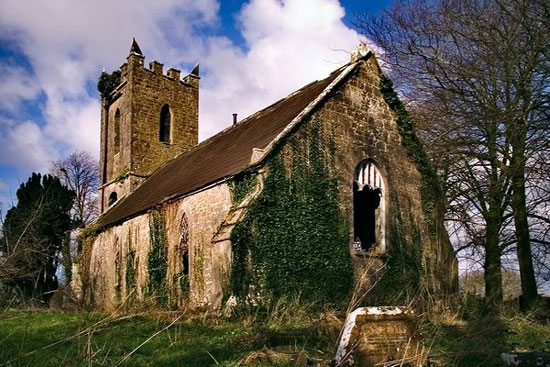
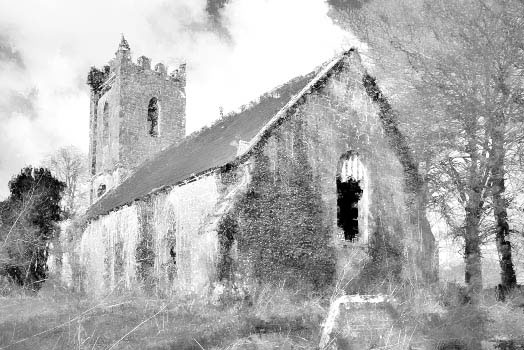
Open the picture with the grass landscape in a new window: File – Open (Ctrl+O).
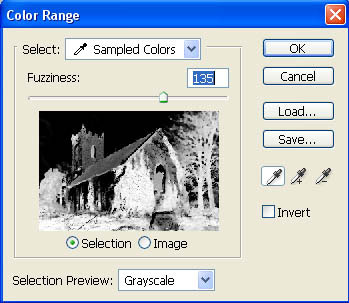
Apply next the command Select – Color Range to mark out the greenness on the picture by clicking on the eyedropper. The marked zone becomes white.
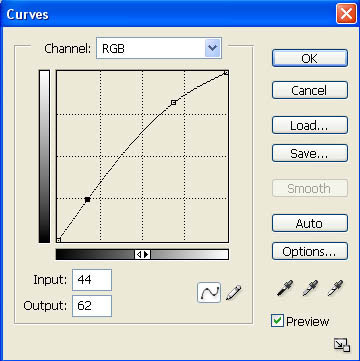
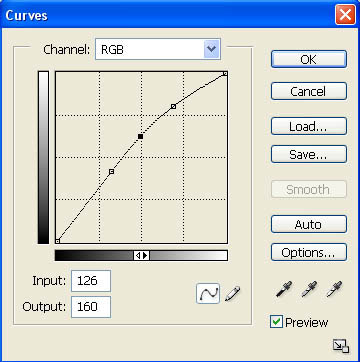
Decolorize the marked zone: Image – Adjustments – Desaturate (Shift+Ctrl+U) and increase its brightness and the contrast, making use of next selection: Image – Adjustments – Curves (Ctrl+M).

Erase then the markings with Select – Deselect (Ctrl+D)
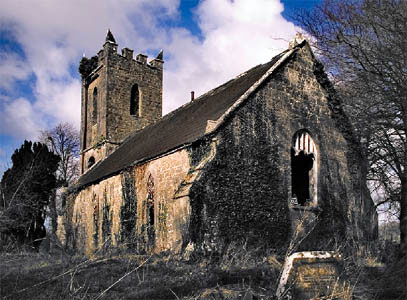
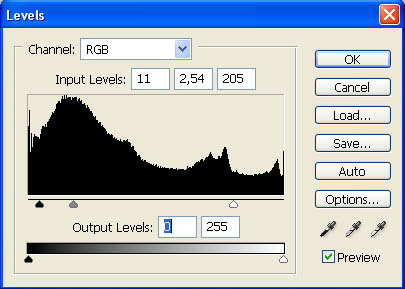
Make the picture look lighter with Image – Adjustments – Levels (Ctrl+L).
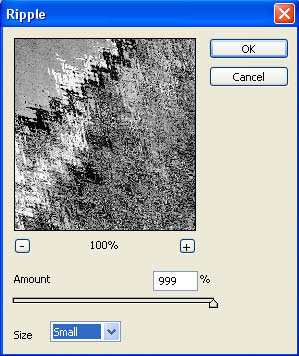
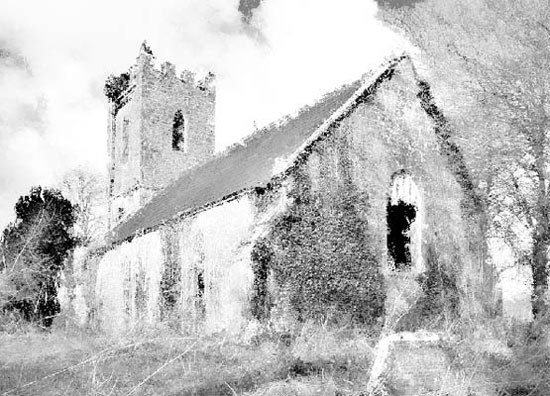
Decolorize next the entire picture: Image – Adjustments – Desaturate (Shift+Ctrl+U) and make a copy of it: Layer – Duplicate Layer (Ctrl+J). Apply to the copy a special filter (Filter – Distort – Ripple).
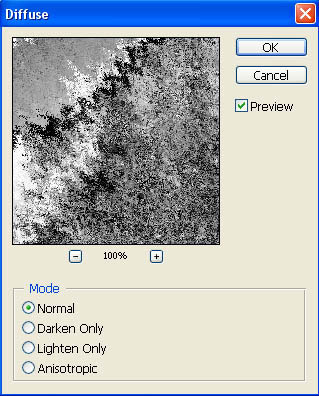
Then make use of another filter (Filter – Stylize – Diffuse).
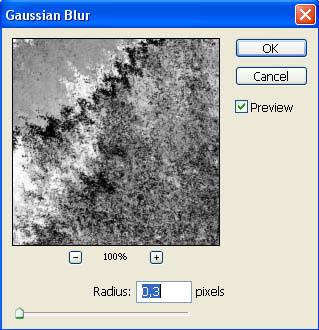
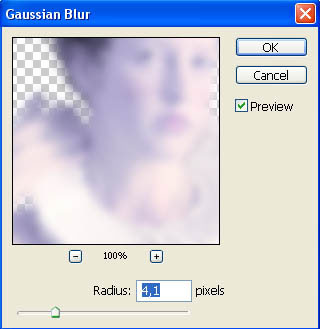
Blur it out a little, using Filter – Blur – Gaussian Blur.
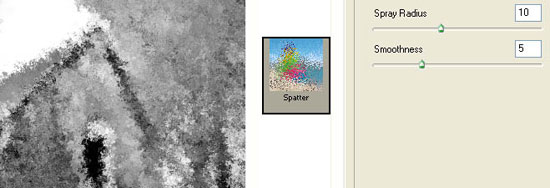
Apply another one: Filter – Brush Strokes – Spatter.
Now change the layer’s type on Lighten.
Make the layer look lighter with Curves.
After that you should combine two layers: Layer – Merge Down (Ctrl+E). Copy again the layer that you’ve got and change the copy’s type on Soft Light. Merge down the layers.
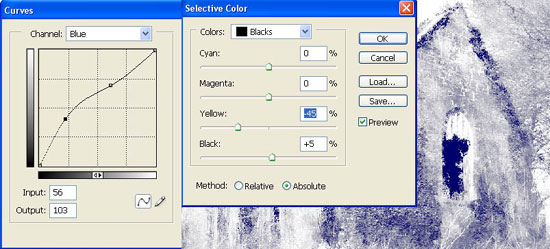
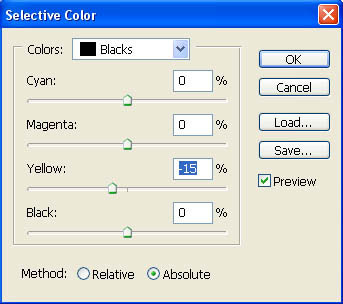
Introduce in the picture a blue nuance, making use of Image – Adjustments – Curves (Ctrl+M) and Image – Adjustments – Selective Color.
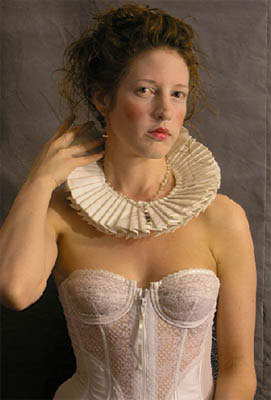
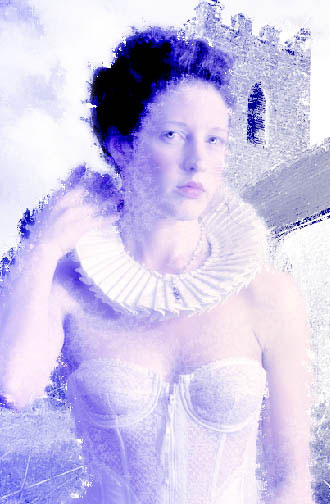
Now you have to add the girl’s picture.
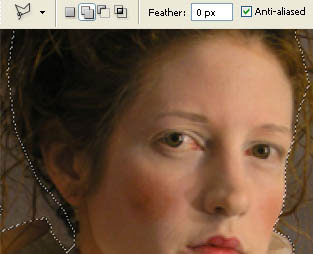
It’s necessary to open it in a new window, to mark it with Rectangular Marquee Tool and to copy it with next selection: Edit – Copy (Ctrl+C). Get back now to the file with the processed picture and insert it on a new layer: Edit – Paste (Ctrl+V). Mark out now the girl’s image along her contours, having Polygonal Lasso Tool. The hair must be marked out just as a common mass.
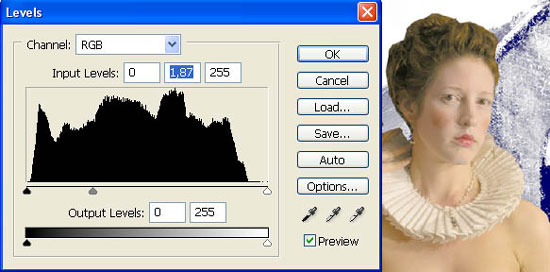
Copy (Ctrl+C) and insert it on a new layer (Ctrl+V). The previous layer must be erased applying the fast button on Layers window. Increase the brightness too (Levels).
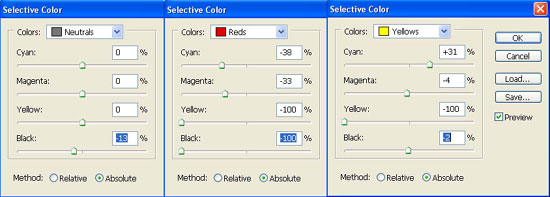
Change the colors now: Image – Adjustments – Selective Color.
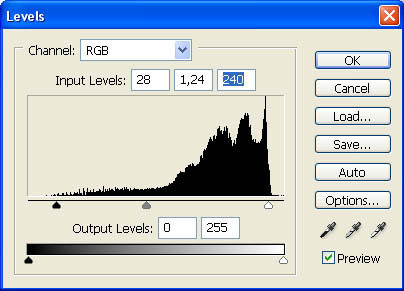
Levels again:
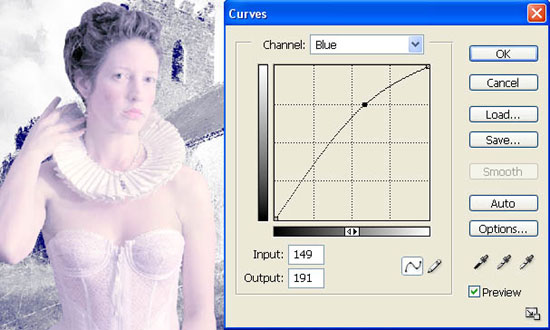
The last changing of the colors must be done with Image – Adjustments – Curves (Ctrl+M).
Copy
now the girl’s layer and process the picture applying the filters. It
must be done the same way we did with the background, without changing
the adjustments:
1) Filter – Distort – Ripple
2) Filter – Stylize – Diffuse
3) Filter – Blur – Gaussian Blur
4) Filter ? Brush Strokes ? Spatter
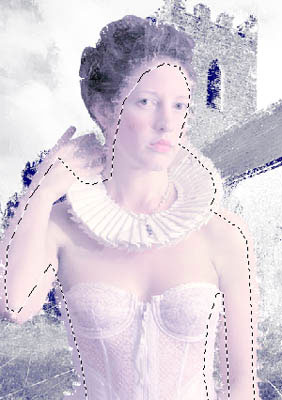
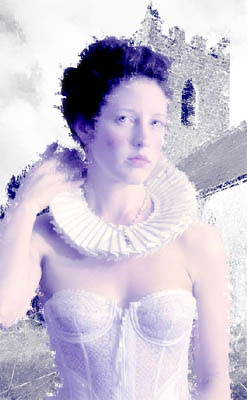
Mark out the girl’s skin on the new layer and deviating a little from the edges (Polygonal Lasso Tool), erase it with the Delete button on the keyboard.
Erase the markings now. After that you should decolorize the eyes with the Dodge Tool.

Copy the layer with the girl and blur out this copy (Gaussian Blur).
Change the copy – layer’s type on Color Burn.
Combine the layers with the girl now (Ctrl+E).
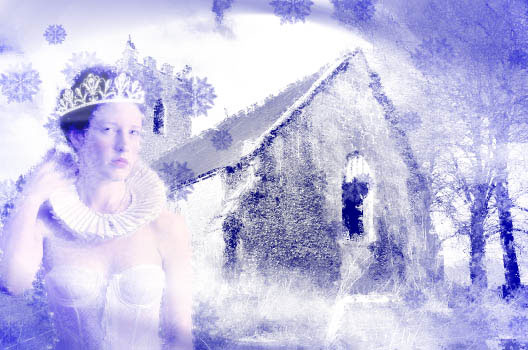
Having the Gradient Tool on a new layer, the corners must be darked out.
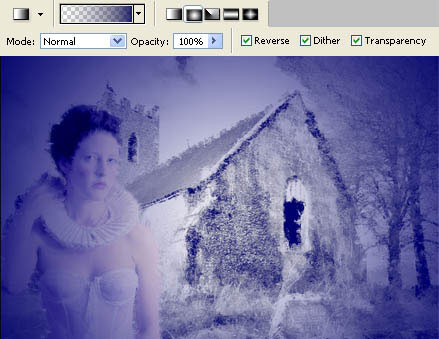
Change the layer’s type on Color Dodge. Create a new layer above the girl and group these two layers: Layer – Create Clipping Mask (Ctrl+G). Try to represent on the girl several snowflakes, having the Brush Tool (it’s possible to download them here: http://www.deviantart.com/deviation/13486710/ ?qo=22&q=snowflakes&qh=in%3Aresources%2Fapplications%2Fpsbrushes+sort%3Atime)
Change now the layer’s type on Soft Light and combine it with the girl’s layer (Ctrl+E).
Now we have to renounce to the black patches on the girl’s hair: Selective Color.
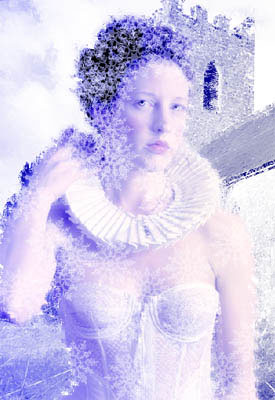
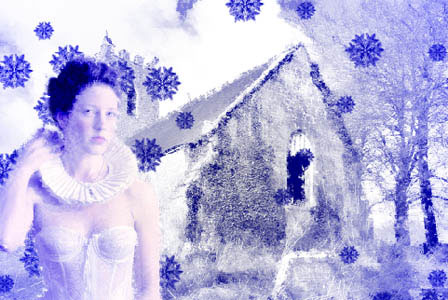
Represent
on a new layer that must be situated upper than all the rest, the
snowflakes colored in blue-dark and situate them on the entire
background. If the snowflakes’ color is not intensive enough, you just
have to copy their layer.
Minimize the Opacity of the snowflakes till 44%. Represent then on a new layer, above the girl’s one a crown, having a ready brush too. Download it here: http://www.deviantart.com/deviation/25594369/ ?qo=7&q=by%3Aspiritsighs-stock&qh=sort%3Atime+-in%3Ascraps.
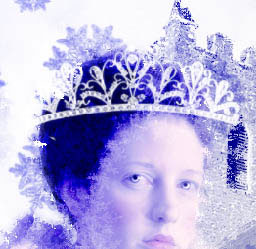
Correct its size, using Edit – Transform – Distort.
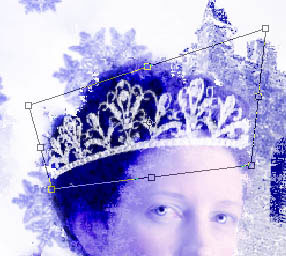
Copy now the layer with the crown (Ctrl+J) and blur out the copy (Gaussian Blur) just to make it shine.

Applying now the Brush Tool, represent several wavy stripes on a new layer.
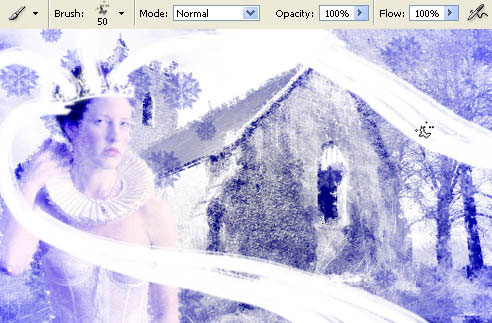
Blur them out on the given direction with next command: Filter – Blur – Motion Blur.
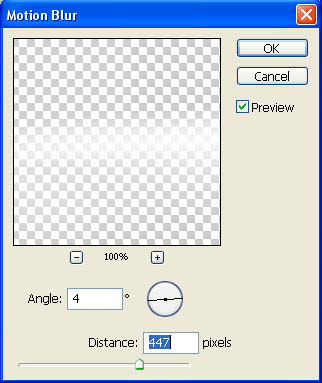
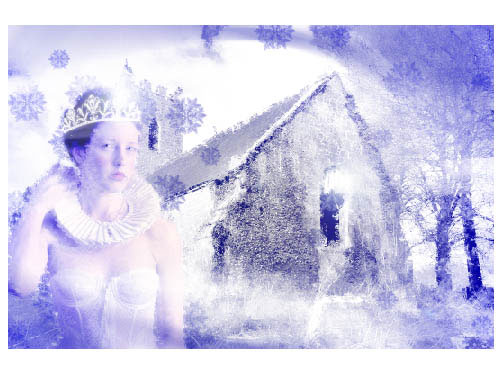
Represent now on a new layer dark rounded corners.
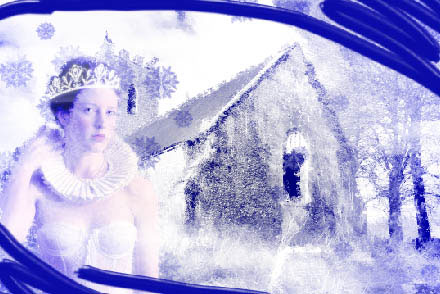
And blur them out along the circle’s trajectory with Filter – Blur – Motion Blur.
Combine now all the layers: Layer – Merge Visible (Shift+Ctrl+E).
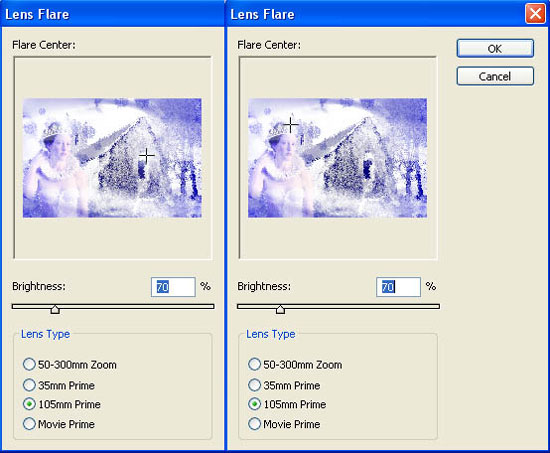
Add two flares now on the crown and on the house’s window: Filter – Render – Lens Flare.
Insert the picture now in a frame that is possible to create with the Crop Tool and Paint Bucket Tool.
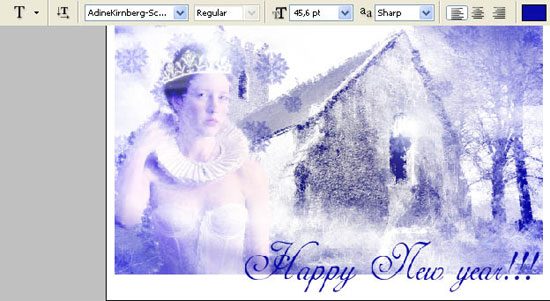
Choosing Horizontal Type Tool, introduce the text on the illustration:
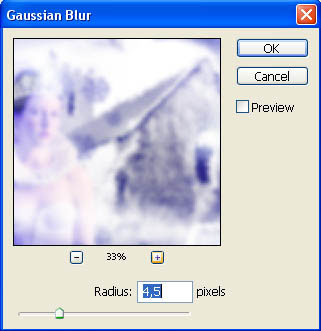
Copy the layer with the text and blur out the copy (Gaussian Blur). Merge down these two layers (Ctrl+E) and change the type of the new layer on the Color Burn. Merge down again all the layers (Shift+Ctrl+E), Make a copy of the new layer and blur out the copy.
Minimize the Opacity of the copy-layer till 18%.
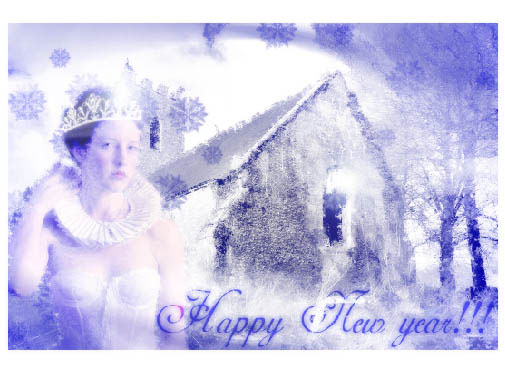
Finished!
Made by Sigma
Comments