
Web Hosting Layout

Next step includes adding a kind of flare on the previous layer.
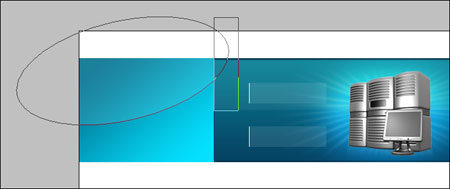
Using the following tool  , stretch out the white ellipse (Fill 10%). Then choose next tool
  to place the figure exactly the same way it is done below by keeping pressed the Alt button.
This way we’ll erase the unnecessary part of the ellipse. After that, take the next tool  to draw a stripe of 1 px thickness on the right vertical surface.
The second stripe with 2 px thickness (colored in 03ADC5) must be drawn on the lowest horizontal surface.
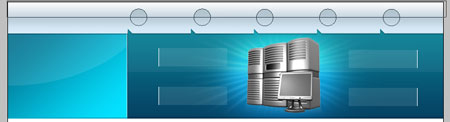
Get to representing the upper part of the web-site, where must be included the Main Menu. Using the next instrument  , create the next figure that you may see below.


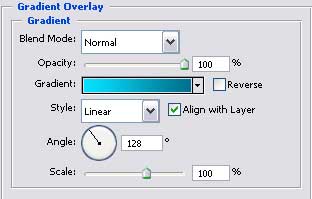
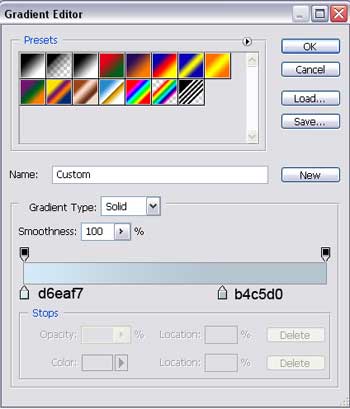
Gradient’s parameters.
Next step includes creating a new rectangle with usual instrument . Having the next tool and keeping pressed the Alt button, you may cut out an orifice in that rectangle.
Comments