
Tinsel Picture
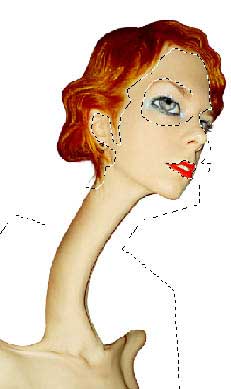
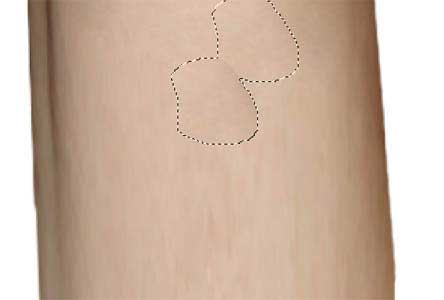
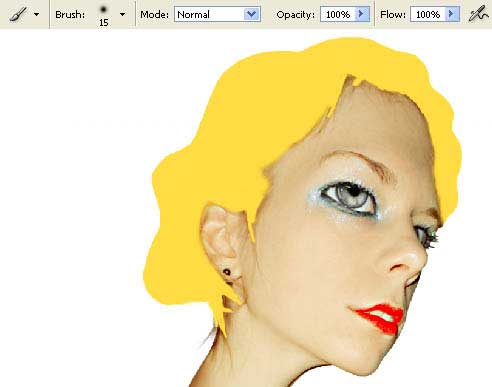
Choose the Polygonal Lasso Tool to mark out the girl’s skin.
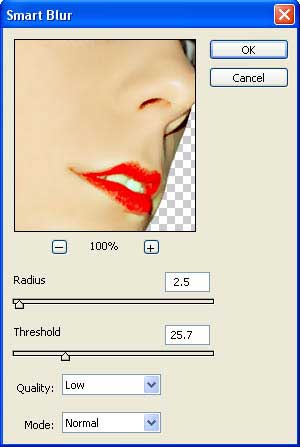
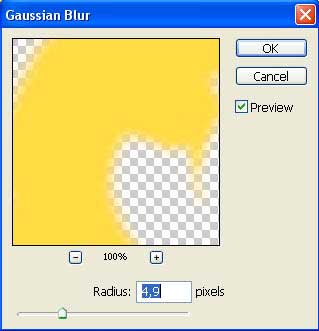
Apply the filter for the marked place: Filter – Blur – Smart Blur.
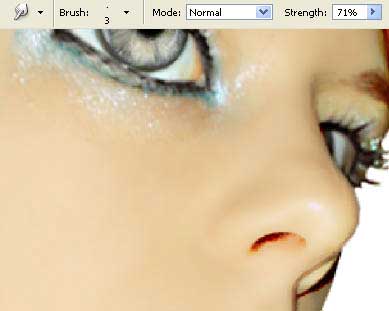
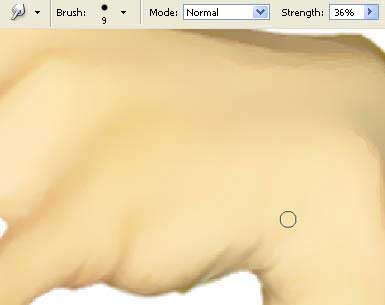
Because we’ve got in several places some sharp lines when using the filter, we need now to use the Smudge Tool.

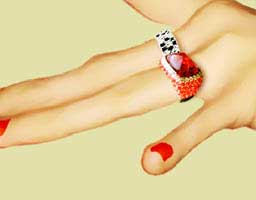
On a new layer must be inserted a cut arm from another picture.
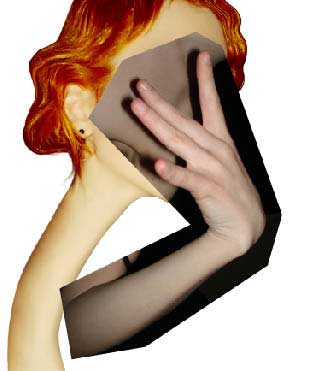
Place it on the necessary place with Free Transform (ctrl+t) and Edit – Transform – Distort. Then in the Liquefy window we have to distort this element by applying the Turbulence Tool.
Give to the arm the same color and texture, like the girl’s skin.
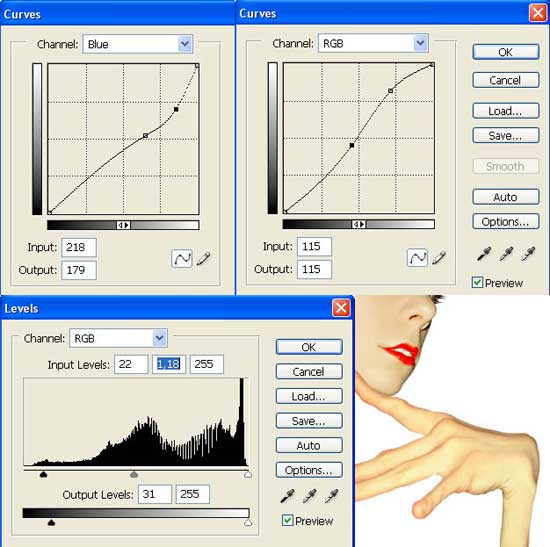
We need to choose first: Image – Adjustments – Levels (ctrl+l) and Image – Adjustments – Curves (ctrl+m).
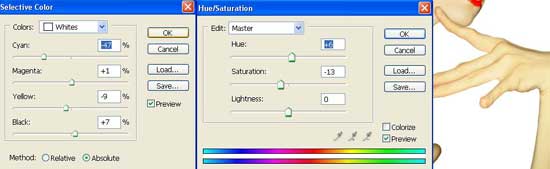
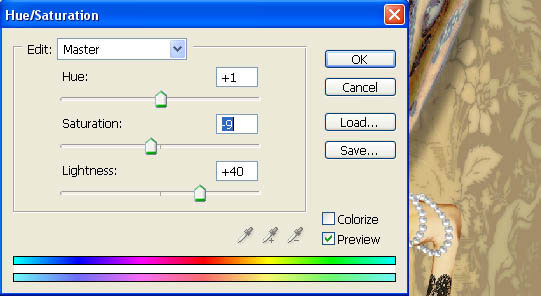
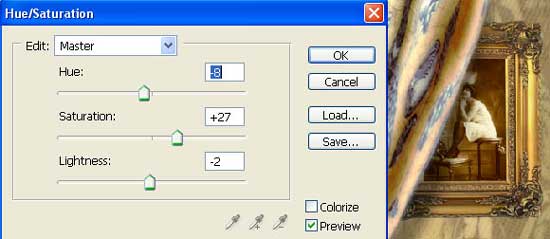
Then: Image – Adjustments – Selective Color and Image – Adjustments – Hue/Saturation (ctrl+U).
Apply the filter also on the arm’s layer: Filter – Blur – Smart Blur. The sharp lines must be painted too.
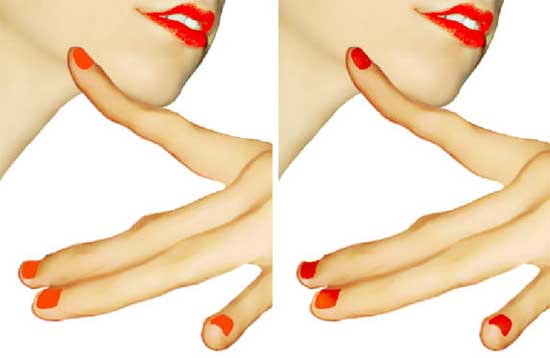
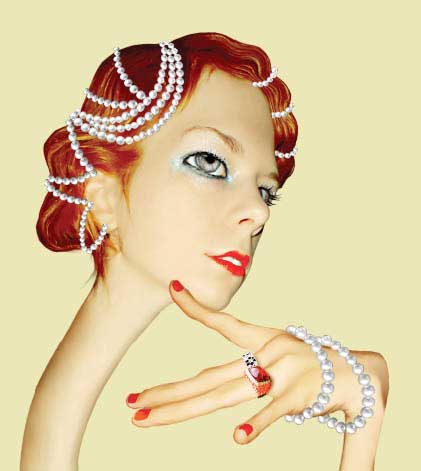
On a new layer choose the Brush Tool to paint the nails. Change the blending mode of this layer on the Color Burn.
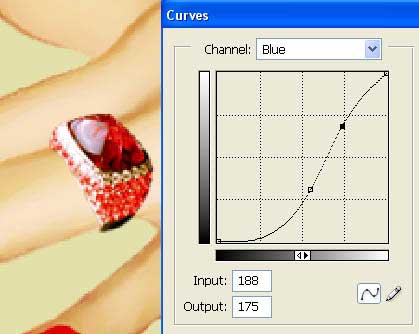
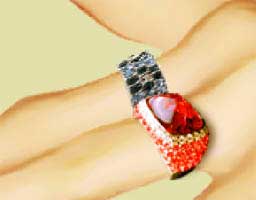
Insert on a new layer the cut ring from another picture too.
Place it on the girl’s finger (Free Transform ?? Distort).
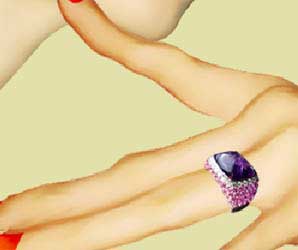
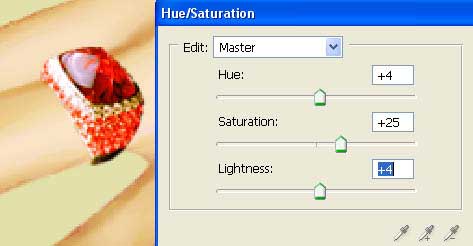
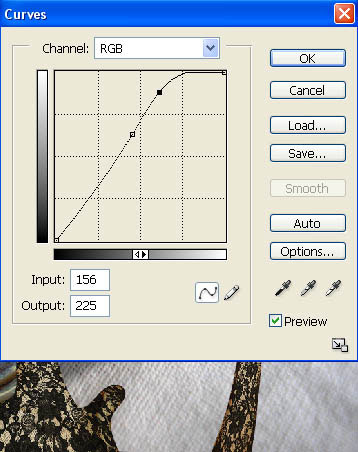
Change its color by using the Curves (ctrl+m).
And Hue/Saturation (ctrl+u).
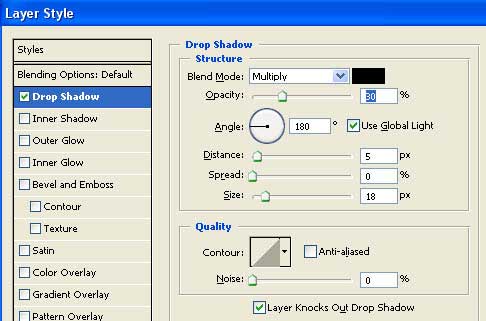
Represent now the ring’s shadow with Layer – Layer Style – Blending Options, choosing the Drop Shadow.
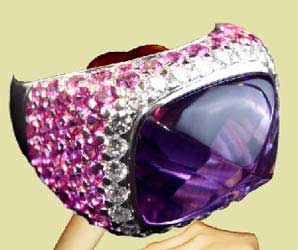
Insert also the picture of another ring.
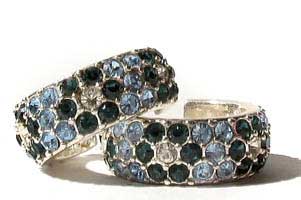
Place it on the girl’s finger.
Decolorize it: Image – Adjustments – Desaturate (shift+ctrl+u) and increase the brightness and the contrast by using the Curves (ctrl+m) on RGB option. Add the ring’s Drop Shadow too.
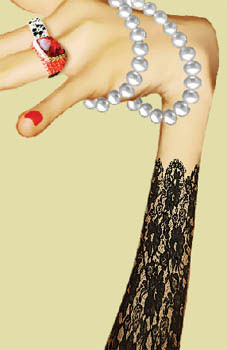
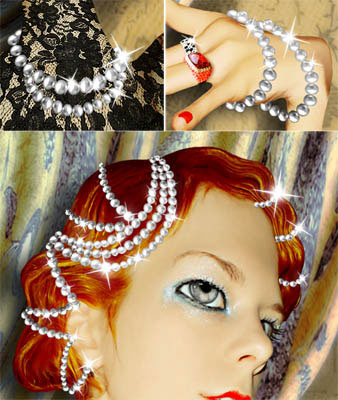
Take a picture representing the pearls.
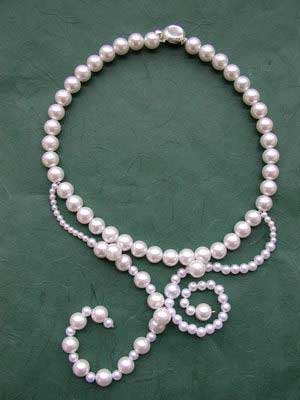
Cut
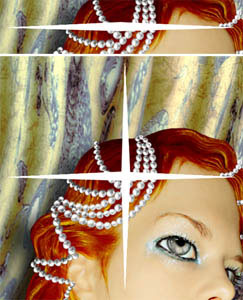
out from the picture the pearls. Turn them around, changing their size
and the distorting level. Adorn with the pearls the girl’s hair and the
arm. Correct their brightness and the contrast (Levels). Don’t forget to use the option Filter – Sharpen – Sharpen.
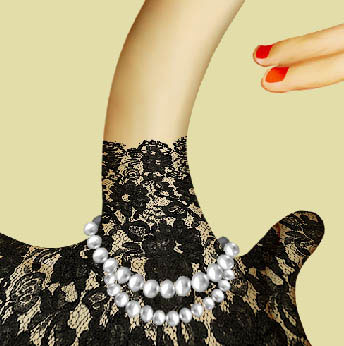
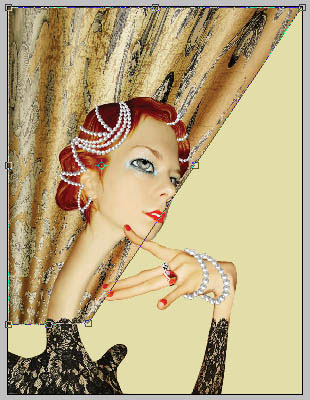
Next step includes inserting the lace’s texture above the girl’s layer.
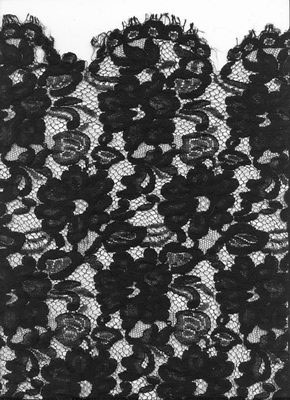
Group out both layers (ctrl+g) and increase the laces’ contrast (Levels). Correcting its size (ctrl+t), try to place it the way to look like a sleeve. Change the layer’s type on Multiply and apply the shown option: Filter – Sharpen – Sharpen.
Insert the lace on the girl’s body too, by distorting it with Edit – Transform – Perspective.

Represent on her neck the pearls’ beads.
Pass
to representing the blind on the back background. We need for this to
insert on a new layer (ctrl+n) the necessary textile’s texture.
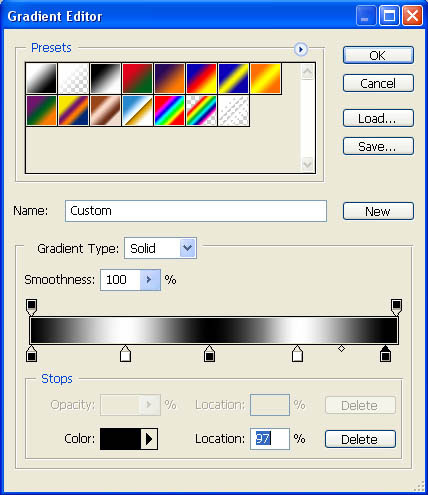
Create above it a new layer and paint it out with the Gradient Tool with the next adjustments:
Change the layer’s type on Soft Light and combine the layers. Insert the new picture that we’ve got under the girl’s layer, correcting its size (ctrl+t).
Distort it a little with the next selection: Edit – Transform – Distort.
Choose the Turbulence Tool in the Liquefy window.
Distort the blind more with the Distort option.
Now
we have to increase the number of the folds on the blind. Just copy the
blind’s layer and change the placement’s angle and the copy’s size
(ctrl+t), Then place it close to the folds that we already have on the
previous layer (that was possible to do exactly after the textile’s
placement under the girl’s layer). Combine the layers with the blind’s
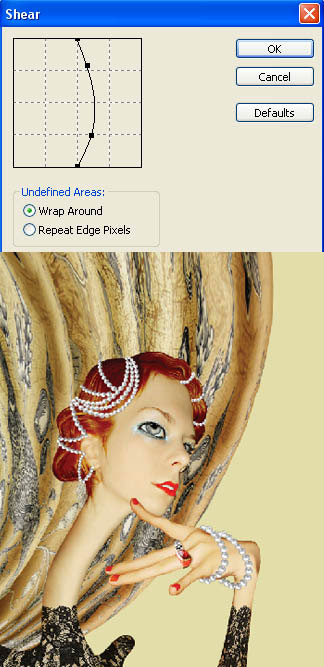
parts and apply the next filter (Filter – Distort – Shear).
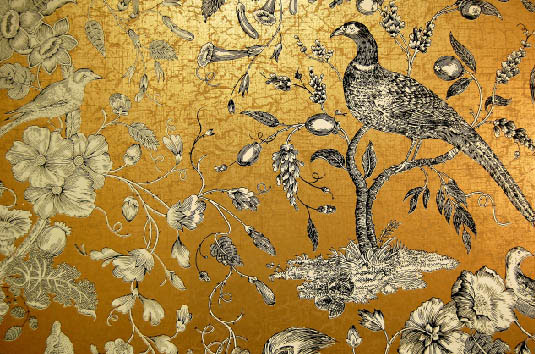
Choose now the picture of the wallpapers.
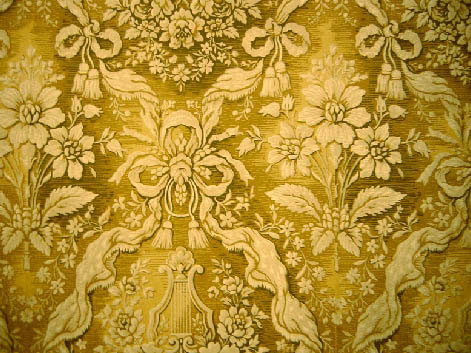
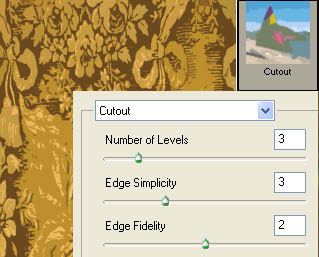
Correct the brightness and the contrast (Levels) and apply the necessary filter (Filter – Artistic – Cutout).
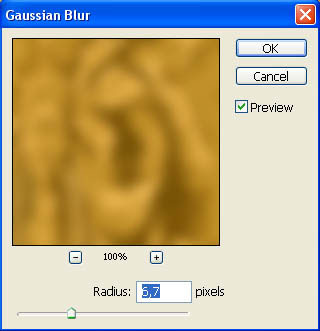
Copy this layer (ctrl+j) and blur out this copy: Filter – Blur – Gaussian Blur.
Change the layer’s type on darken and merge down the layers.
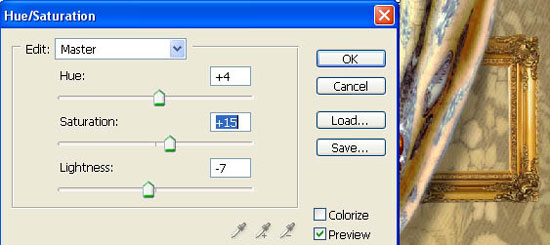
Correct after that their color by using Hue/Saturation (ctrl+u).
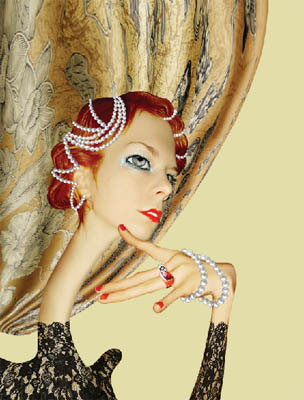
Above the wallpapers’ layer must be introduced the textile’s texture.

Correct again the brightness and the contrast (ctrl+m).
Change the layer’s type on color Burn and minimize the Opacity till 40%. Make use of the Blending Mode to add the girl’s Drop Shadow to the blind.
Get to represent the flare. First we need to picture a figure with Rounded Rectangular Tool, which half must be erased. The rest of it must be distorted with Edit – Transform – Perspective.
Copy the new layer (ctrl+j) and turn it around horizontally: Edit – Transform – Flip Horizontal. Combine these layers after that (ctrl+e), make a copy after that and turn it around with next selection: Edit – Transform – 90 CW.
Merge
down the flares’ parts (ctrl+e) and make a copy of the layer (ctrl+j).
Minimize the copy and turn it around (ctrl+t).Represent then a circle
in the middle of the star on a new layer. You have to use for this the Ellipse Tool (you’ll get an equal circle by keeping pressed the Shift button).
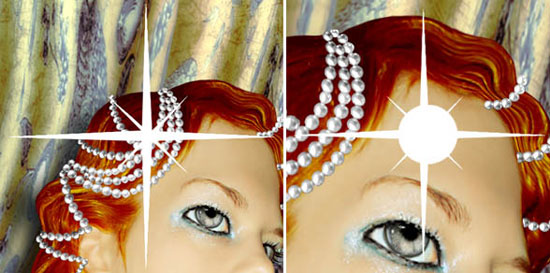
Blur out the circle (Gaussian Blur) and merge the flares’ parts. The new layer must be copied and the copy blurred out.
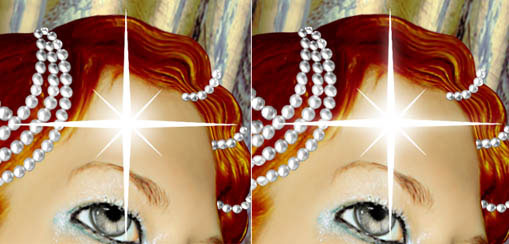
Combine
again the flares’ parts. Then copy many times the layer and change the
size of the copies and placement’s angle (ctrl+t). Place the flares on
the ornaments. To make the brilliance more intensive, we have to merge
down all the layers containing the flares (ctrl+e). Copy the new layer
and blur out the copy (Gaussian Blur).
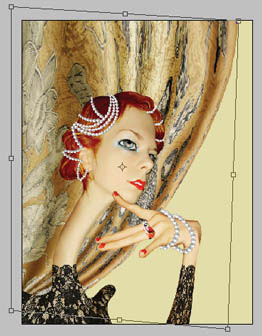
Choose now the picture of a pretentious frame.
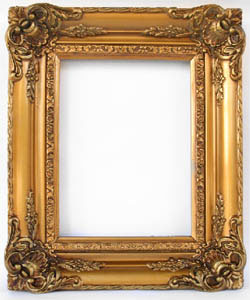
Erase its background and place the frame above the wall’s layer. Correct its color with Hue/Saturation (ctrl+u).
On the layer, under the frame, must be inserted an old picture.
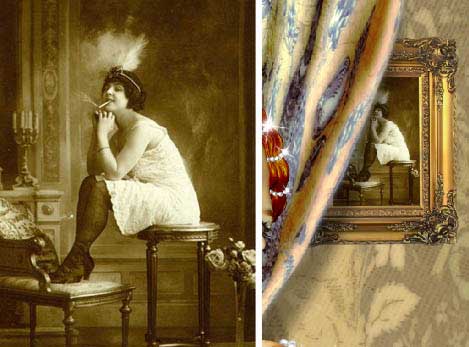
Correct its color (ctrl+u).
Add after that the frame’s Drop Shadow in the Blending Options menu?
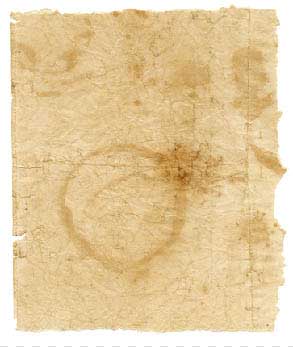
Above the frame’s layer introduce the texture of an old and dirty paper sheet.

Change the layer’s type on Multiply.

Merge down all the layer now: Layer – Merge Visible (shift+ctrl+e) and insert on a new layer the picture of a paper with unequal edges.
Erase
the background it is situated on. Then place the layer lower than the
picture’s layer. Group these layers (ctrl+g) and create a new layer
lower than the rest of them. It must be painted with the Paint Bucket Tool.

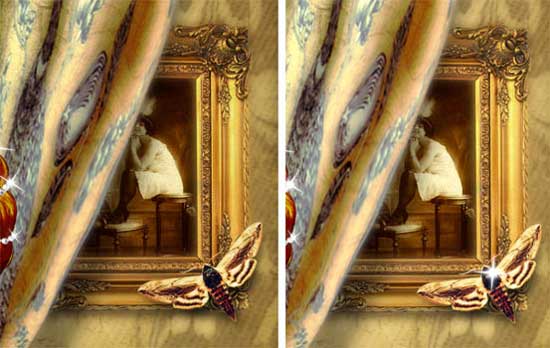
On a new layer introduce a butterfly’s picture.

Cut
it out, minimize its size and turn it around (ctrl+t). Correct the
brightness and the contrast (ctrl+l). Add after that the butterfly’s Drop Shadow and a flare on it.
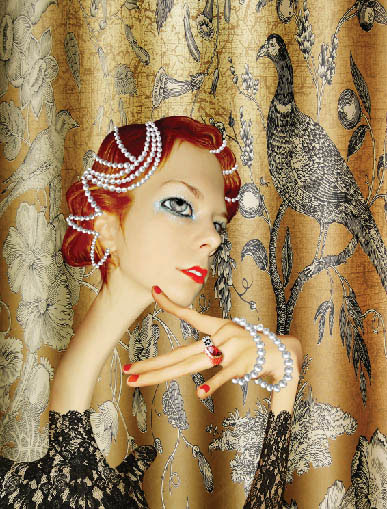
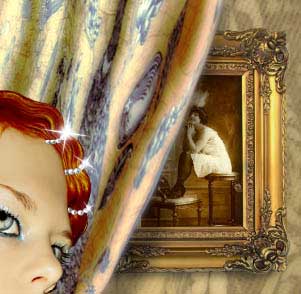
That’s it, the illustration is finished!
Finished!
Made by Sigma
Next lesson we’ll learn to distort
and lengthen the figures, create the effect of “plastic” skin, create a
blind of textile’s texture. We’ll see how to represent the flares, to
make the picture look older and to work with the layers and textures.
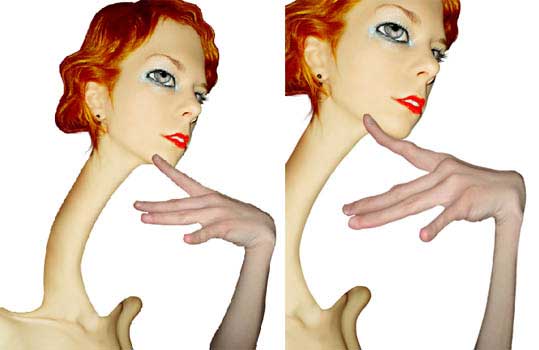
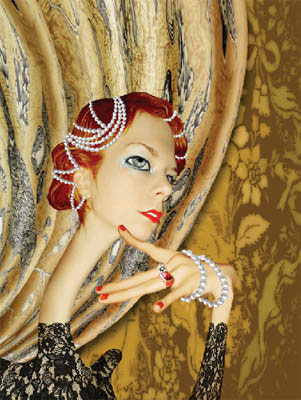
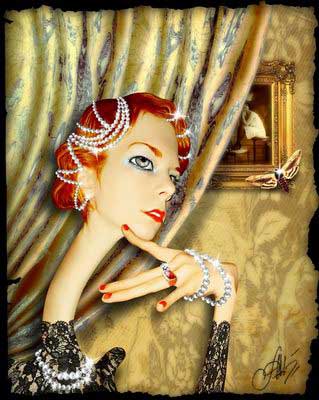
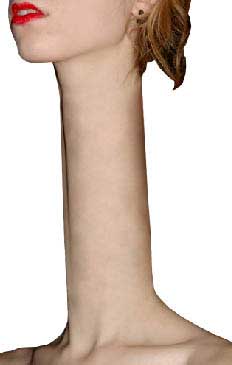
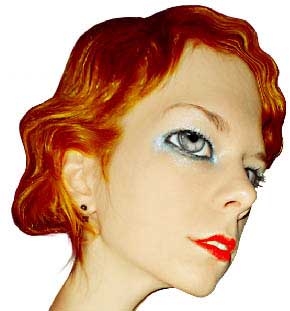
Before: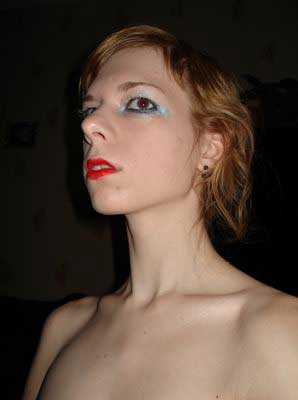 |
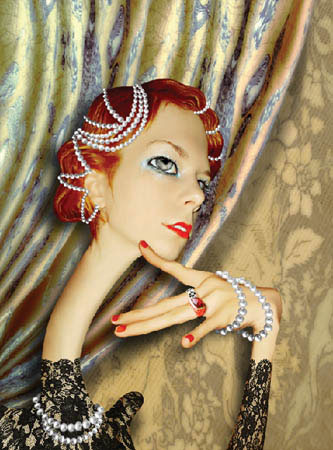
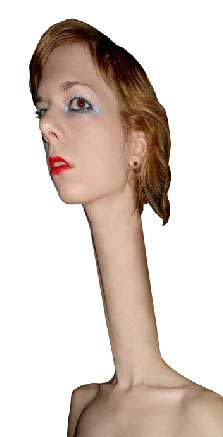
After: |
First we need to open the photo in a new window: File – Open (ctrl+o)
Mark out the girl along her contours, using Polygonal Lasso Tool.
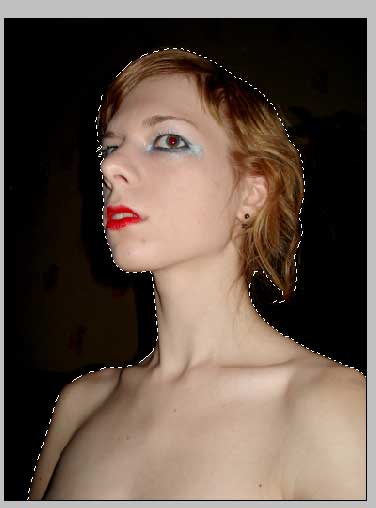
Copy the girl: Edit – Copy (ctrl+c) and insert the picture on a new layer: Edit – Paste (ctrl+v). Erase the previous layer by applying the Delete Layer– button on the Layers window. Create after that a new layer: Layer – New – Layer and place it under the girl’s layer. It must be painted in white with the Paint Bucket Tool.
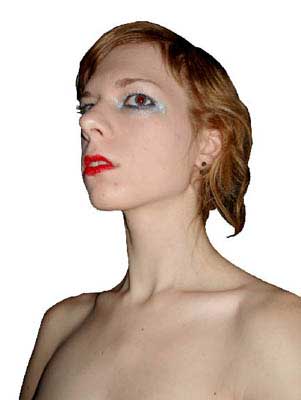
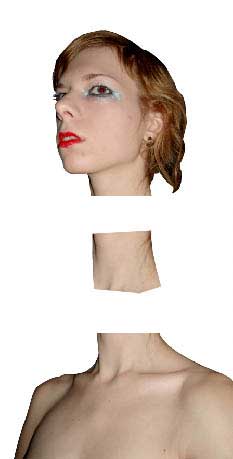
Then we need to mark out, copy (ctrl+c) and insert on a new layer (ctrl+v) the girl’s neck. After that mark out, cut out: Edit – Cut (ctrl+x) and insert on a new layer the girl’s head with half of her neck. Using the Move Tool, it must be gathered in one line.
Apply the Patch Tool to hide all the skin’s defects.
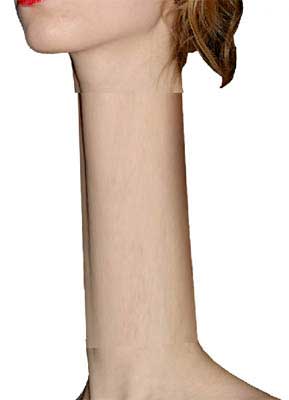
Then make use of the next command Edit – Free Transform (ctrl+t) to pull out the neck which is situated on a separate layer.
Choose the Patch Tool to give her a normal skin’s texture, after combining all the layers with the girl’s parts with the next command Layer – Merge Down (ctrl+e).
Select the next tool (Polygonal Lasso Tool) to make even the neck’s edges.
This layer must be distorted with the next command Edit – Transform – Skew.
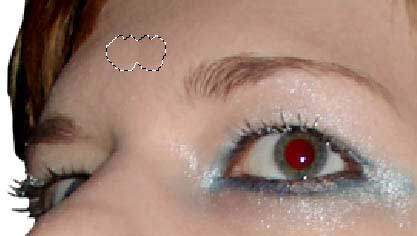
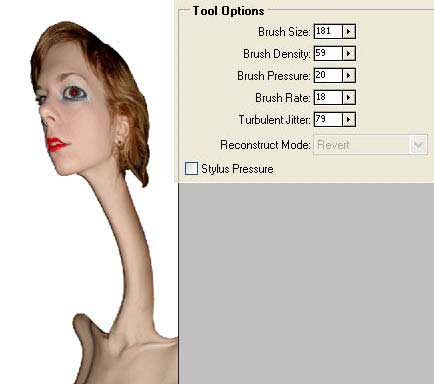
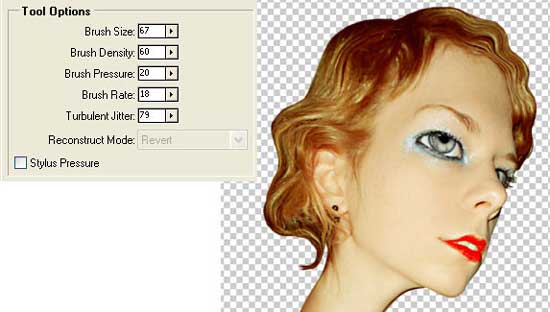
Pass to another window Filter – Liquify (shift+ctrl+x) where we should choose the Turbulence Tool
(change in the adjustments only the brush’s size) to make the girl’s
eyes bigger, lift up the eyebrows, make the lips more curved, curve her
neck and distort the body.
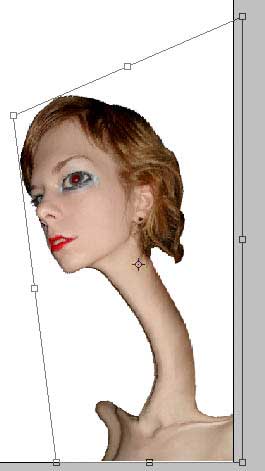
Use the next selection: Edit – Transform – Distort.
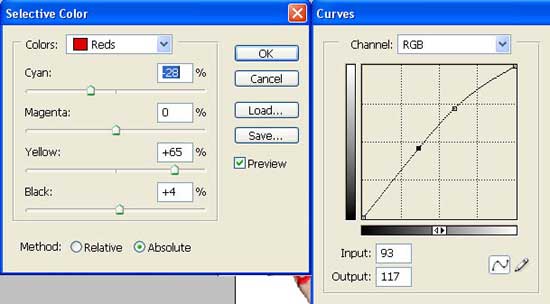
Correct now the picture’s brightness, contrast and the color, applying Image – Adjustments – Curves (ctrl+m) and Image – Adjustments – Selective Color.
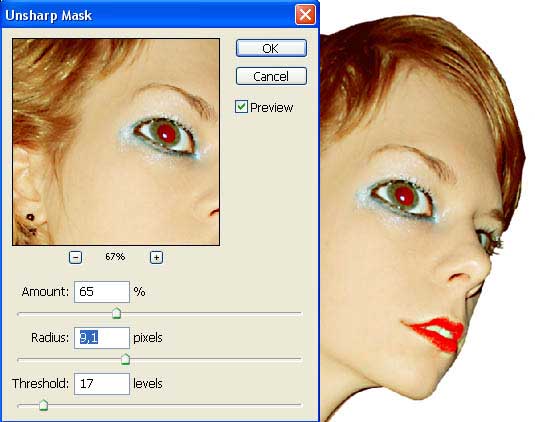
Turn the girl around horizontally: Edit – Transform – Flip Horizontal. To make the picture look sharper we need to select the next option: Filter – Sharpen – Unsharpened Mask.
Cut out an eye from any picture (ctrl+x) and insert it on a new layer (ctrl+v).
Then get back to the processed picture.
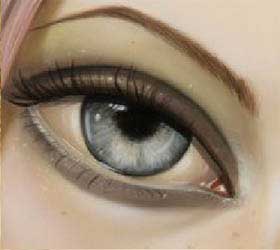
Cut out the eyelid from the picture (Polygonal Lasso Tool), correct its size and the placement’s angle (ctrl+t) and the distorting level (Edit – Transform – Distort). Place it on the girl’s eye. Dark out the edges, making use of the Burn Tool.
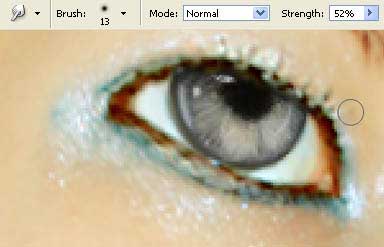
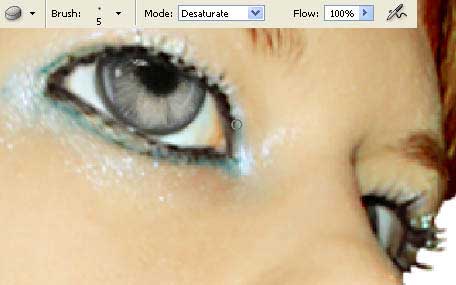
Decolorize after that the contour of both eyes applying the Sponge Tool.
Get to the next window again Liquefy (shift+ctrl+x) and choose the Turbulence Tool to make the girl’s hair look curly.
Using the Smudge Tool, make the tips look downy.

Create now a new layer and select the Brush Tool to colorize the hair.
Copy the layer and blur out this copy with a special filter: Filter – Blur – Gaussian Blur.
Group both layers the girl is situated on: Layer – Create Clipping Mask (ctrl+g) and change the blending mode of both layers on Color Burn.
Comments