
The Santa Claus Wallpaper
Try to introduce on the character’s hat the fur of white color, selecting for this manipulation the Ellipse Tool (U). Draw firstly the basis for the fur and then press Alt button while using the tool to erase the unnecessary elements.
Pass to representing Santa’s hair, applying the Pen Tool (P) of white color and making the corrections on it with the Convert Point Tool.

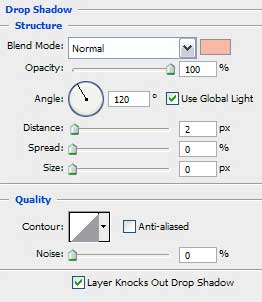
The layer’s parameters: Blending Options>Drop Shadow

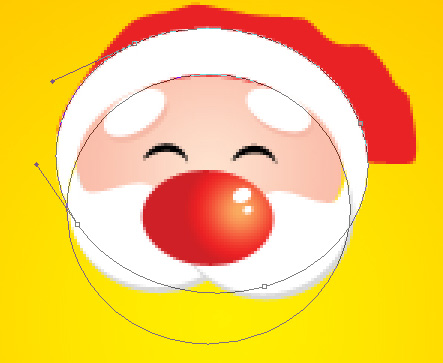
 Now we have to represent the beard of white color too, choosing for this operation the Pen Tool (P) and the Convert Point Tool for making the corrections on its shape. Place the beard’s layer lower than all the previous layers, composing Santa’s head.

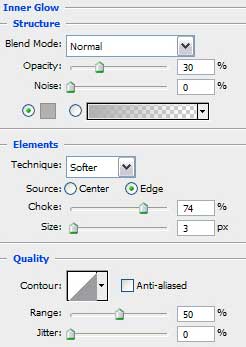
The layer’s parameters: Blending Options>Inner Glow

Make a copy of the recently made layer and move off the layer’s effect on the copy. We have to apply the color #D48B00 and Free Transform option for moving the copy to the right side and a little downwards. The copy must be situated lower than the previous layer (on the layers’ panel).

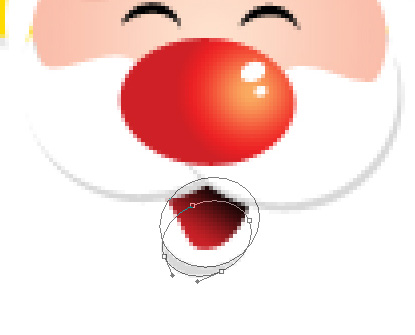
Make now the character’s mouth, using the Pen Tool (P) and the Convert Point Tool for giving the right shape for the element.

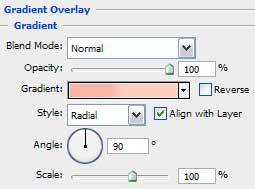
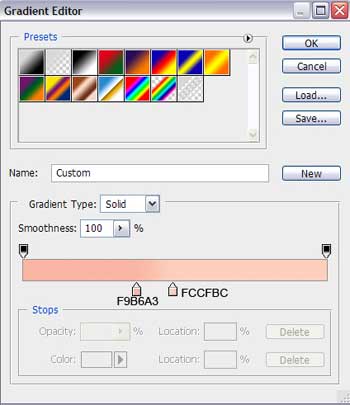
The layer’s parameters: Blending Options>Gradient Overlay
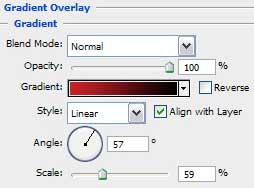
Gradient’s parameters:


Next we’ll draw under the mouth a shadow, colored with #D8D8D8. In this case we have to apply the Ellipse Tool (U) for drawing the basis of the element we want to introduce on the picture. Then we’ll pres Alt button to erase all the unnecessary elements.
Take now the Ellipse Tool (U) that is helpful when picturing Santa’s ear. The ear’s layer must be situated lower than the layer containing the hat’s fur (on the layers’ panel).

The layer’s parameters: Blending Options>Gradient Overlay
Gradient’s parameters:
 Make a copy of the layer containing character’s ear and select after that the Free Transform option to turn over the copy as it is shown next picture.

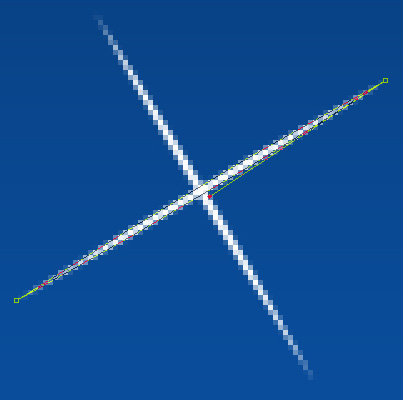
We’ll draw now several shining stars around Santa by choosing the Pen Tool (P) for the beginning. Make firstly a star’s ray of white color which shape is possible to correct with the Convert Point Tool. After that try to make a copy of the layer and select the Free Transform option to turn the copy over as it is demonstrated on the next image:

Using the Ellipse Tool (U), represent on this stage a small circle on the star.
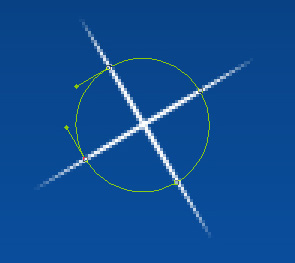
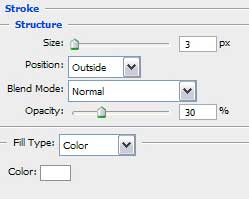
The layer’s parameters: Fill 0%
Blending Options>Stroke


Next combine in a group all the layers composing the recently made star (press Ctrl button for marking out the corresponding star’s layers and hold on left mouse’s button when taking the marked layers on Create a new group selection). Using the earlier described method, try to represent one more star, having the rays of white color. Fill 50%

Using the Ellipse Tool (U) we’ll make one more circle around the second made star.
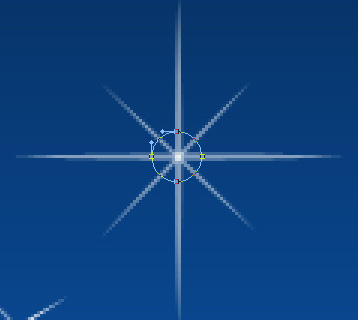 The layer’s parameters: Fill 0%
Blending Options>Stroke
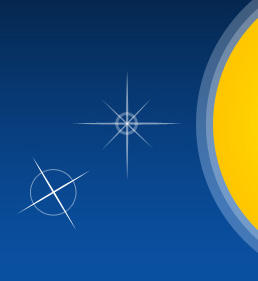
Combine in a group all the layers, composing the second made star (press Ctrl button as usually for marking out the appropriate layers and hold on left mouse’s button while moving the marked layers on Create a new group selection). Using the same elements and the same method described above, it’s possible to represent one more star.
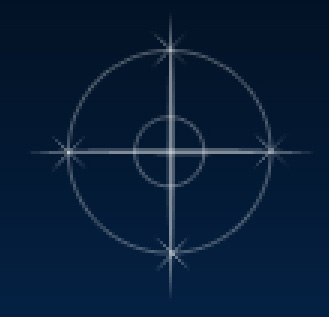

It’s necessary also to combine in a group all the layers composing the third star, applying the already well known methods. Select the Ellipse Tool (U) to represent a small circle of white color for the last star too.
Apply for the last layer the next demonstrated parameters: Fill 20%

Make a copy of the last represented layer and use again Free Transform option to make the copy smaller and to place it in the middle of the previous layer.


The last made two small circles must be combined in a group too. Now we have to make the necessary number of copies of each group containing the stars and their circles. The Free Transform option will be helpful when changing the copies’ sizes if necessary and placing them the way shown next picture:

The picture is finished!
View full size here.
Page: 1 2
Comments