
Stone wall
|
Important note: Try with different values of the border thickness parameter when you apply the stained glass filter, use a value of 5 or some thing like that and I think it would look better (im too lazy to change the tutorial because I would have to change the sample pics too) Please reset your colors before trying this tutorial (hotkey D) This tutorial will tech you how to make nice stone walls easily and quickly. If you want to follow it, you should know some of the next things: – Styles If you dont have them, dont worry I will try to make this as easy as possible. 1. Making the base shapes. 
1. Go to the Channels tab
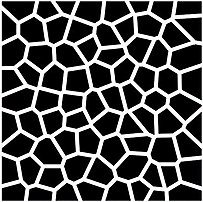
Now apply the cutout filter (Filter/Artistic/Cutout) with the next settings: Number of levels: 8 Apply it once again with the same settings (just press CTRL+F)
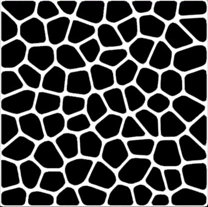
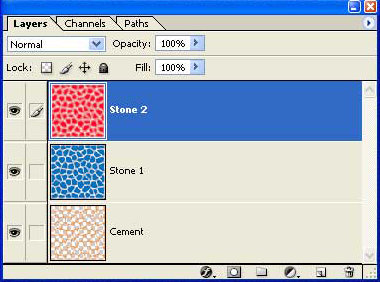
Now it looks with a less geometrical shape 2. Finishign it Well…now it will look like stone. Hold CTRL while you click the “shapes” channel thumbnail, this should generate you a selection that contains the white areas, go back to the Layers tab, and create a new layer, name it “Cement”. Select the paint bucket , and fill it (The color doesnt matter). Dont discard the selection, we still need it. Make a new layer, and name it Stone 1, press CTRL+SHIFT+I to invert the selection, and fill the “Stone 1” layer with any color. There is one last thing to do with that selection, go to Select/Feather (or press CTRL+ALT+D), and feather the selection 5 px. Make a new layer, name it “Stone 2”, use the paint bucket and fill it again. At this point you should have 3 layers, like the next ones:
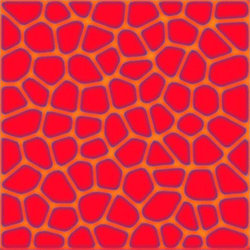
My image looks like this… looks pretty bad but it will change after we apply the styles
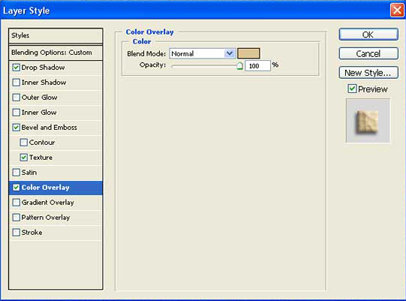
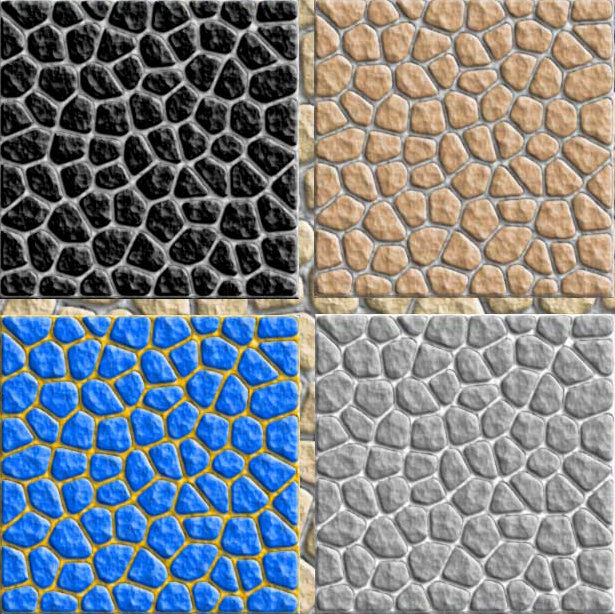
Your layers shouldnt be very different from my layers Now, load the style package , and apply the “cement” style to the “cement” layer, the “Stone 1” style to the stone 1 layer, and the “Stone 2” Style, to the “Stone 2” layer and you’re done! You can change their color by changing the color of the “Color overlay” element of the “Stone 1” Style, and the “Cement” Style. ( .psd to look at )
Play with the color to change the way the stones look.
|
Comments