
Skype Logo
December 13, 2006 | 0 comments
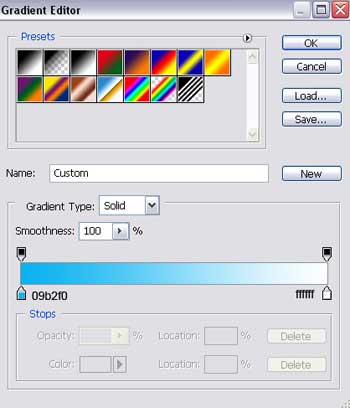
Gradient’s parameters.
The second copy must be minimized too. Fill 0% on the layers and apply the next instrument  (holding the Alt button) to represent an ellipse which will delete the unnecessary part. Use the sizes from next step.

Blending Options-Gradient Overlay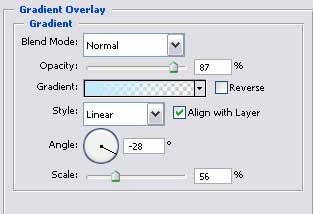
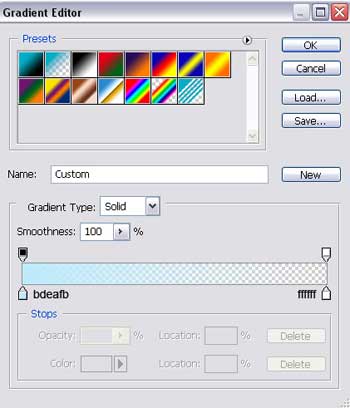
Gradient’s parameters.

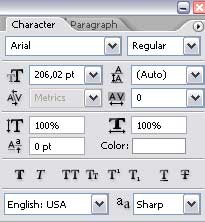
Add next the text, keeping the type, size and the color indicated in the next table.

Merge down now all the layers, representing the blue icon with S letter in a group (CTRL+SHIFT+E). Copy the new made group and apply Free Transform action to turn it around. Click on this

on the layers and make use of the next instrument, exactly like it is demonstrated next step.

The final result is this one!
Page: 1 2
Comments