RGB TV Scanlines Tutorial
May 21, 2006 |
0 comments
Start with a photo that you want to add TV Scanlines to.

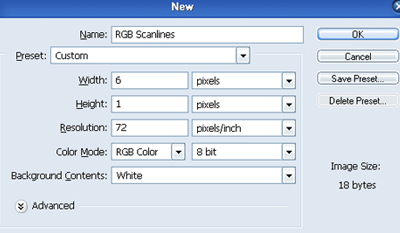
Create a new file, CTRL + N, set the width to 6 pixels and height to 1 pixel, zoom in 800% by pressing CTRL + =.
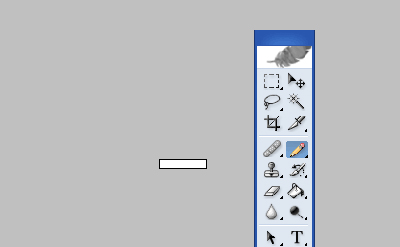
Select the pencil tool.
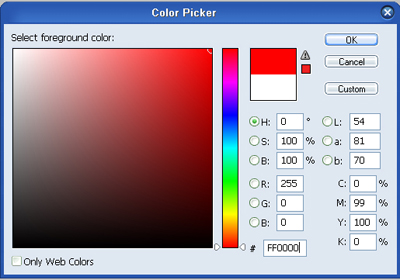
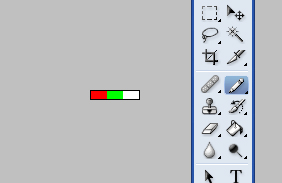
Click on the color picker box and set the color to red, #FF0000.
Use the pencil tool and draw a 2 pixel wide rectangle to the left of the image.
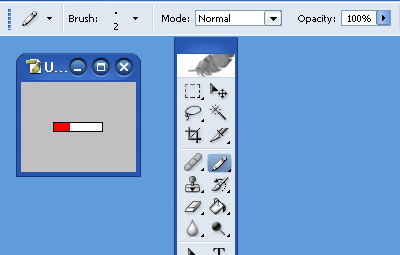
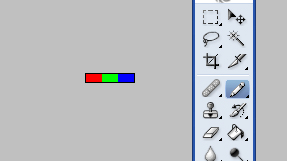
Return to the color picker box and select green, #00FF00, than draw another 2 pixel wide rectangle next to the red one.
Go to your color picker box one last time and select blue, #0000FF, than draw a 2 pixel wide rectangle next to the green one.
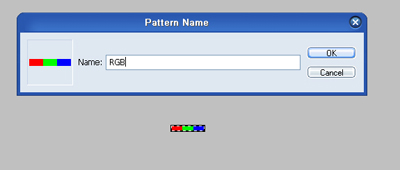
Press CTRL + A to select the image, than go to Edit -> Define Pattern and name it whatever you like
Return to your original image and create a new layer, than go to Edit -> Fill and select the pattern you just defined.

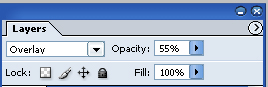
On that same layer that you just filled with the pattern, set the adjustment layer to Overlay and opacity to 55%.
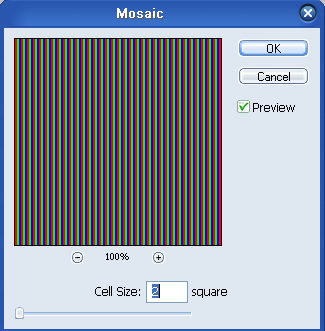
Than go to Filter -> Mosaic and change the cell size to 2 square.
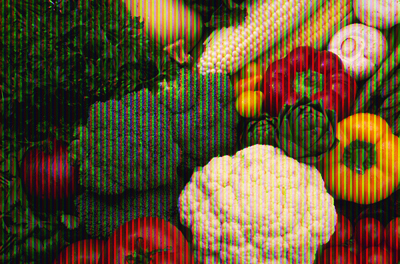
Here is the final result.
Comments


Comments