
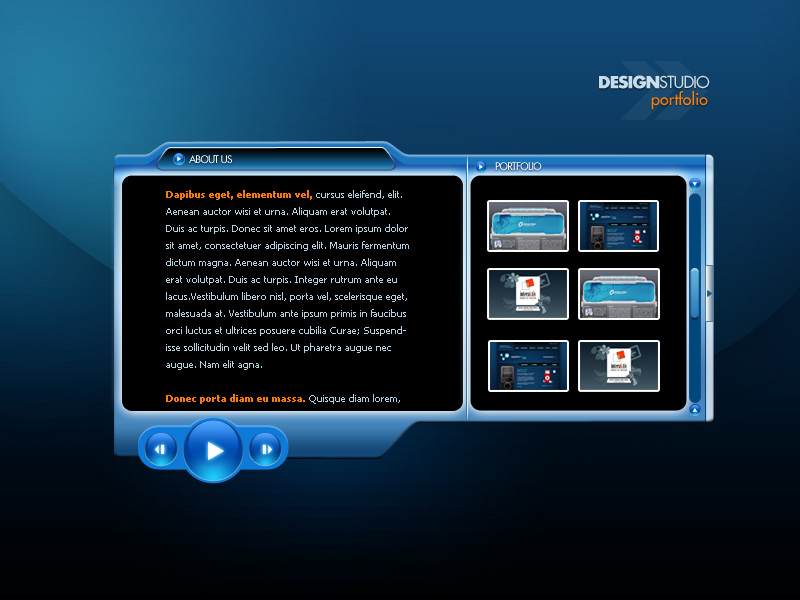
Professional Design Studio Web Layout
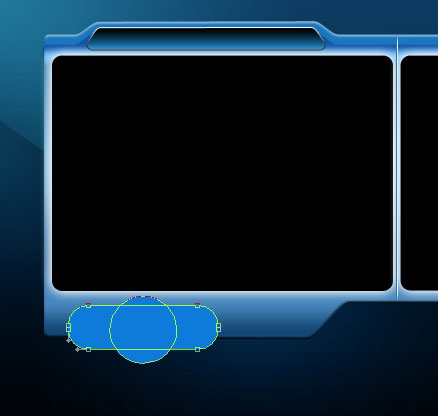
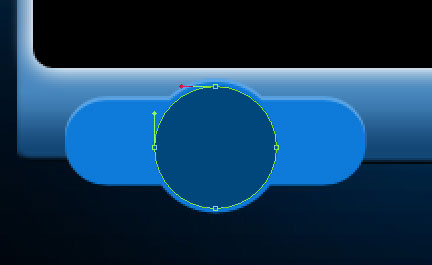
Next we’ll represent the palette reserved for the navigating buttons. For the beginning we’ll take the Rounded Rectangle Tool (U) to represent one part of the palette to be and then hold on the Shift button, choosing simultaneously the Ellipse Tool (U) to finish the buttons. The color should be this one – #0E7AD9

The layer’s parameters:
Blending Options>Inner Shadow

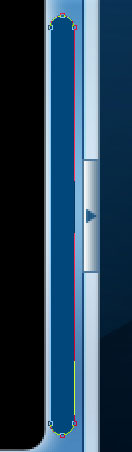
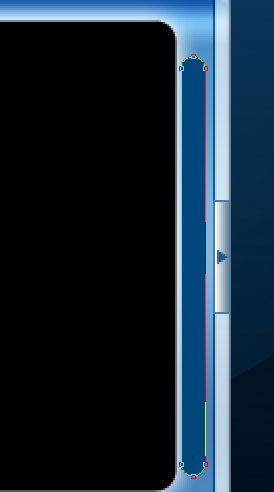
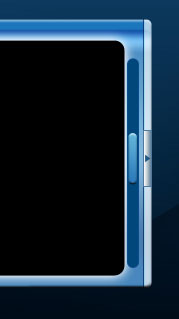
 Next step includes drawing a scrolling bar, colored in #01477B. The instrument we need to pick up for this operation is Rounded Rectangle Tool (U).


The layer’s parameters:
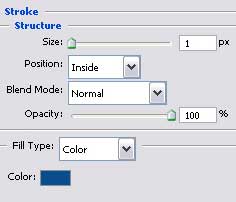
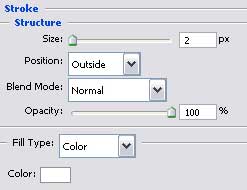
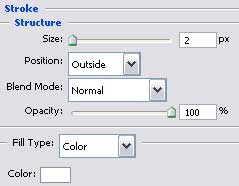
Blending Options>Stroke

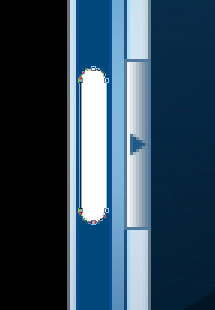
Next try to represent the button inside the scrolling bar, selecting the last instrument too.

 The layer’s parameters:
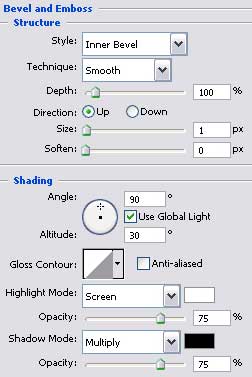
Blending Options>Bevel and Emboss
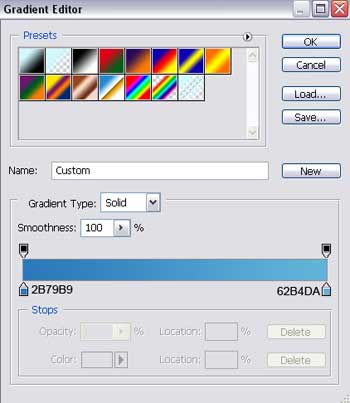
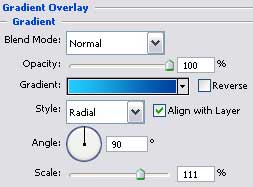
Blending Options>Gradient Overlay
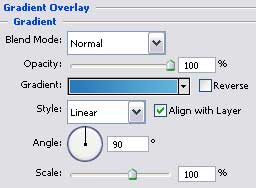
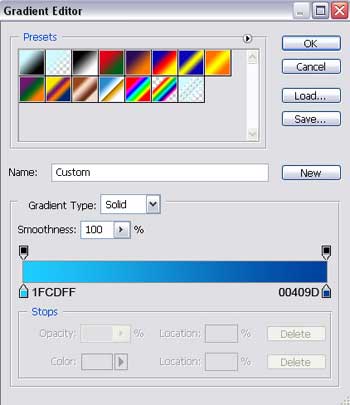
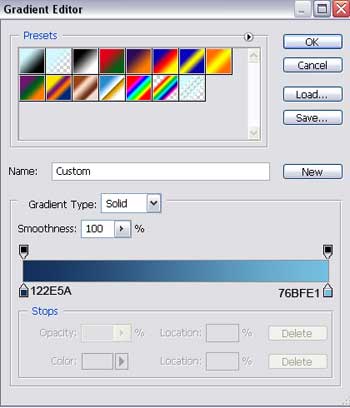
Gradient’s parameters:
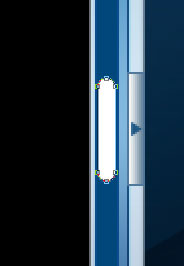
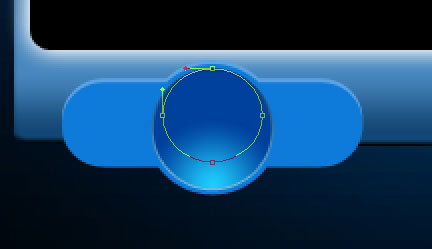
Now we shall represent the navigating button, applying the Ellipse Tool (U).
The layer’s parameters:
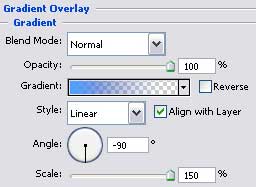
Blending Options>Gradient Overlay
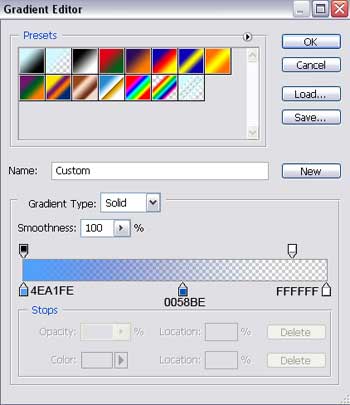
Gradient’s parameters:
Blending Options>Stroke
 Gradient’s parameters:
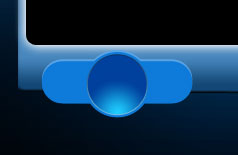
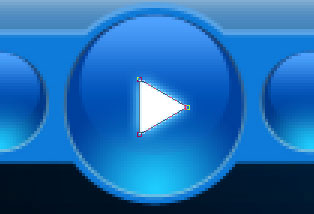
Applying the last instrument, it’s possible to draw a flare on the previous button.
The layer’s parameters:
Fill 0% on the layers.
Blending Options>Gradient Overlay
Gradient’s parameters:

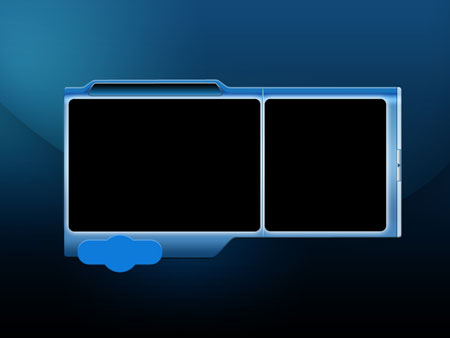
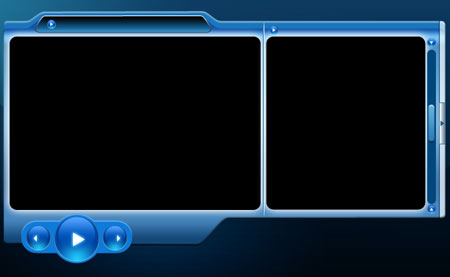
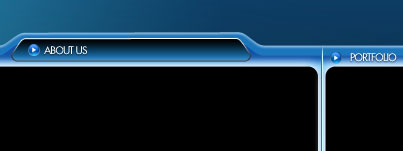
For the convenience, we need to combine in a group all the layers composing the recently made button. Press on the Ctrl button to mark out the necessary layers and then hold on the left mouse’s button to take the layers downside on Create a new group option. Make six copies of the made group and apply the Free Transform option to make the copies smaller if necessary and place the copies exactly the way it is demonstrated below.
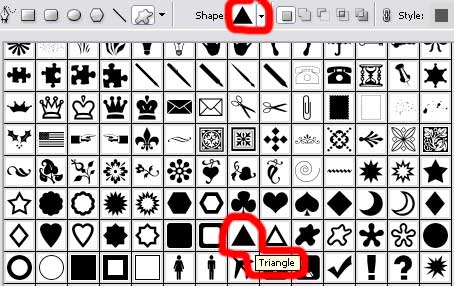
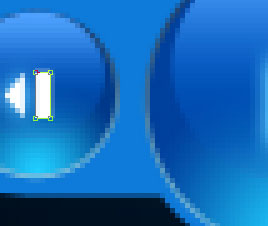
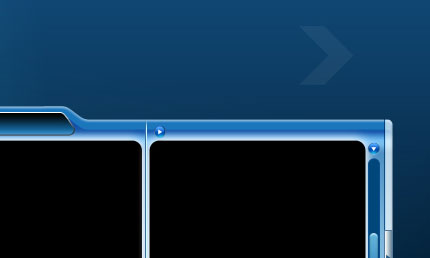
We need to draw a pointer of white color on our button, choosing the Custom Shape Tool (U) and turn it over with the Free Transform option.
The layer’s parameters:
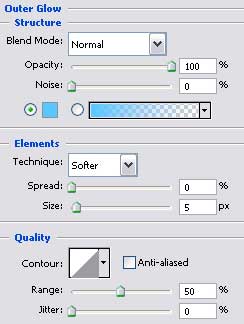
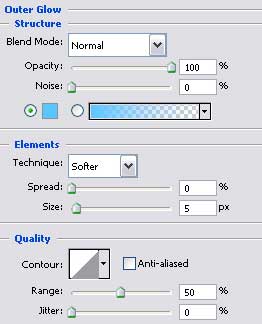
Blending Options>Outer Glow
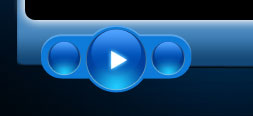
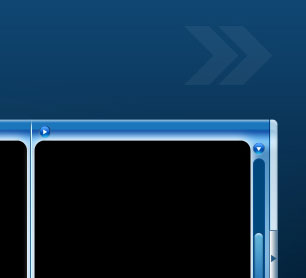
Make six copies of the new made layer and choose again the Free Transform option to turn the copies over if that is necessary or make them smaller. Place them the same way it is shown on the picture below. We need also to move off the effect from the copies on the upper buttons.
Add by one white small stripe near the pointers on the lowest buttons, taking the Rectangle Tool (U).


The layer’s parameters are the same.
Blending Options>Outer Glow
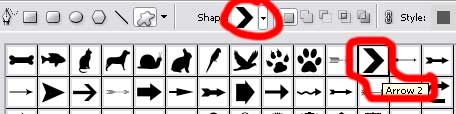
Next we’ll represent the site’s logotype, choosing again the Custom Shape Tool (U) and picking up the next pattern shown with red color.

The layer’s parameters:
Opacity 5%

Make a copy of the last made layer and choose the Free Transform option to place the copy like it is shown below.
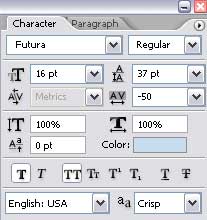
Insert the section’s titles, following the demands from the table below.
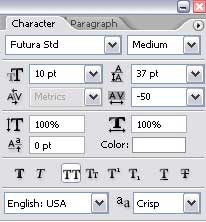
 The layer’s parameters:
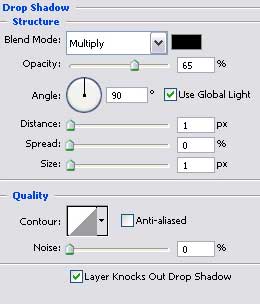
Blending Options>Drop Shadow
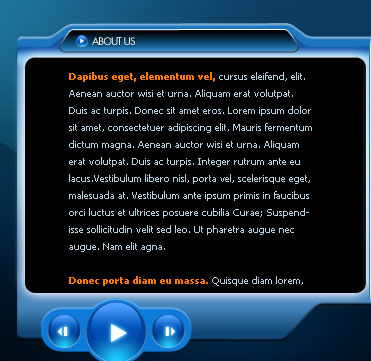
Fill the site’s section with the necessary text:
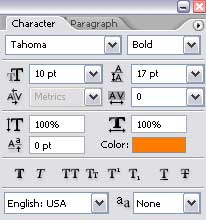
(the orange text)
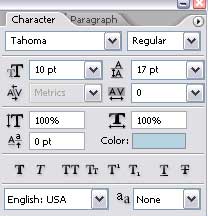
(the basic section’s text).
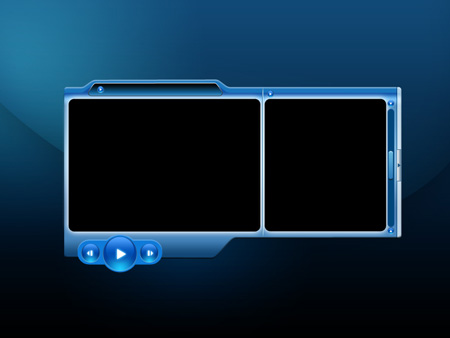
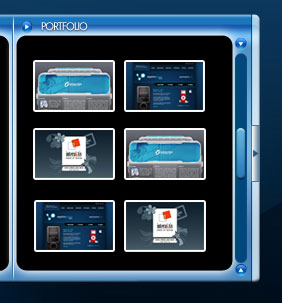
Finally we’ll introduce the works’ screenshots, applying equal parameters for all of them.
Blending Options>Stroke
In the end we’ll introduce the site’s name, keeping the demands from below.

(design)
(studio)

(portfolio)
The site’s text inscription has the same parameters too.
Blending Options>Drop Shadow
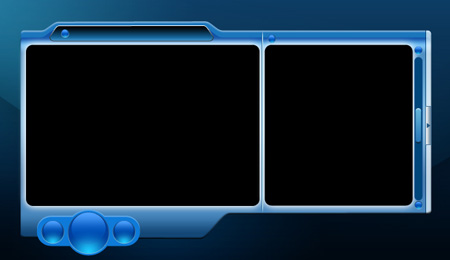
Finished!
View full size here.
Page: 1 2
Comments