Photoshop Elements 2 Move Tool
Photoshop Elements 2 Move Tool |
|
|
|
|
| Used for moving the contents of selections or layers |
|
  |
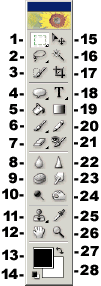
To move a selection with the move tool, simply placed the pointer inside the selection border and drag to where you want it. If you have selected more than one area [by holding down the Shift key while using a selection tool], they will all move in unison when one is dragged. If you want to move a copy of a selection to a new location, leaving the original in place, press the Alt key, and then drag the selection. To make multiple copies of a selection while the move tool is selected, hold down the Alt key, and click an arrow key. A copy will appear displaced slightly from the original. Click the arrow key for as many copies as you would like. Note – if your Alt key does not appear to be working in Elements, you may have another program running in the background that has taken over that key. GuruNet (Atomica) and FlySwat are two such applications. Uninstall them, or reassign the hot key in those programs to regain use of the Alt key in Elements. You may drag selections, or layers from one window to another. Drag from the active window. A border will highlight the destination window if you can drop the selection there (some images don’t accept drag and drop). You can access the move tool while using most other tools by holding down the Control key. However, this does not work when using the hand tool, or the zoom tool. The other options for moving selections or layers are the Copy, Cut, Paste, and Paste Into commands. Make sure your resolutions are the same in both windows before transferring images. Note that the Copy command copies only from the active layer. The Copy Merged copies from all visible layers. The keyboard shortcut for this tool is the letter V.
|
|
The illustration below is the move tool’s options bar. If you choose Auto Select Layer, the first layer with pixels which is under the cursor when the move tool is clicked on the image will be moved, whether or not it is the currently selected layer. If the Show Bounding Box checkbox is selected, your layer’s contents will be surrounded by a box with handles that looks like this. Note that this screen shot shows a black square on a white background. The white was not part of the layer being moved and transformed. From left to right, the items on the transform options bar are the tool icon, the transform origin selection dots, and three text boxes. The first two text boxes are for setting width, and height. Check or uncheck the little chain link between the height and width boxes to constrain proportions or not. The third text box is for entering an angle (for counter clockwise angles use a minus sign) followed by three little faint icons that you’ll probably miss since they’re practically invisible. Click on one of those little icons to limit the transformation to, from left to right, rotation, scale or skew. You can enter values in any of the text boxes to transform by numbers, or simply drag on the handles of the bounding box. Press the Ctrl key as you drag a corner to distort (move only one corner at once). Before and during transformations, your cursor will change to indicate which type of motion will happen depending on which handle you drag. In the black box illustration above, the rotation cursor is shown. If you don’t like your transformation, click the cancel button at the end of the options bar. You will be returned to the move tool position where you started with no transformation applied. |
|
|
|
|
|
If you have doodled with a tool’s options and want to get back to the default settings, click that tool’s icon at the far left end of its options bar. Choose either Reset Tool to reset only the current tool, or Reset All Tools to restore default settings to every tool. Please note that all descriptions, and illustrations featured refer to files which are in Photoshop’s .psd format, and which are in RGB color mode. Other file formats, and color modes may generate different options. Some Photoshop features are not available for images not in .psd format, or RGB color mode. To find what color mode your image is in, choose Image > Mode. |
|


Comments