Photoshop Elements 2 Magnetic Lasso
Photoshop Elements 2 Magnetic Lasso |
|
|
|
|
|
Used for selecting areas |
|
  |
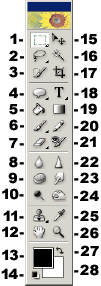
Find the magnetic lasso by clicking and holding down the mouse button on the regular lasso in the toolbox. Select it from the pop-up menu that appears.. This tool can be used only for selecting objects with a clearly defined edge. As you drag the tool near this edge, it will automatically find, and attach anchor points to it. To make a selection with the magnetic lasso, start by clicking once on the edge of what you wish to select. Then move the cursor along the outline of the object. You don’t have to press the mouse button, though you can if you like. Periodically, points should snap to the edge of the image you are selecting. You can force a point to be added by clicking. You can temporarily switch to the regular, or polygonal lasso tools in the middle of making a selection, by holding down Alt and either dragging [regular], or clicking [polygonal]. Note – if your Alt key does not appear to be working in Elements, you may have another program running in the background that has taken over that key. GuruNet (Atomica) and FlySwat are two such applications. Uninstall them, or reassign the hot key in those programs to regain use of the Alt key in Elements. To remove the part of a selection that you have just made in error, press Delete. You may then continue to make your selection. To close, and complete your selection, double-click, or press Enter. The keyboard shortcut key for this tool is the letter L. Press the Shift key with the shortcut letter to cycle through the lasso tools. |
|
The illustration below is the magnetic lasso tool’s options bar (split in two because it’s so long). The Feather amount can be set to give a softer edge to your selection [usually between 2-5 pixels]. Be aware that colors in the feathering will go with the selection if it is moved. Anti-aliasing softens the pixel edges on curved sections of the outline. Width sets the distance the cursor may be from the edge of the object you are selecting, and still work. The Edge Contrast value designates how strong or weak the edge must be to be responded to by the magnetic lasso. Frequency sets the rate at which the tool will set fastening points.Pen Pressure is only for people using drawing tablets, and can be disregarded by those who are not. The second illustration, below is a numbered, larger scale version of the buttons from the left end of the options bar which determine how the selection you draw will interact with any existing, active selections. They are:
|
|
 |
|
|
If you have doodled with a tool’s options and want to get back to the default settings, click that tool’s icon at the far left end of its options bar. Choose either Reset Tool to reset only the current tool, or Reset All Tools to restore default settings to every tool. Please note that all descriptions, and illustrations featured refer to files which are in Photoshop’s .psd format, and which are in RGB color mode. Other file formats, and color modes may generate different options. Some Photoshop features are not available for images not in .psd format, or RGB color mode. To find what color mode your image is in, choose Image > Mode.
|
|


Comments