Photoshop Elements 2 Gradient Tool
Photoshop Elements 2 Gradient Tool |
|
|
|
|
| Used adding and editing gradient color blends |
|
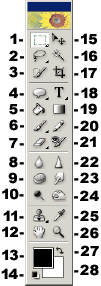  |
The linear gradient is applied by dragging over the entire length of the area you are applying it to. The other four gradients are applied to the radius of the area, since the gradient will expand outward in all directions from the start point. The Linear gradient, which icon you see at the top of the page, adds shades from where you first click to where you release the mouse button after dragging across the image. The radial gradient, icon shown below, applies shades in a circular pattern, radiating outward from the point where you first click. The line you drag is the radius of the circle of colors. The colors applied by the angle gradient, icon shown below, look like a cone, or Chinese hat, with the point at the top being the spot where you first click. Shades are applied in a counterclockwise spiral. The reflected gradient, icon shown below, looks like the linear gradient but with a mirror image gradient radiating in the opposite direction from the linear one where you have dragged with the pointer. A diamond gradient looks like a starburst, or lens flare with distinct, shaded flare lines radiating from the point where you first click. The gradient you have chosen, or created in the gradient edit dialog box [see second section below] is applied from the color shown on the left side of the gradient bar on the options palette, to the right. If you wish it applied in the other direction, check the Reverse box on the options bar. All gradients will cover the entire layer with their colors. The area you drag over will show the gradient variations and the rest will have the end color without gradient. If you want the gradient applied only to a particular area, select it first, and apply the gradient by dragging across the selected area. You can start and/or end your gradient drag outside of the selection boundary, but coloring will only be applied within the selection. All gradients are applied with a transparency mask. You can turn it off by deselecting Transparency in the options palette, or edit it in the gradient editor [see second section below]. If you have problems with banding in your gradients (colors separating into stripes of different shades instead of making a smooth transition), try applying a small amount of noise with the Add Noise filter. Choose Filter > Noise > Add Noise. The keyboard shortcut for the gradient tool is the letter G.
|
|
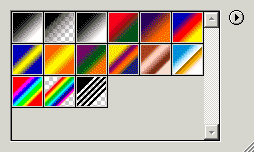
The first two illustrations below, are the gradient tool’s options bar. I cut it in two since it was so long, it stretched the window. The box showing Normal is a drop down menu of all the blend modes available for the gradient. The Opacity setting will determine the transparency of the entire gradient. Type a value into the box, or press the arrow to the right of the box, and use the slider that appears. Note that this is not the same as the transparency mask that is part of the gradient itself. This setting affects opacity for all of the color applied with the gradient tool. The gradient’s transparency mask gives a opacity transition across the length of the gradient colors, and can be edited via the Edit button. The mask can be turned off by deselecting the Transparency check box. Choose Dither to make a smoother transition between the colors in the gradient. This helps prevent banding. Choose Reverse if you want the gradient color sequence shown to be applied from right to left instead of the default left to right. Clicking on the tiny arrow next to the gradient thumbnail at the left end of the options bar will open the gradient pop-up palette showing the default gradients from which you may choose, see the second illustration below. Clicking on the arrow in the upper right corner of that pop-up palette will open the menu, shown to the right which includes other gradient palettes which are available. If you create and save a custom set of gradients, they will appear in this menu after you have closed and reopened Elements. |
|
  |
|
|
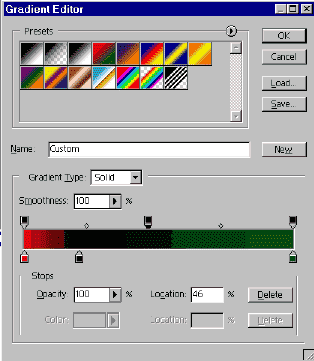
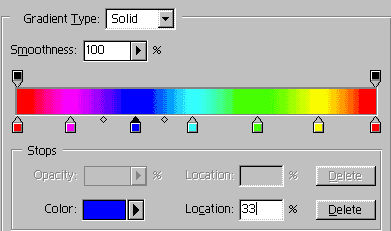
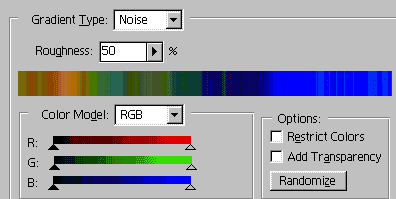
Gradients may be created, or edited by clicking on the thumbnail which is showing in the options bar (not one which is in the pop-up palette). In the illustration shown left below, the gradient transparency is being edited. Notice that the Color settings at the bottom of the menu are grayed out. You can choose to edit an existing gradient from the menu at the top, or create your own gradient from scratch by clicking the New button, and choosing a name. Transparency stops are upside down, along the top of the gradient bar. Color stops are right side up (if you think of them as little houses) underneath the gradient bar. You can add as many intermediate stops as you wish to the gradient by clicking next to the gradient bar. Stops can be dragged to relocate them. The little hollow dots which appear on either side of a selected stop determine the midpoint of the shading between two stops. They too can be dragged. Experiment with dragging stops and midpoints. In the first example, the transparency stop centered above the bar is currently selected. A selected stop will have a black “roof”. This stop’s location in the gradient is shown in the Location box. In the second example, which shows just the bottom of the dialog box, a color stop is selected. It’s the blue one just left of center, and below the gradient bar. Color stops are below the bar, transparency stops are above. Note that the Color options at the bottom of the box are now active, and the transparency settings are grayed out. Also note that I changed gradients between the two illustrations. The third example shows a noise gradient being edited. This can be chosen from the Gradient type menu, and I have no idea what it is. Looked interesting, though. Append previously saved gradients to the menu list by clicking the Load button. Using this button or the Load command in the pop-up palette menu allows you to open a new gradient palette without closing the current palette and thus losing your custom gradients in the current palette. If you use Reset Gradients or load any of the other gradient palettes by choosing them from the palette menu, you will lose all custom gradients that have not been saved to their own set. When you have edited the gradient to your satisfaction, click OK, to return to your image. The newly created or edited gradient will now appear in the gradient tool’s options palette. If you want to create more than one gradient while still in the Gradient Editor, click the New button at the completion of each gradient to add the gradient that you have just created to the current palette. Custom gradients that you have created can be saved as a custom set along with the other gradients in the current palette by clicking the Save button. If you want to save your custom gradients in a custom set without the rest of the current palette, use the Preset Manager and not the Save button. To do this choose Edit > Preset Manager, and choose Gradients from the Preset Type menu. Click, and Shift-click to select all the gradients you would like to be included in your new set. Choose Save Set and give the set a name. After you close and reopen Elements, your new set will appear in the gradient tool pop-up palette’s menu.[Note that all illustrations shown below are from Elements 1. Except for cosmetic differences, they are the same in Elements 2.] |
|
|
|
|


Comments