
Photographer Page Layout
Make a copy of the recently created layer and apply the Free Transform option to turn the copy over and to place it the way it is demonstrated below.

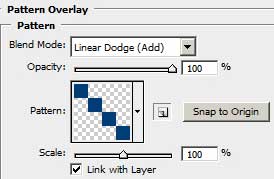
It’s time to create one more new file with 4×4 px and 72 dpi. Choose after that the Pencil Tool (B) of 1 px to create a pattern, like that one from below, colored with #003D76

Edit>Define Pattern
Create one more new layer (Create new layer) to apply on it the new parameters from below. Fill 0%
Blending Options>Pattern Overlay


We should also apply a new option on the made layer (Add a Mask) on the lowest part on the menu palette. Next select the Gradient Tool (G) for using it diagonally from the lowest right corner to the left upper corner.

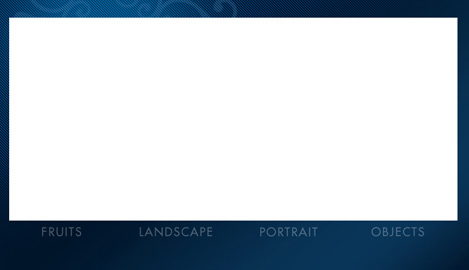
Using the Rectangle Tool (U), try to represent the portfolio section of white color on the site’s page.

Under the portfolio’s section we’ll insert the inscription, containing the sections’ names, keeping the next demands:
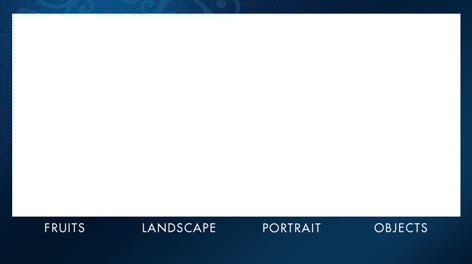
For our convenience, combine in a group all the layers, containing the sections’ names (press Ctrl button to mark out the necessary layers and hold on the left mouse’s button to take down the marked layers on Create a new group option). The next parameters should be applied for the new group. Opacity 30%,
Comments