
Optimizing Performance in Photoshop CS2 – part 2
Setting Preferences
Photoshop ships with factory settings, known more popularly as Preferences, sometimes shortened to Prefs, that you have the option of accepting or rejecting and, in their place, specifying your own. Naturally, the settings in Preferences affect your resources.To ration your resources, especially if they are on the meager side, you can tell Photoshop how you would like it to display and save files, how many history states you would like to keep, and other preferences. Most of the settings you want to affect can be found in one dialog box (Figure 1-3). Windows users can access the Preferences dialog box from Edit>Preferences (Ctrl+K), whereas Macintosh users can access it from Photoshop>Preferences (Ф+K).
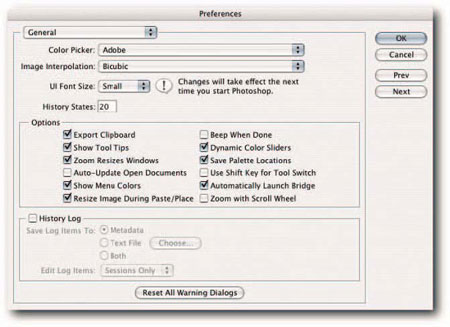
FIGURE 1-3: The Preferences dialog box can be accessed using the keyboard shortcut Ctrl+K (Windows), Ф+K (Mac OS). Cache Settings for Image Cache Levels
When you view an image in the document window at anything less than 100% magnification, Photoshop can use downsampled, low-resolution cached versions of the 100% view for speedier redraws. This can be helpful if you constantly work on large images and you need to zoom out frequently. However, it will take longer to open files while Photoshop creates the low-resolution previews. You can specify the number of cache levels in the Preferences>Image & Memory Cache screen (Figure 1-4). Needless to say, the higher the number of cache levels, the more resources Photoshop needs to consume. If you have limited RAM, or scratch disk space, you may wish to set the level to 1 or 2; the default is 4 levels. You can go as high as 8 levels, which will give you cached views at 66.67, 50, 33.33, 25, 16.67, 12.5, 8.33, and 6.25%. Setting the cache level to 1 is the same as turning it off because only the current view is cached at that setting.
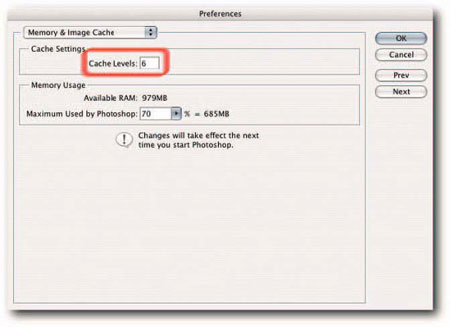

FIGURE 1-4: Specifying high cache levels can help with redraws but also consumes more resources; Level 2 is a good compromise.
Pixel Doubling for Faster Screen Redraws
When you use tools or commands to move pixel data, you can force Photoshop to create faster redraws if you have the option Pixel Doubling selected in Preferences>Display & Cursors (Figure 1-5). The feature works by doubling the size of the pixels temporarily (effectively halving the resolution) and, after the tool or command has been applied, restoring them to how they were before the tool or command was applied. This is not so useful on small files or when plenty of RAM is still available to Photoshop, but when you’re working on large files and Photoshop is making use of the scratch disk, you may wish to select the option. Selecting this option has no effect on the actual pixels in the image; it affects only the preview.
Reducing Overheads by Reducing Histories
The Histories feature has become one of the most widely used and “can’t-do-withouts” in Photoshop. Its major downside is that it’s another resource hog, and it’s by no means a smalltime operator but one that steals and hordes resources big time; imagine a congregation of Friar Tucks descending after Lent on a pantry stocked with finite provisions and you should get the picture!
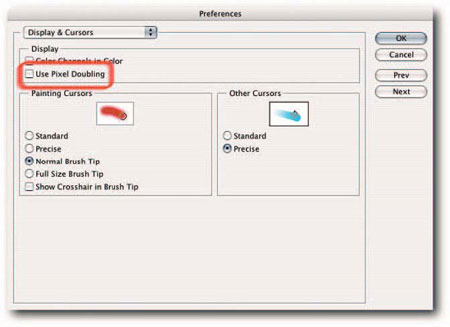
FIGURE 1-5: To help speed up screen redraws, you can select “Pixel Doubling” in the Display & Cursors section of the Preferences dialog.
You can change several options to conserve and stretch your provisions. The first one is the number of History states that Photoshop saves in RAM or on your scratch disk. The higher the number, the more resources are eaten up. However, the higher the number, the more undos available to you should you need to step back to a previous state. You need to strike a good balance between a fallback position and the ability to cruise faster. By default, Photoshop saves 20 history states. You can change this number at any time in the Preferences>General screen, under History States (Figure 1-6). If you find that you rarely, if ever, go back beyond, say, 5 to 10 history states, then reducing the number will allow the saved resources to be used elsewhere. If you find yourself constantly trying to find states that have disappeared from the History palette, then increase the default number and just put up with slower performance, which may not be noticeable on small files or if you have large reserves of RAM and fast, independent scratch disks.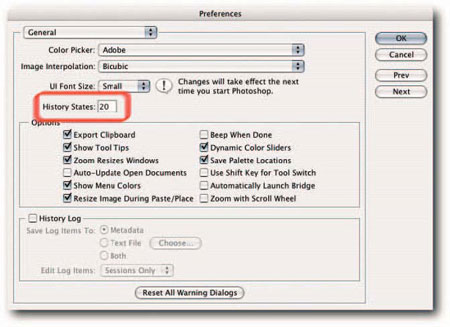
FIGURE 1-6: You can control the number of history states that Photoshop saves in RAM, or in the scratch disk temporary file, from the General section of the Preferences dialog.
Comments