
MP3 Player Illustration
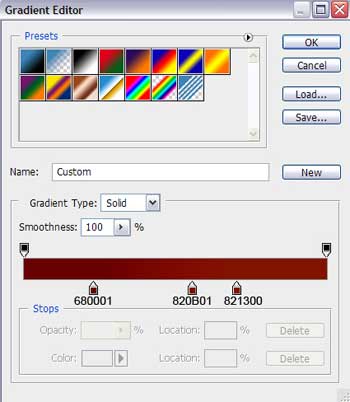
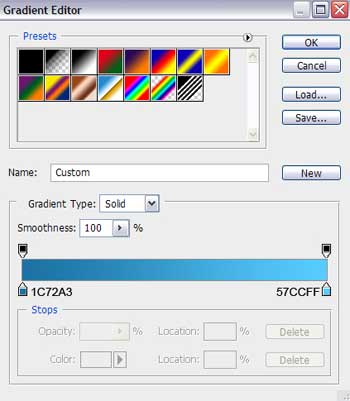
Gradient’s parameters:

Create a new layer for representing the ear-phone with the Rectangular Marquee Tool (M). Firstly mark out the necessary zone and then select the Paint Bucket Tool (G) to paint the marked place with black color.


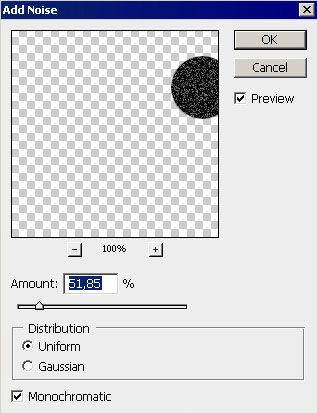
Apply on this layer the next filter’s option – Filter>Noise>Add Noise

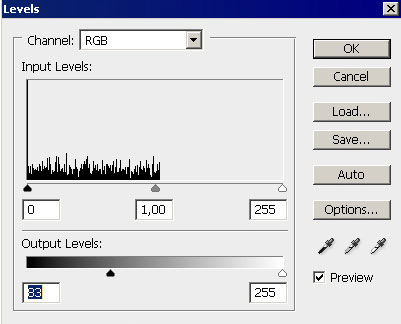
Press next on Ctrl+L and set the parameters from below:

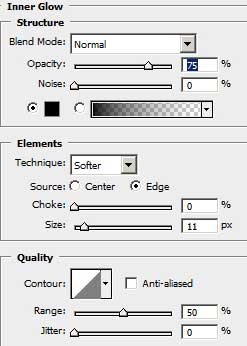
Apply for the layer the next demonstrated parameters: Blending Options>Inner Glow
 Make a copy of the last made layer and select the Free Transform option to place the copy as in the picture. We have to erase on the copy the layer effect, shifting it with the mouse in the recycle bin on the lowest part of the layers’ palette.

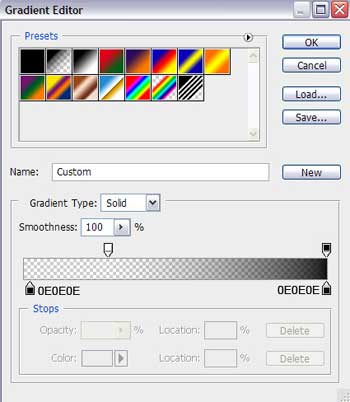
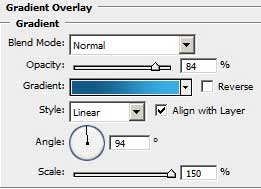
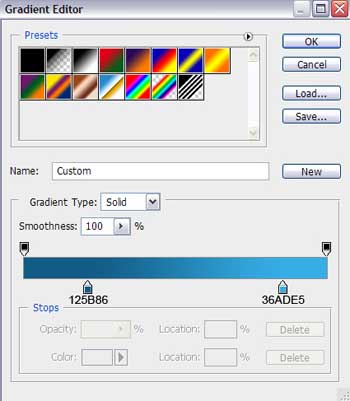
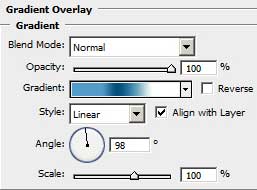
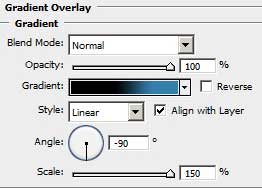
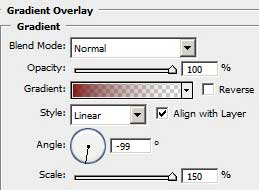
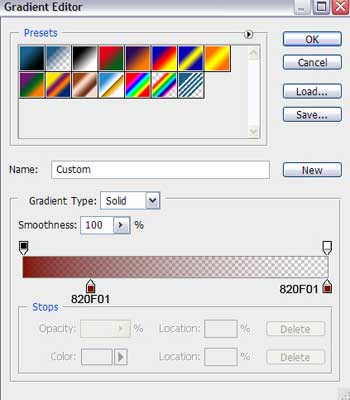
Apply different parameters for the copy: Blending Options>Gradient Overlay
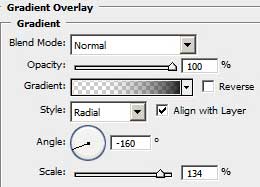
Gradient’s parameters:

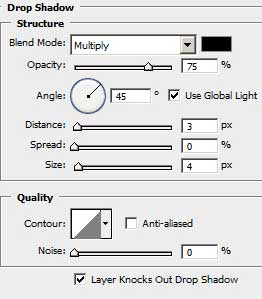
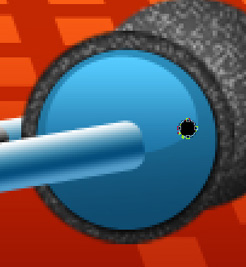
Using the Ellipse Tool (U), it’s possible to represent the next part of the ear-phone corps.

The layer’s parameters: Blending Options>Drop Shadow
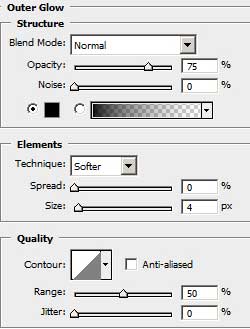
Blending Options>Outer Glow
Blending Options>Gradient Overlay
Gradient’s parameters:

Applying the same instrument, try to make now the highlight on the surface of the ear-phones corps.
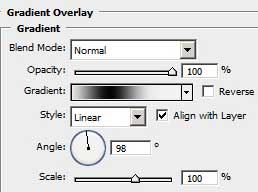
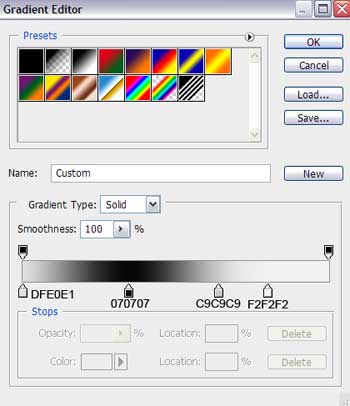
The layer’s parameters: Blending Options>Gradient Overlay
Gradient’s parameters:

We have to continue by making the next part of the ear-phones’ corps with the Rounded Rectangle Tool (U). The detail may be turned over with Free Transform selection.


The layer’s parameters: Blending Options>Gradient Overlay
Gradient’s parameters:


Make a copy of the last made layer and select the Free Transform option to make shorter the right side of the copy, the way you may see below. Change the parameters of the copy-layer.
Blending Options>Gradient Overlay
Gradient’s parameters:

Combine in a group all the layers, composing the holder of the ear-phones with the metallic detail (press on Ctrl button to mark out the necessary layers and hold on the left mouse’s button to take the marked layers on Create a new group option). Make a copy of the last made group and select the Free Transform option to place the copy like in the next picture (lower that the layers).

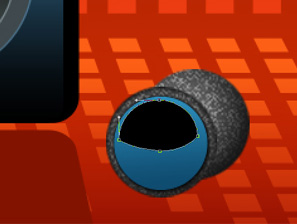
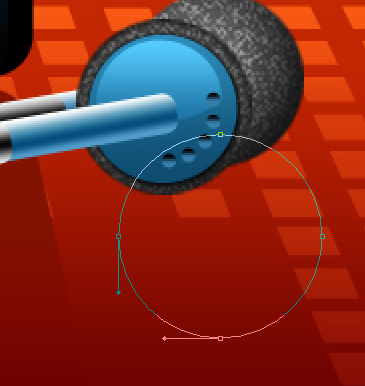
Using the Ellipse Tool (U) try to represent a round deeping on the era-phone’s corps.
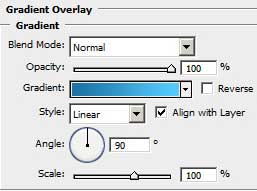
The layer’s parameters: Blending Options>Gradient Overlay
Gradient’s parameters:


Make four copies of this new layer and choose the Free Transform option to place the copies as in the next image.

Now we have to represent the flex of the era-phones with the Pen Tool (P) and the color #1A618B
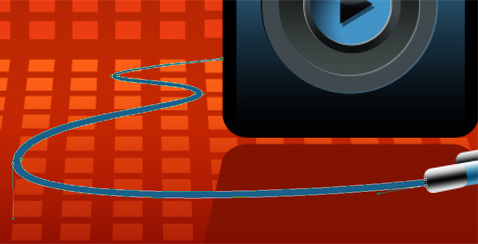
The layer’s parameters: Blending Options>Inner Shadow
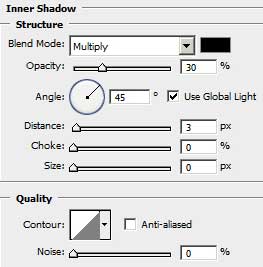

Using the same instrument, make the second flex of the same color the first is, having the same parameters.
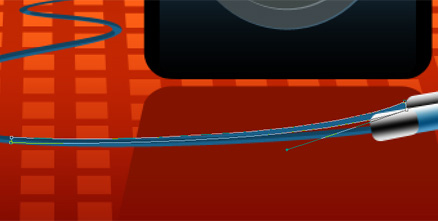
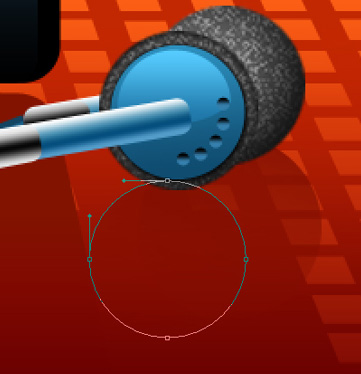
(place its layer lower that other layer, as the picture shows it). Now it’s time to create the shadow of the ear-phones, selecting the Ellipse Tool (U) and placing the layer lower that other layers.
The layer’s parameters: Fill 0%
Blending Options>Gradient Overlay
Gradient’s parameters:

Make a copy of the recently made layer and choose the Free Transform option to make the copy smaller and place it the way it is shown below.
Don’t forget to place correctly the layers. The last stage includes creating the shadow under the flex of the era-phones, using the Pen Tool (P) and the color #850B00


The final result!
View full size here.
Comments