
How to create Happy New Year 2011 greeting card in Photoshop CS5
Insert the mask on the layer containing the word ‘Happy’ by choosing Add layer mask on the bottom part of the Layers panel and choose the Soft Mechanical brush of black color.
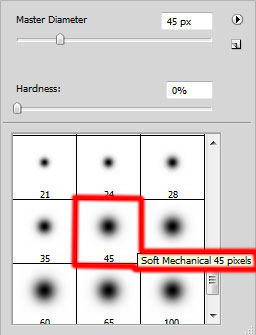
Paint in the mask using this brush to hide the bottom part of both ‘p’ letters.

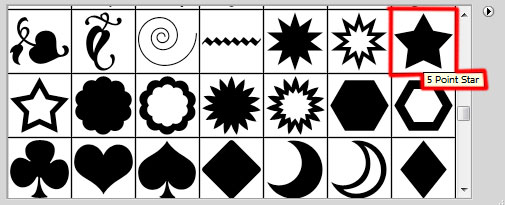
Add on the canvas several stars and Christmas baubles, select the Custom Shape Tool (U) in the Tools bar, in the Options bar click the Shape to open the selection menu. Find 5 Point Star at the bottom of the menu, and then double-click a shape thumbnail to select it.

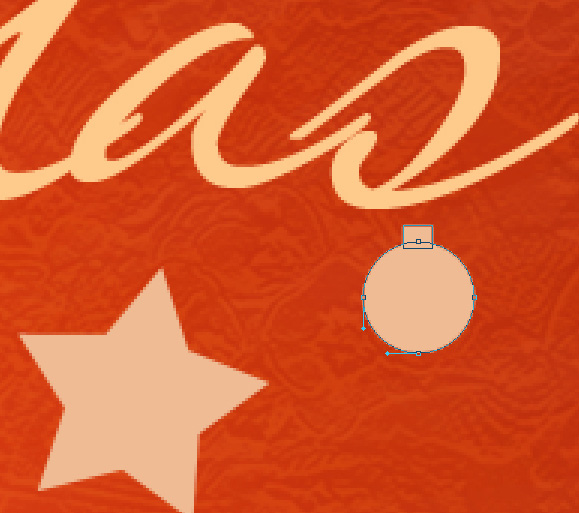
Click and drag to add some stars as shown.

Use Ellipse Tool (U) to draw the Christmas baubles, firstly draw the ellipse and then press SHIFT button or select Add to shape area (+) in Options bar, use Pen Tool (P) to add the next element on the shape to create the ball’s support. The stars and balls have the color #EFBB94.
We’ve got the next result:

Combine in a group all the text’s layers now and those of the stars and balls (press CTRL button to select the necessary layers and hold on the left mouse’s button while dragging the selected layers on Create a new group icon from bottom part of the Layers panel). Merge Down all the layers into a single layer by pressing CTRL+E.
Click on Add a layer style icon from bottom part of the Layers panel and select Drop Shadow.
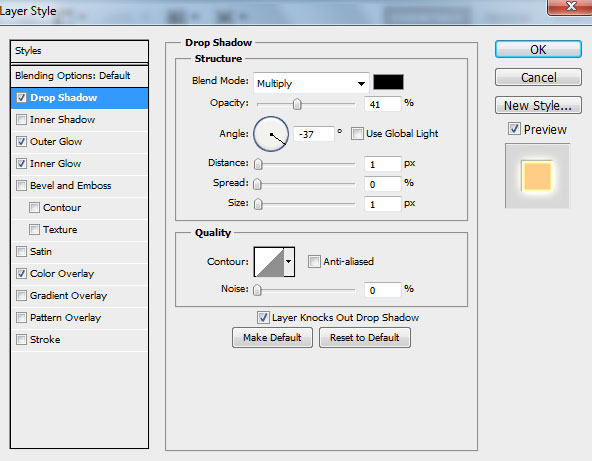
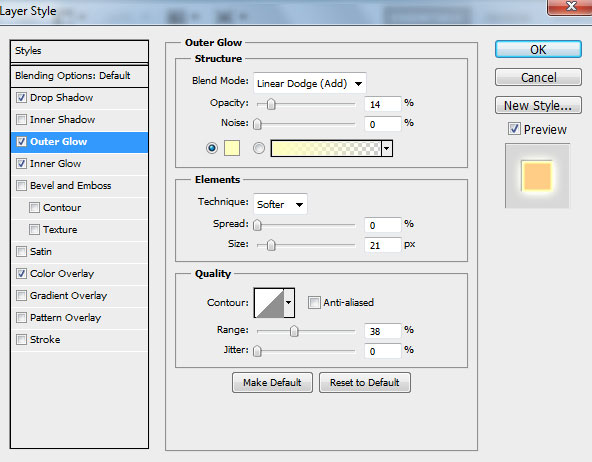
Add Outer Glow.
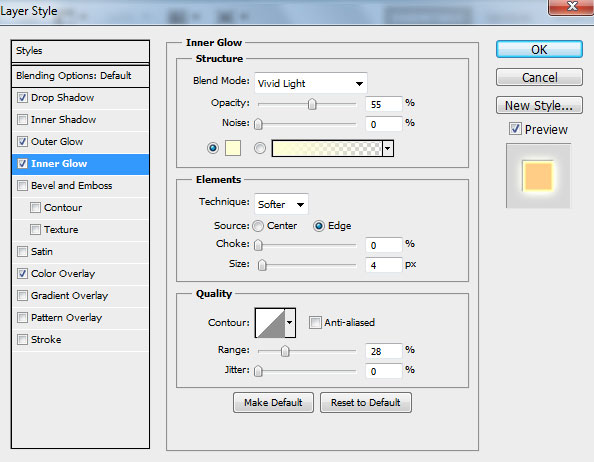
Insert Inner Glow.
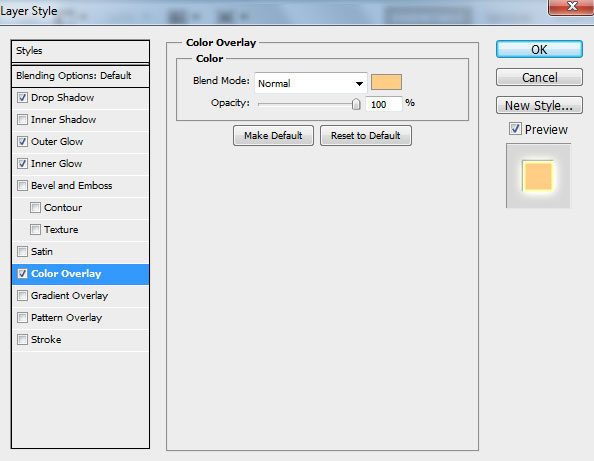
Apply Color Overlay.
We’ve got the next result:

Using the Rectangle Tool (U), we may represent now a frame.

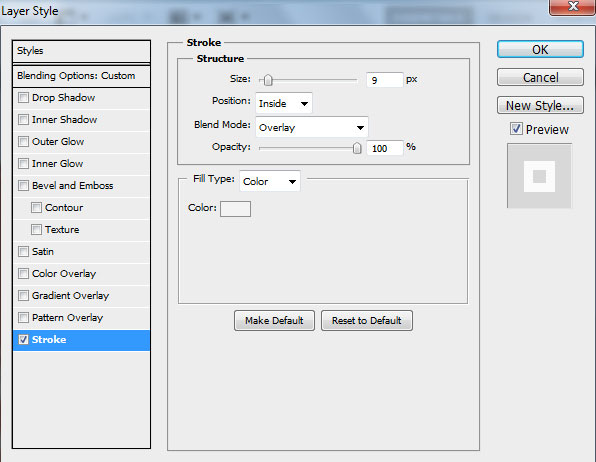
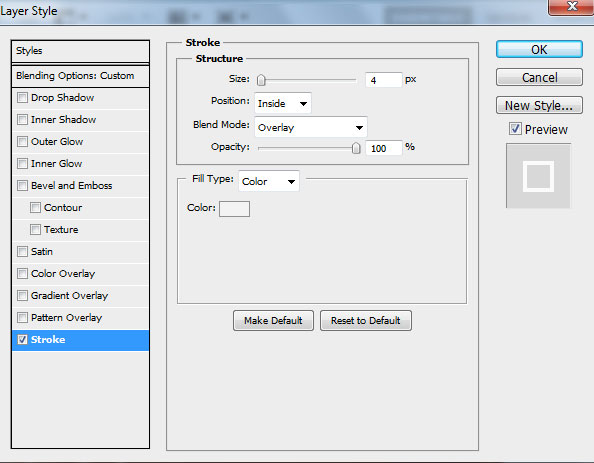
Set Fill to 0% for this layer and click on Add a layer style icon from bottom part of the Layers panel and select Stroke.
We’ve got the next result:

Using the same tool, we may create one more frame inside the already drawn one.

Set Fill to 0% for this layer and click on Add a layer style icon from bottom part of the Layers panel and select Stroke.
We’ve got the next result:

Create a new layer and choose the Paint Bucket Tool (G) to fill this layer with the #731605 color.

Insert the mask on the layer by choosing Add layer mask on the bottom part of the Layers panel and choose the Soft Round brush of black color.
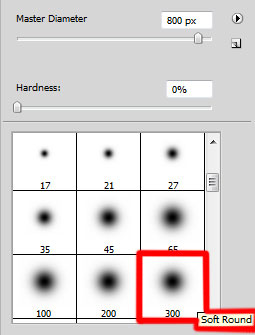
Paint in the mask using this brush on the middle part of the canvas.

Set Fill to 20% for this layer and change the Blending mode for this layer to Substract.

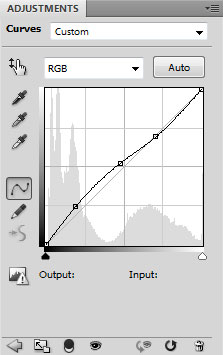
Click Create new fill or adjustment layer from bottom part of the Layers panel and click to Curves to adjust the curve shape as shown to make a little color corrections.
We’ve got the next result:

Happy New Year and Merry Christmas!
View full size here.
Page: 1 2
Comments