
How to Create and decorate Christmas tree in Photoshop
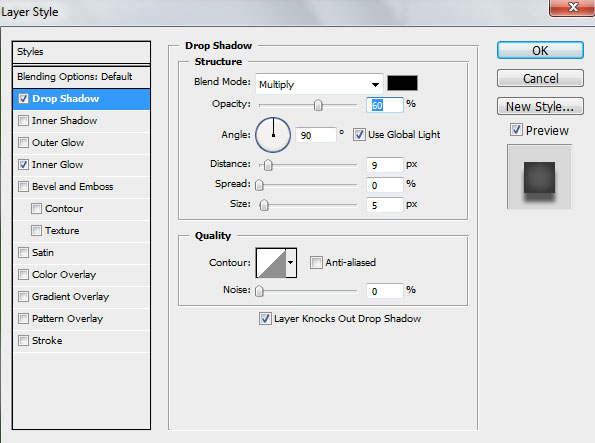
Select Add a layer style icon from bottom part of the Layers panel and click to Drop Shadow:
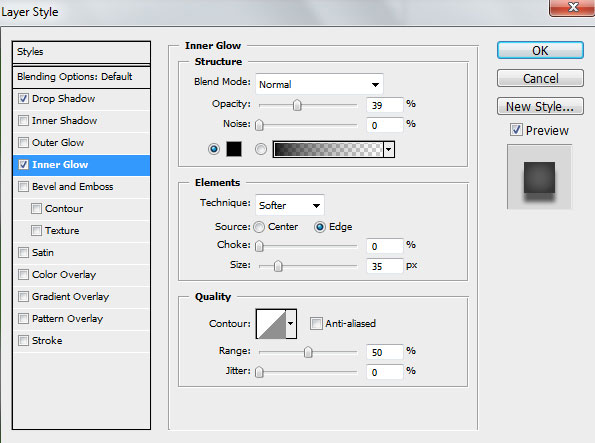
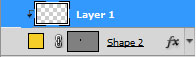
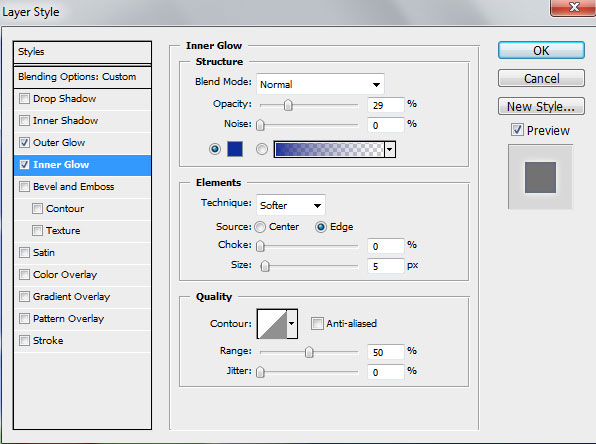
Add the Inner Glow
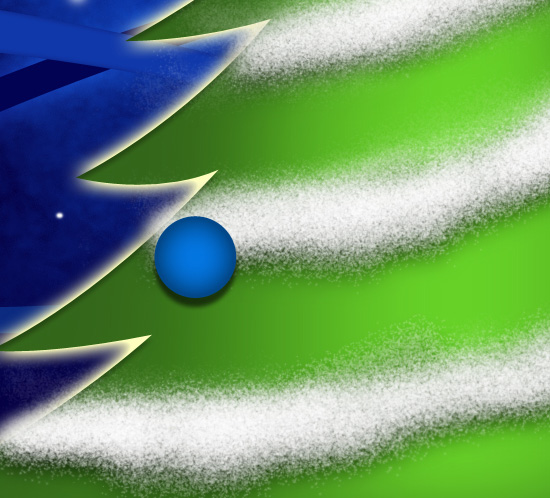
We’ve got the next sphere:
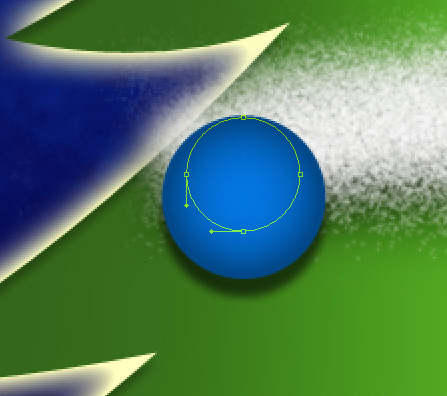
Now we must draw a highlight on the ball’s surface, applying the same Ellipse Tool (U).
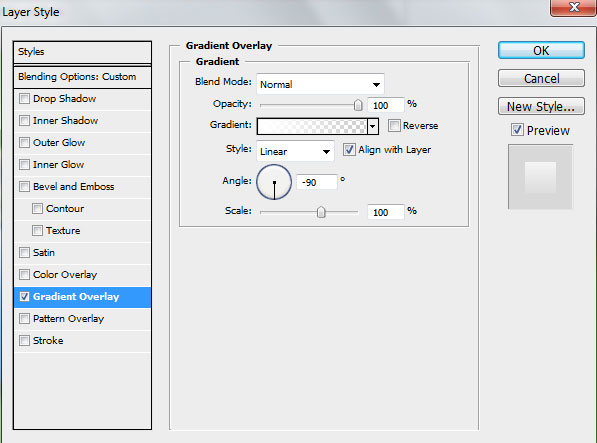
Set the Fill to 0% for this layer and go to Layer Style > Gradient Overlay. Click in the color bar to open the Gradient Editor and select Foreground to Transparent gradient. Click OK to close the Gradient Editor dialog box.
We’ve got the next decoration for our fir tree:


Next we’ll combine in a group all the layers composing the ball (press CTRL button to select the corresponding layers and then hold on the left mouse’s button while dragging the selected layers on Create new group icon from bottom part of the Layers panel). Make several copies of the recently got group, changing the colors of the copies’ layers (the basic color of the ball). Finally apply the Free Transform (Ctrl+T) to place the copies exactly the way represented below:
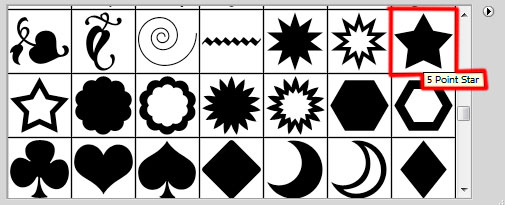
Next we’ll represent a small star, using the Custom Shape Tool (U), the color is #F5CE28

Using the Convert Point Tool, select the anchor points of the star. Then apply the Free Transform (Ctrl+T) click on Maintain Aspect Ratio and drag the anchor points to the central part of the star to change the shape form.

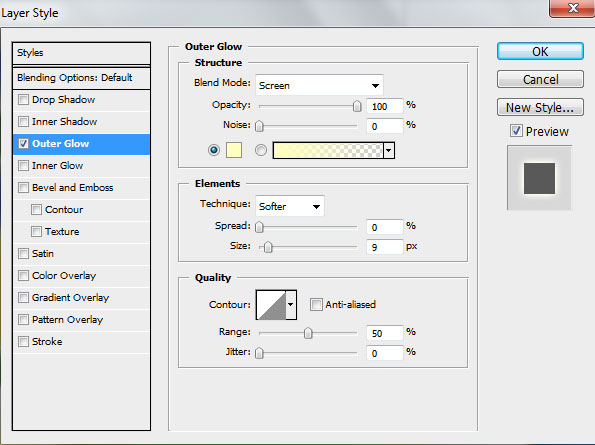
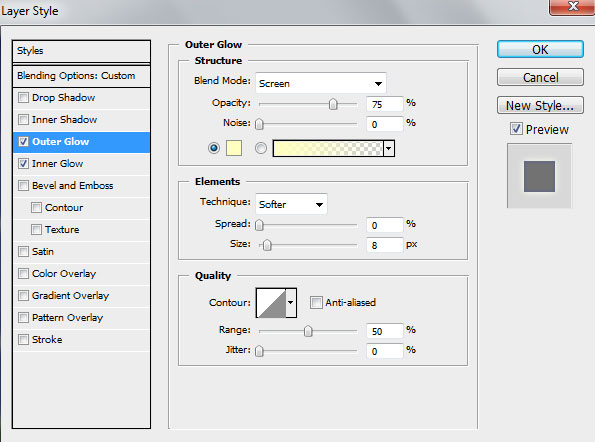
Select Add a layer style icon from bottom part of the Layers panel and click to Outer Glow:
We’ve got the next star:

Select now the Pen Tool (P) to draw next shape on the star.

Set Fill to 0% for this layer and go to Layer Style > Inner Shadow
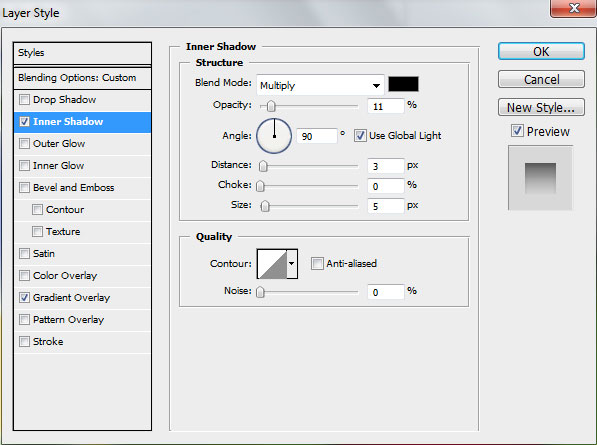
Set also the Gradient Overlay
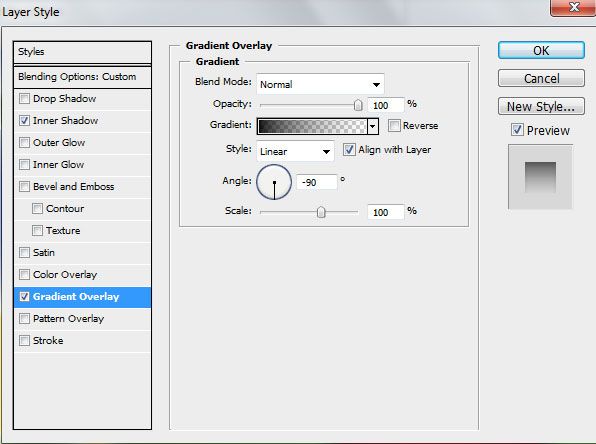
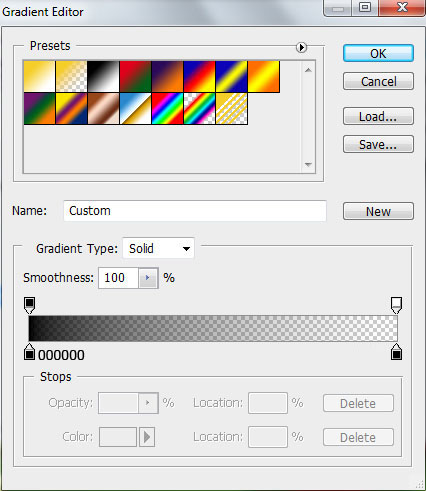
Click in the color bar to open the Gradient Editor and set the color stops as shown. Click OK to close the Gradient Editor dialog box.
We’ve got the next effect on the star:

Make four copies of the last made layer and choose the Free Transform (Ctrl+T) to place the copies the way it is shown on the next picture.

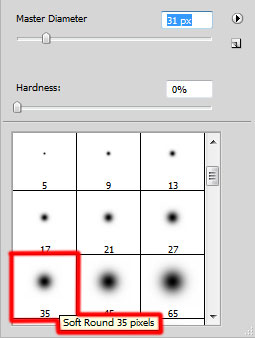
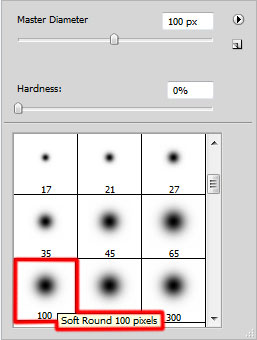
Create a new layer which will be processed with the Soft Round brush of white color.
Draw several highlights on the star.

Press Alt button and click simultaneously between the highlights’ layers and the very first layer of the star (on the Layers’ panel) to apply highlights just for the star.


Next we’ll combine in a group all the layers composing the star (press CTRL button to select the appropriate layers and hold on the left mouse’s button when dragging the selected layers on Create new group icon from bottom part of the Layers panel). Make ten copies of the last made group and select after that the Free Transform (Ctrl+T) to change the copies’ sizes, placing them as below:

Make a copy of one group, on your choice, containing the stars and choose the Free Transform (Ctrl+T) to enlarge the star and place it on the top of the Christmas tree.

Next we have to draw the shining rays coming out of the star on the tree’s top, using the Pen Tool (P).

Set the layer Opacity to 80%. Select Add a layer style icon from bottom part of the Layers panel and click to Outer Glow:
Set the Inner Glow
We’ve got the next effect:

Create a new layer and use on it Soft Round brush of white color to represent this time the luminescence lower than the layer containing the star on the top.

Using the same brush on a new layer we can create a kind of luminescence above the star’s layer.

Set the layer Blending mode to Soft Light on Layers panel.

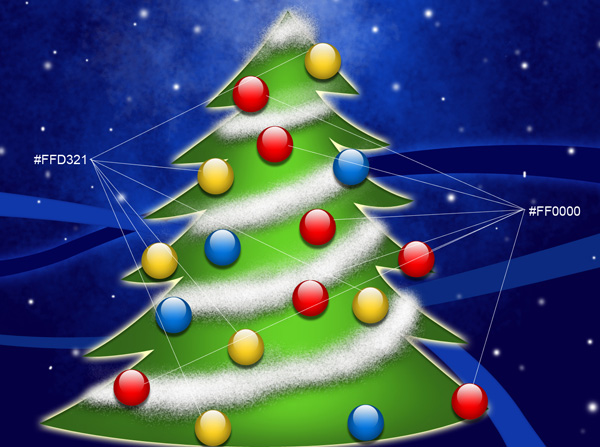
The final result!
View full size here.
Page: 1 2
Comments