
How to create abstract Valentine’s Day illustration with hearts in Photoshop CS5
Now we have to put on the left side a copy with Opacity – 30%:

Represent several copies with Opacity – 30%:

One more heart with Opacity – 50%.


… and then a copy with Opacity – 70%.

Now we have to represent several copies of the heart with the Opacity to 10%. Change the copies’ sizes, applying the Free Transform (Ctrl+T) command.

Let’s represent a heart’s copy with Opacity – 30%:

… and represent several copies of the heart with Opacity – 10%:

Choose the Custom Shape Tool (U) and draw a heart of white color. Incline it a little, applying the Free Transform (Ctrl+T) command. Set Fill to 50% for this layer.

Make three copies of the last made layer and select the Free Transform (Ctrl+T) command to change the copies’ sizes and place them as shown:

Using the same tools, we have to represent one more small heart:

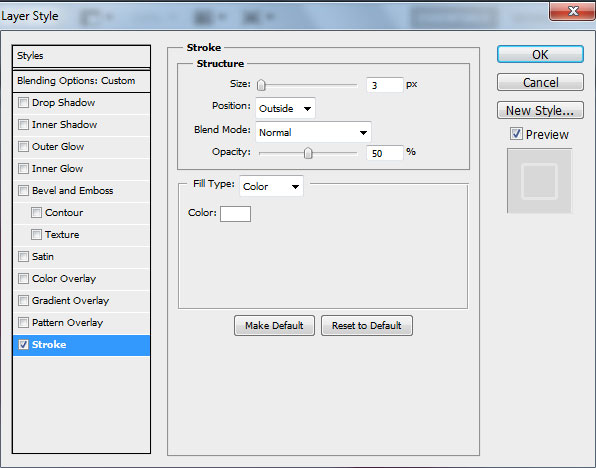
Set Fill to 0% for this layer and click on Add a layer style icon from bottom part of the Layers panel to select Stroke.
We’ve got the next result:

Make seven copies of the last made layer and select the Free Transform (Ctrl+T) command to change the copies’ sizes, placing them as it is shown below:

Take now the Ellipse Tool (U) to draw an ellipse.

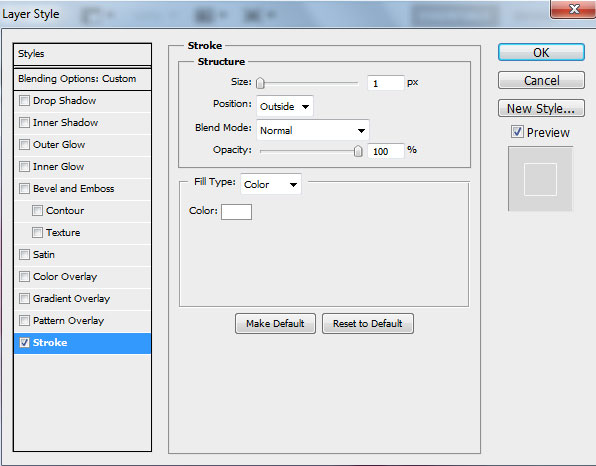
Set Fill to 0% for this layer and change the Opacity to 80%. Click on Add a layer style icon from bottom part of the Layers panel and select Stroke.
We’ve got the next result:

Make two copies of the last made layer and select the Free Transform (Ctrl+T) command to change the copies’ sizes, placing them the same way indicated next picture:

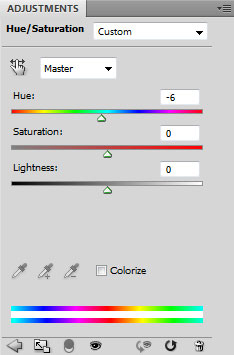
Click Create new fill or adjustment layer from bottom part of the Layers panel and select Hue/Saturation. Drag the slider to the left to decrease the Hue value.
We’ve got the next result:

Happy Valentine’s Day!
View full size here.
Page: 1 2
Comments