
How to create a New Year 2011 colorful card in Photoshop CS5
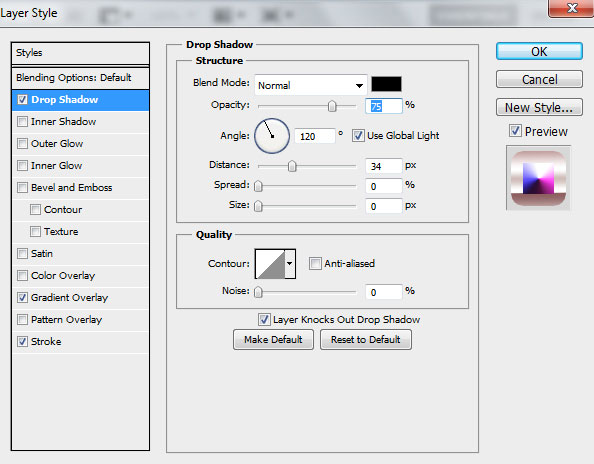
For layer containing ‘0’ click on Add a layer style icon from bottom part of the Layers panel and select Drop Shadow.
Add Gradient Overlay:

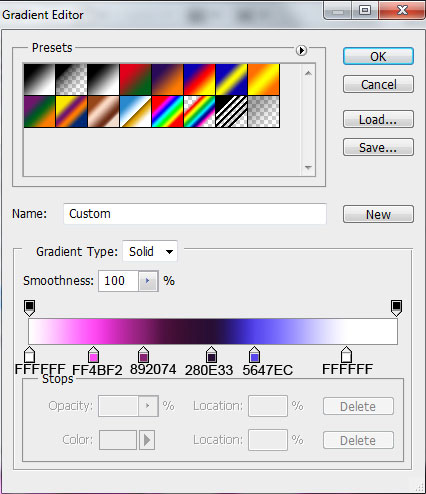
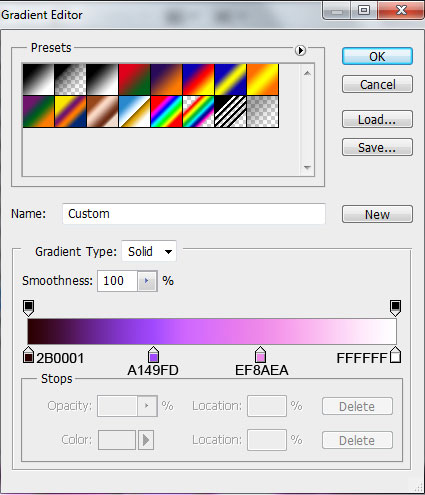
Click in the color bar to open the Gradient Editor and set the color stops as shown. Click OK to close the Gradient Editor dialog box.

Settings for Stroke.

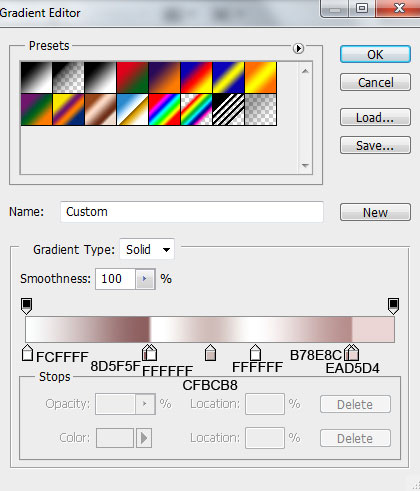
Select File type – Gradient and click in the color bar to open the Gradient Editor and set the color stops as shown. Click OK to close the Gradient Editor dialog box.
We’ve got the next result:

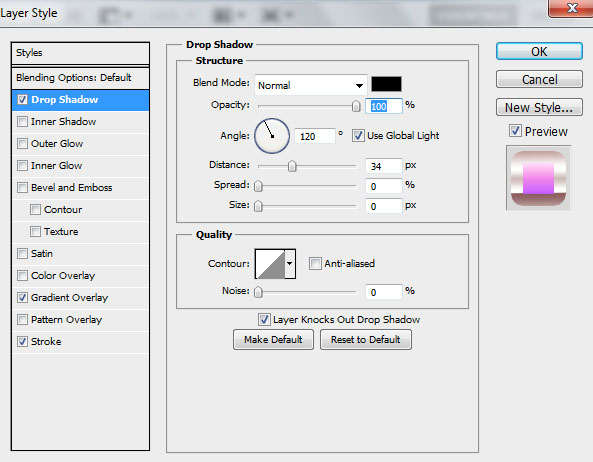
For layer containing number ‘1’ click on Add a layer style icon from bottom part of the Layers panel and select Drop Shadow.
Add Gradient Overlay:

Click in the color bar to open the Gradient Editor and set the color stops as shown. Click OK to close the Gradient Editor dialog box.
Setting for Stroke are the same with the previous number ‘0’. We’ve got the next result:

The Layer Styles for the layer containing the second number ‘1’ are the same with the first one:

Let’s represent a highlight now. Choose the Pen Tool (P), set the drawing mode on Shape Layers in Options bar and draw a four rays star as shown.

Make two copies of the last made layer and select the Free Transform (Ctrl+T) command to change the copies’ sizes and place them the way from below.

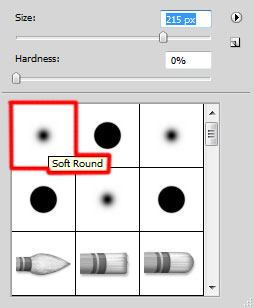
Create now a new layer and select the Soft Round brush of white color.
Use this brush to represent in the middle part of each small star bright points.

Click Create new fill or adjustment layer from bottom part of the Layers panel and select Hue/Saturation.

Drag the slider to the right to increase the Saturation of the color range.

Click again Create new fill or adjustment layer from bottom part of the Layers panel and select Exposure.
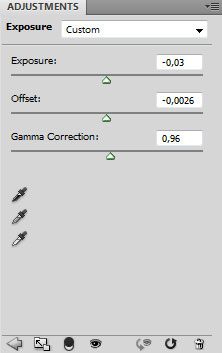
Drag the sliders to the left to decrease the Exposure, Offset and Gamma Correction as shown.

The final result!
View full size here.
Page: 1 2
Comments