
How to Create a Cosmic Photo Composition in Photoshop
Set Fill to 0% for this layer and click on Add a layer style icon from bottom part of the Layers panel and select Inner Shadow:

We’ve got the next result:

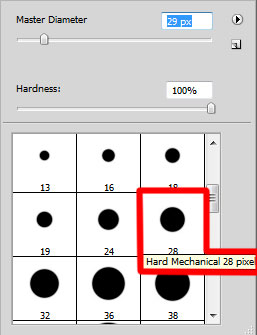
Create a new layer and apply here the Hard Mechanical brush to paint the whole layer with the color #1FFFAC (Opacity 25%).
Place the layer under the girl’s layer:

Set the Blending mode for this layer to Color

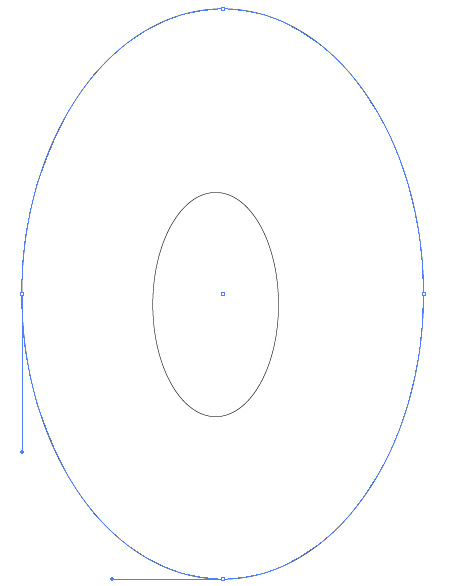
Pass on the Adobe Illustrator and select here the Ellipse Tool (L) to represent two ellipses of black color.

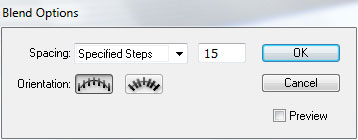
Then we have to continue with the same operations we did with the lines. Select them firstly with the Direct Selection Tool (A) and apply Object>Blend>Blend Options
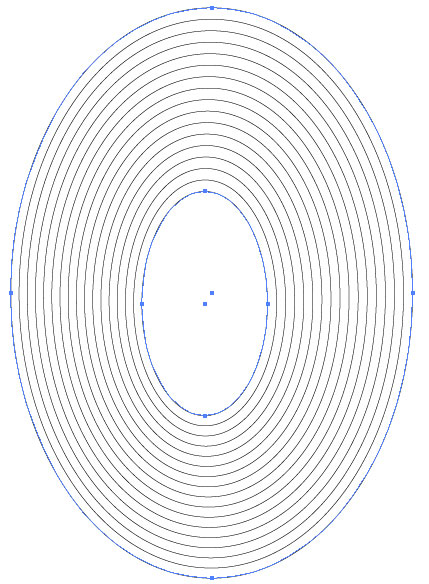
We’ve got the next result:
Save the circles. Pass on the Adobe Photoshop program and insert the saved circles (Paste as: Pixels). The layer containing the circles should be placed under the girl’s layer:
Inverse the layer content using CTRL+I.

Set the Blending mode for this layer to Overlay

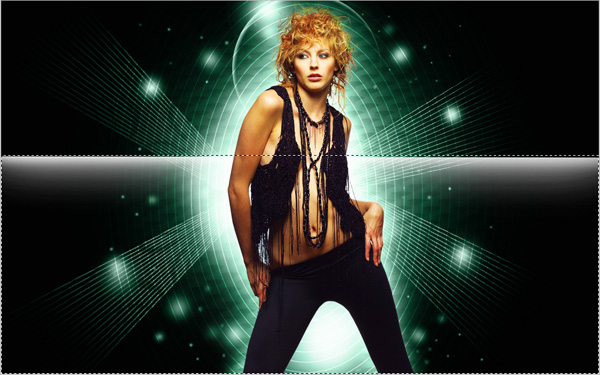
On the next new layer we’ll chose the Rectangular Marquee Tool (M) to make a selection as shown on the next picture.

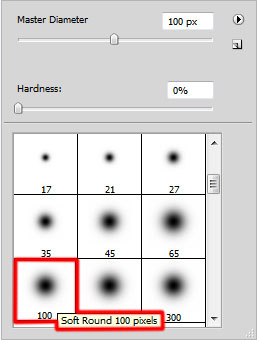
Use then the Soft Round brush of white color (Opacity 10%) to paint the top part of the selection.

Place this layer also lower than the girl’s layer:
Using the Free Transform (Ctrl+T) command we should incline a little the line, the same way demonstrated on the picture:

Make two copies of the last made layer and apply the Free Transform (Ctrl+T) command to situate the copies as it is shown on the next image:

Click on each layer of those three lines on the bottom part of the Layers panel on Add layer mask icon and select the Soft Round brush of black color
Make some brushstroke to hide the lines’ edges:

Create a new layer and apply the Soft Round brush mentioned above to represent two spots of white color (Opacity 20%)

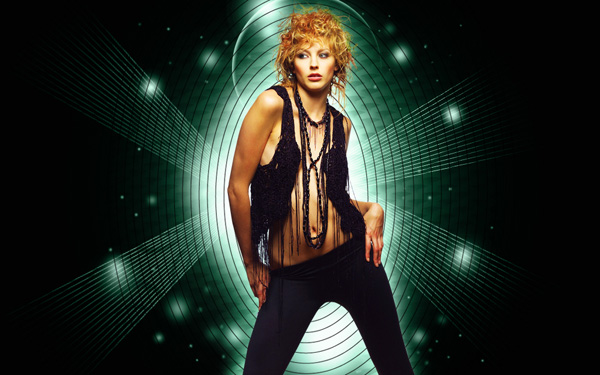
The final result!
View full size here.
Download free Layered PSD file.
Page: 1 2
Comments